<?xml version="1.0" encoding="utf-8"?><feed xmlns="http://www.w3.org/2005/Atom" ><generator uri="https://jekyllrb.com/" version="3.10.0">Jekyll</generator><link href="https://maxhawkins.info/feed.xml" rel="self" type="application/atom+xml" /><link href="https://maxhawkins.info/" rel="alternate" type="text/html" /><updated>2026-09-09T18:57:50+00:00</updated><id>https://maxhawkins.info/feed.xml</id><title type="html">Max Hawkins</title><subtitle>Personal website of Max Hawkins, a Computational Science and Engineering PhD student at Georgia Tech researching general measures of computational performance.</subtitle><author><name>Max Hawkins</name></author><entry><title type="html">Shannon Used ‘Alternatives’ before ‘Bits</title><link href="https://maxhawkins.info/tech/shannon-alternatives/" rel="alternate" type="text/html" title="Shannon Used ‘Alternatives’ before ‘Bits" /><published>2026-09-08T00:00:00+00:00</published><updated>2026-09-08T00:00:00+00:00</updated><id>https://maxhawkins.info/tech/shannon-alternatives</id><content type="html" xml:base="https://maxhawkins.info/tech/shannon-alternatives/"><![CDATA[<p>Computing Fun Fact for Today: Before the term ‘bit’ (binary digit) was invented, Shannon used ‘alternatives’ to quantify binary information.</p>
<p>Although the ‘bit’ is widely used today, it postdates some of Claude Shannon’s information theory work. John Tukey is credited with the first use of ‘bit’ in 1946–47, offered as a less clunky replacement for ‘binary digit’. But Shannon had already been quantifying information in base two for over a year. What was he using?</p>

<p>Shannon used ‘alternatives’, emphasizing the fact that a binary state only has two possible states. There is the path taken, and then there is the alternative. A coin flip leads to heads or tails. Combining N binary states together, then there are N alternatives. Each bit or alternative could be thought of as a fork in a road leading to 2^N possible states. More bits. More alternatives. More information.</p>

<p>I like this historical unit because it emphasizes the finiteness of discrete representations and the math applied on top. We often reason about digital computers using mathematical notions of error and real-valued functions. However, these operations are just mappings between concatenated alternatives. There are infinite real numbers, but only 2^64 possible FP64 values (even less due to redundant encodings). We use finite computers managing finite states. ‘Alternatives’ offers a more immediate reminder of this fact than the ‘bit’ does.</p>

<p>If I give you two variables and tell you to multiply them, how many alternatives are there? If you’re a mathematician, you’ll say “Infinitely many!” but if you’re a computer scientist, you might ask for the operand bit width. Regardless, the answer could take many possible values, and you need to perform the computation to reduce uncertainty about the result.</p>

<p>Now what if I tell you that one of those values is 0? How many alternatives are there? 0. You know that x times 0 is 0 for any x (ignoring infinities and NaNs). The output is certain, there are no alternatives, and there is no information to be gained by performing the operation.</p>

<p>This is the framing I’m building my PhD around, and I find talking about it in terms of ‘bits’ makes things a bit more abstract than if ‘alternatives’ were still used. Nowadays, the technically correct unit of base-two information is the ‘Shannon’ as specified by the IEC 80000 13:2025 standard. Three different units for the same quantity in 80 years certainly is fun for metrologists!</p>

<p>Regardless, don’t forget that Shannon once thought information a bit alternative.</p>

<p>Sources:</p>
<ul>
  <li><a href="https://iacr.org/museum/shannon45.html">1945 “A Mathematical Theory of Cryptography”</a></li>
  <li><a href="https://www.iso.org/standard/87648.html">IEC 80000-13:2025</a></li>
</ul>]]></content><author><name>Max Hawkins</name></author><category term="Tech" /><category term="information-theory" /><category term="tech" /><summary type="html"><![CDATA[Measures of Information in Log Base-Two]]></summary></entry><entry><title type="html">Wooden Pinch Pots - Design for Utility and Aesthetics</title><link href="https://maxhawkins.info/diy/wooden-pinch-pots/" rel="alternate" type="text/html" title="Wooden Pinch Pots - Design for Utility and Aesthetics" /><published>2023-01-01T00:00:00+00:00</published><updated>2023-01-01T00:00:00+00:00</updated><id>https://maxhawkins.info/diy/wooden-pinch-pots</id><content type="html" xml:base="https://maxhawkins.info/diy/wooden-pinch-pots/"><![CDATA[<p><strong>Note: This post is still in the making.</strong></p>

<p>I like making things that I’ll use, and I cook a lot. Recently, I’ve noticed that getting a pinch of salt or sugar takes more effort than it should - at least in my kitchen. My sugar is stored in a sack, in a bag, on a back shelf behind some pots in a cupboard. It’s not so easy to get to, but due to lack of space, there are not many better places to store it. Salt is a similar situation but more of a measuring conundrum pouring from the big Morton jars.</p>

<p>These dilemmas made me want counter-top pinch pots for easy access. I liked some online designs, but they weren’t EXACTLY what I wanted, and hey, I like making things. I decided to make my own.</p>

<p>Some initial design considerations came to mind:</p>

<ul>
  <li>Wooden</li>
  <li>One-handed usability</li>
  <li>Aesthetically pleasing</li>
  <li>Large enough to hold more than a few pinches</li>
</ul>

<p>From an earlier project, there was some scrap wood left over, so I constrained my designs to that piece and came up with the following draft design page. Ignore my crappy handwriting, drawing, and math. :)</p>

<p align="center">
<img src="/assets/images/posts/pinch-pots/pinch-pots-design.jpg" />
</p>
<p align="center">
<em>
</em>
</p>

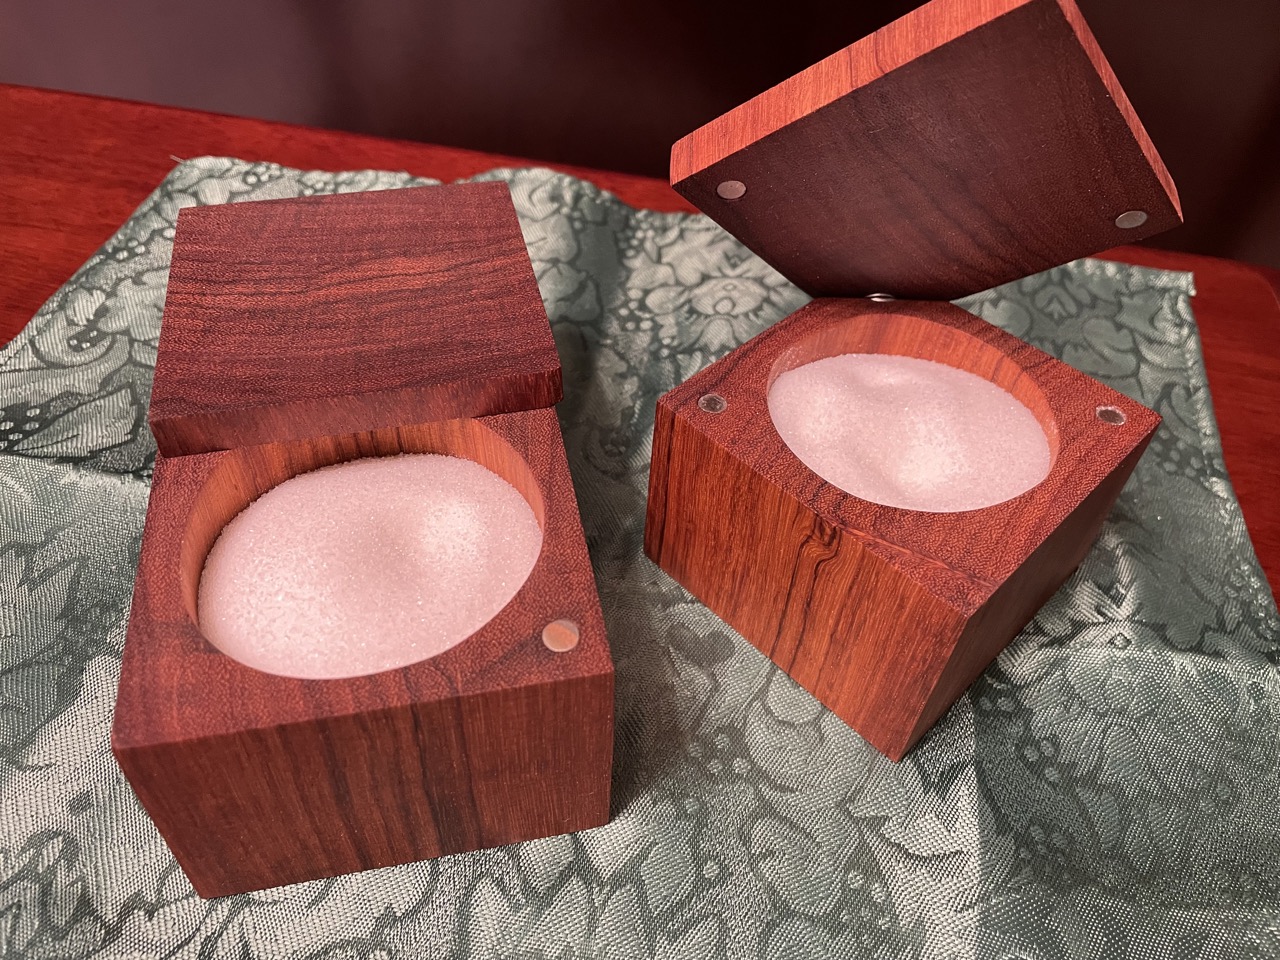
<p>Here’s the raw piece of what I believe is padauk.</p>

<p align="center">
<img src="/assets/images/posts/pinch-pots/pinch-pots-raw.jpeg" />
</p>
<p align="center">
<em>
</em>
</p>

<p>After cutting into the two lids and two bodies:</p>

<p align="center">
<img src="/assets/images/posts/pinch-pots/pinch-pots-cut.jpeg" />
</p>
<p align="center">
<em>
</em>
</p>

<p>I used a plunge router to make the cavity for the salt or sugar. The hole is big enough for all four pinched fingers to fit in.</p>

<p align="center">
<img src="/assets/images/posts/pinch-pots/pinch-pots-cavity.jpeg" />
</p>
<p align="center">
<em>
</em>
</p>

<p align="center">
<img src="/assets/images/posts/pinch-pots/pinch-pots-opening-setup.jpeg" />
</p>
<p align="center">
<em>
</em>
</p>

<p align="center">
<img src="/assets/images/posts/pinch-pots/pinch-pots-opening-demo.jpeg" />
</p>
<p align="center">
<em>
</em>
</p>

<p align="center">
<img src="/assets/images/posts/pinch-pots/pinch-pots-magnet-setup.jpeg" />
</p>
<p align="center">
<em>
</em>
</p>

<p align="center">
<img src="/assets/images/posts/pinch-pots/pinch-pots-magnet-layout.jpeg" />
</p>
<p align="center">
<em>
</em>
</p>

<p align="center">
<img src="/assets/images/posts/pinch-pots/pinch-pots-evening.jpeg" />
</p>
<p align="center">
<em>
</em>
</p>

<p align="center">
<img src="/assets/images/posts/pinch-pots/pinch-pots-protectant-wicking.jpeg" />
</p>
<p align="center">
<em>
</em>
</p>

<p align="center">
<img src="/assets/images/posts/pinch-pots/pinch-pots-finished-closed.jpeg" />
</p>
<p align="center">
<em>
</em>
</p>

<p align="center">
<img src="/assets/images/posts/pinch-pots/pinch-pots-finished-open.jpeg" />
</p>
<p align="center">
<em>
</em>
</p>]]></content><author><name>Max Hawkins</name></author><category term="DIY" /><category term="pinch-pots" /><category term="design" /><category term="diy" /><summary type="html"><![CDATA[Working to make useful and beautiful kitchen gadgets.]]></summary></entry><entry><title type="html">Explorations in Knife Making</title><link href="https://maxhawkins.info/diy/knives/" rel="alternate" type="text/html" title="Explorations in Knife Making" /><published>2022-12-10T00:00:00+00:00</published><updated>2022-12-10T00:00:00+00:00</updated><id>https://maxhawkins.info/diy/knives</id><content type="html" xml:base="https://maxhawkins.info/diy/knives/"><![CDATA[<p><strong>Note: This post is still in the making. Enjoy the pictures for now…</strong></p>

<p align="center">
<img src="/assets/images/posts/knives/knives-first-blanks.jpg" />
</p>
<p align="center">
<em>
</em>
</p>

<p align="center">
<img src="/assets/images/posts/knives/knives-chef-blank.jpeg" />
</p>
<p align="center">
<em>
</em>
</p>

<p align="center">
<img src="/assets/images/posts/knives/knives-grinding.jpg" />
</p>
<p align="center">
<em>
</em>
</p>

<p align="center">
<img src="/assets/images/posts/knives/knives-chef-bevel.png" />
</p>
<p align="center">
<em>
</em>
</p>

<p align="center">
<img src="/assets/images/posts/knives/knives-board.HEIC" />
</p>
<p align="center">
<em>
</em>
</p>

<p align="center">
<img src="/assets/images/posts/knives/knives-blanks.JPG" />
</p>
<p align="center">
<em>
</em>
</p>

<!-- Courtesy of embedresponsively.com -->

<div class="responsive-video-container">
    <iframe src="https://www.youtube-nocookie.com/embed/jm35Hp_nfwY" title="YouTube video player" frameborder="0" webkitallowfullscreen="" mozallowfullscreen="" allowfullscreen=""></iframe>
  </div>

<!-- Courtesy of embedresponsively.com -->

<div class="responsive-video-container">
    <iframe src="https://www.youtube-nocookie.com/embed/dHWDybAFcho" title="YouTube video player" frameborder="0" webkitallowfullscreen="" mozallowfullscreen="" allowfullscreen=""></iframe>
  </div>

<p align="center">
<img src="/assets/images/posts/knives/knives-glueup-setup.heic" />
</p>
<p align="center">
<em>
</em>
</p>

<p align="center">
<img src="/assets/images/posts/knives/knives-glueup-clamp.heic" />
</p>
<p align="center">
<em>
</em>
</p>

<p align="center">
<img src="/assets/images/posts/knives/knives-handle-2.jpeg" />
</p>
<p align="center">
<em>
</em>
</p>

<p align="center">
<img src="/assets/images/posts/knives/knives-handle-1.jpeg" />
</p>
<p align="center">
<em>
</em>
</p>

<!-- Courtesy of embedresponsively.com -->

<div class="responsive-video-container">
    <iframe src="https://www.youtube-nocookie.com/embed/Jaq0gxaVlbU" title="YouTube video player" frameborder="0" webkitallowfullscreen="" mozallowfullscreen="" allowfullscreen=""></iframe>
  </div>

<!-- Courtesy of embedresponsively.com -->

<div class="responsive-video-container">
    <iframe src="https://www.youtube-nocookie.com/embed/kLEe10VdyIc" title="YouTube video player" frameborder="0" webkitallowfullscreen="" mozallowfullscreen="" allowfullscreen=""></iframe>
  </div>

<!-- Courtesy of embedresponsively.com -->

<div class="responsive-video-container">
    <iframe src="https://www.youtube-nocookie.com/embed/NaHXcV02MKw" title="YouTube video player" frameborder="0" webkitallowfullscreen="" mozallowfullscreen="" allowfullscreen=""></iframe>
  </div>

<p align="center">
<img src="/assets/images/posts/knives/knives-finished-kitchen.jpg" />
</p>
<p align="center">
<em>
</em>
</p>]]></content><author><name>Max Hawkins</name></author><category term="DIY" /><category term="knife-making" /><category term="knives" /><category term="diy" /><summary type="html"><![CDATA[My experience making knives from raw steel and wood.]]></summary></entry><entry><title type="html">Making an Electric Longboard - Raw 18650 batteries and wood to road rash</title><link href="https://maxhawkins.info/tech/electric-longboard/" rel="alternate" type="text/html" title="Making an Electric Longboard - Raw 18650 batteries and wood to road rash" /><published>2022-12-05T00:00:00+00:00</published><updated>2022-12-05T00:00:00+00:00</updated><id>https://maxhawkins.info/tech/electric-longboard</id><content type="html" xml:base="https://maxhawkins.info/tech/electric-longboard/"><![CDATA[<p><em>Still working to edit this post…</em></p>

<h2 id="a-summary-document-detailing-how-i-made-my-electric-longboard">A summary document detailing how I made my electric longboard</h2>

<p>During my last few years in high-school, I became interested in electric power generation and transport. This was primarily due to an interest in Tesla and its impressive developments at the time. As a lover of hardware, I wanted to get more experience in the area, but I couldn’t afford a Tesla. I aimed lower and started looking into electric bikes. Then I realized I still couldn’t afford that project, so I aimed even lower and realized I was looking at my feet. A longboard! That’s what I’d build. They’re small, useful, and most importantly, transportable in my car to college.</p>

<p>I looked at previous successful projects on the internet and came up with a design I could build myself. The end result was a medium-sized longboard from a single piece of maple, dual hub motors, and a 2P10S (2 cells in parallel with 10 of those pairs in serial) batterypack composed of Samsung 18650 cells. From the research I did, this seemed to provide a low-cost yet performant electric longboard. Here was my materials list:</p>

<table>
  <thead>
    <tr>
      <th style="text-align: left">Part</th>
      <th style="text-align: right">Price</th>
    </tr>
  </thead>
  <tbody>
    <tr>
      <td style="text-align: left">20 Li-ion Batteries</td>
      <td style="text-align: right">$75.00</td>
    </tr>
    <tr>
      <td style="text-align: left">0.15mm x 8mm Nickel Strip</td>
      <td style="text-align: right">$7.00</td>
    </tr>
    <tr>
      <td style="text-align: left">Hub Motors</td>
      <td style="text-align: right">$150.00</td>
    </tr>
    <tr>
      <td style="text-align: left">10s Battery Charger</td>
      <td style="text-align: right">$26.00</td>
    </tr>
    <tr>
      <td style="text-align: left">Skate Tool</td>
      <td style="text-align: right">$4.00</td>
    </tr>
    <tr>
      <td style="text-align: left">Battery Charging Cable</td>
      <td style="text-align: right">$5.00</td>
    </tr>
    <tr>
      <td style="text-align: left">ESC</td>
      <td style="text-align: right">$88.00</td>
    </tr>
    <tr>
      <td style="text-align: left">8pc Deck Hardware</td>
      <td style="text-align: right">$3.00</td>
    </tr>
    <tr>
      <td style="text-align: left">8mm Shokpad Risers</td>
      <td style="text-align: right">$4.00</td>
    </tr>
    <tr>
      <td style="text-align: left">Bestech 10s BMS</td>
      <td style="text-align: right">$34.00</td>
    </tr>
    <tr>
      <td style="text-align: left">Battery Volt &amp; Temp Monitor</td>
      <td style="text-align: right">$17.00</td>
    </tr>
    <tr>
      <td style="text-align: left">Battery Heat Shrink</td>
      <td style="text-align: right">$7.00</td>
    </tr>
    <tr>
      <td style="text-align: left">DiyEboard Shipping</td>
      <td style="text-align: right">$38.00</td>
    </tr>
    <tr>
      <td style="text-align: left"><strong>Total Cost</strong></td>
      <td style="text-align: right"><strong>$458</strong></td>
    </tr>
  </tbody>
</table>

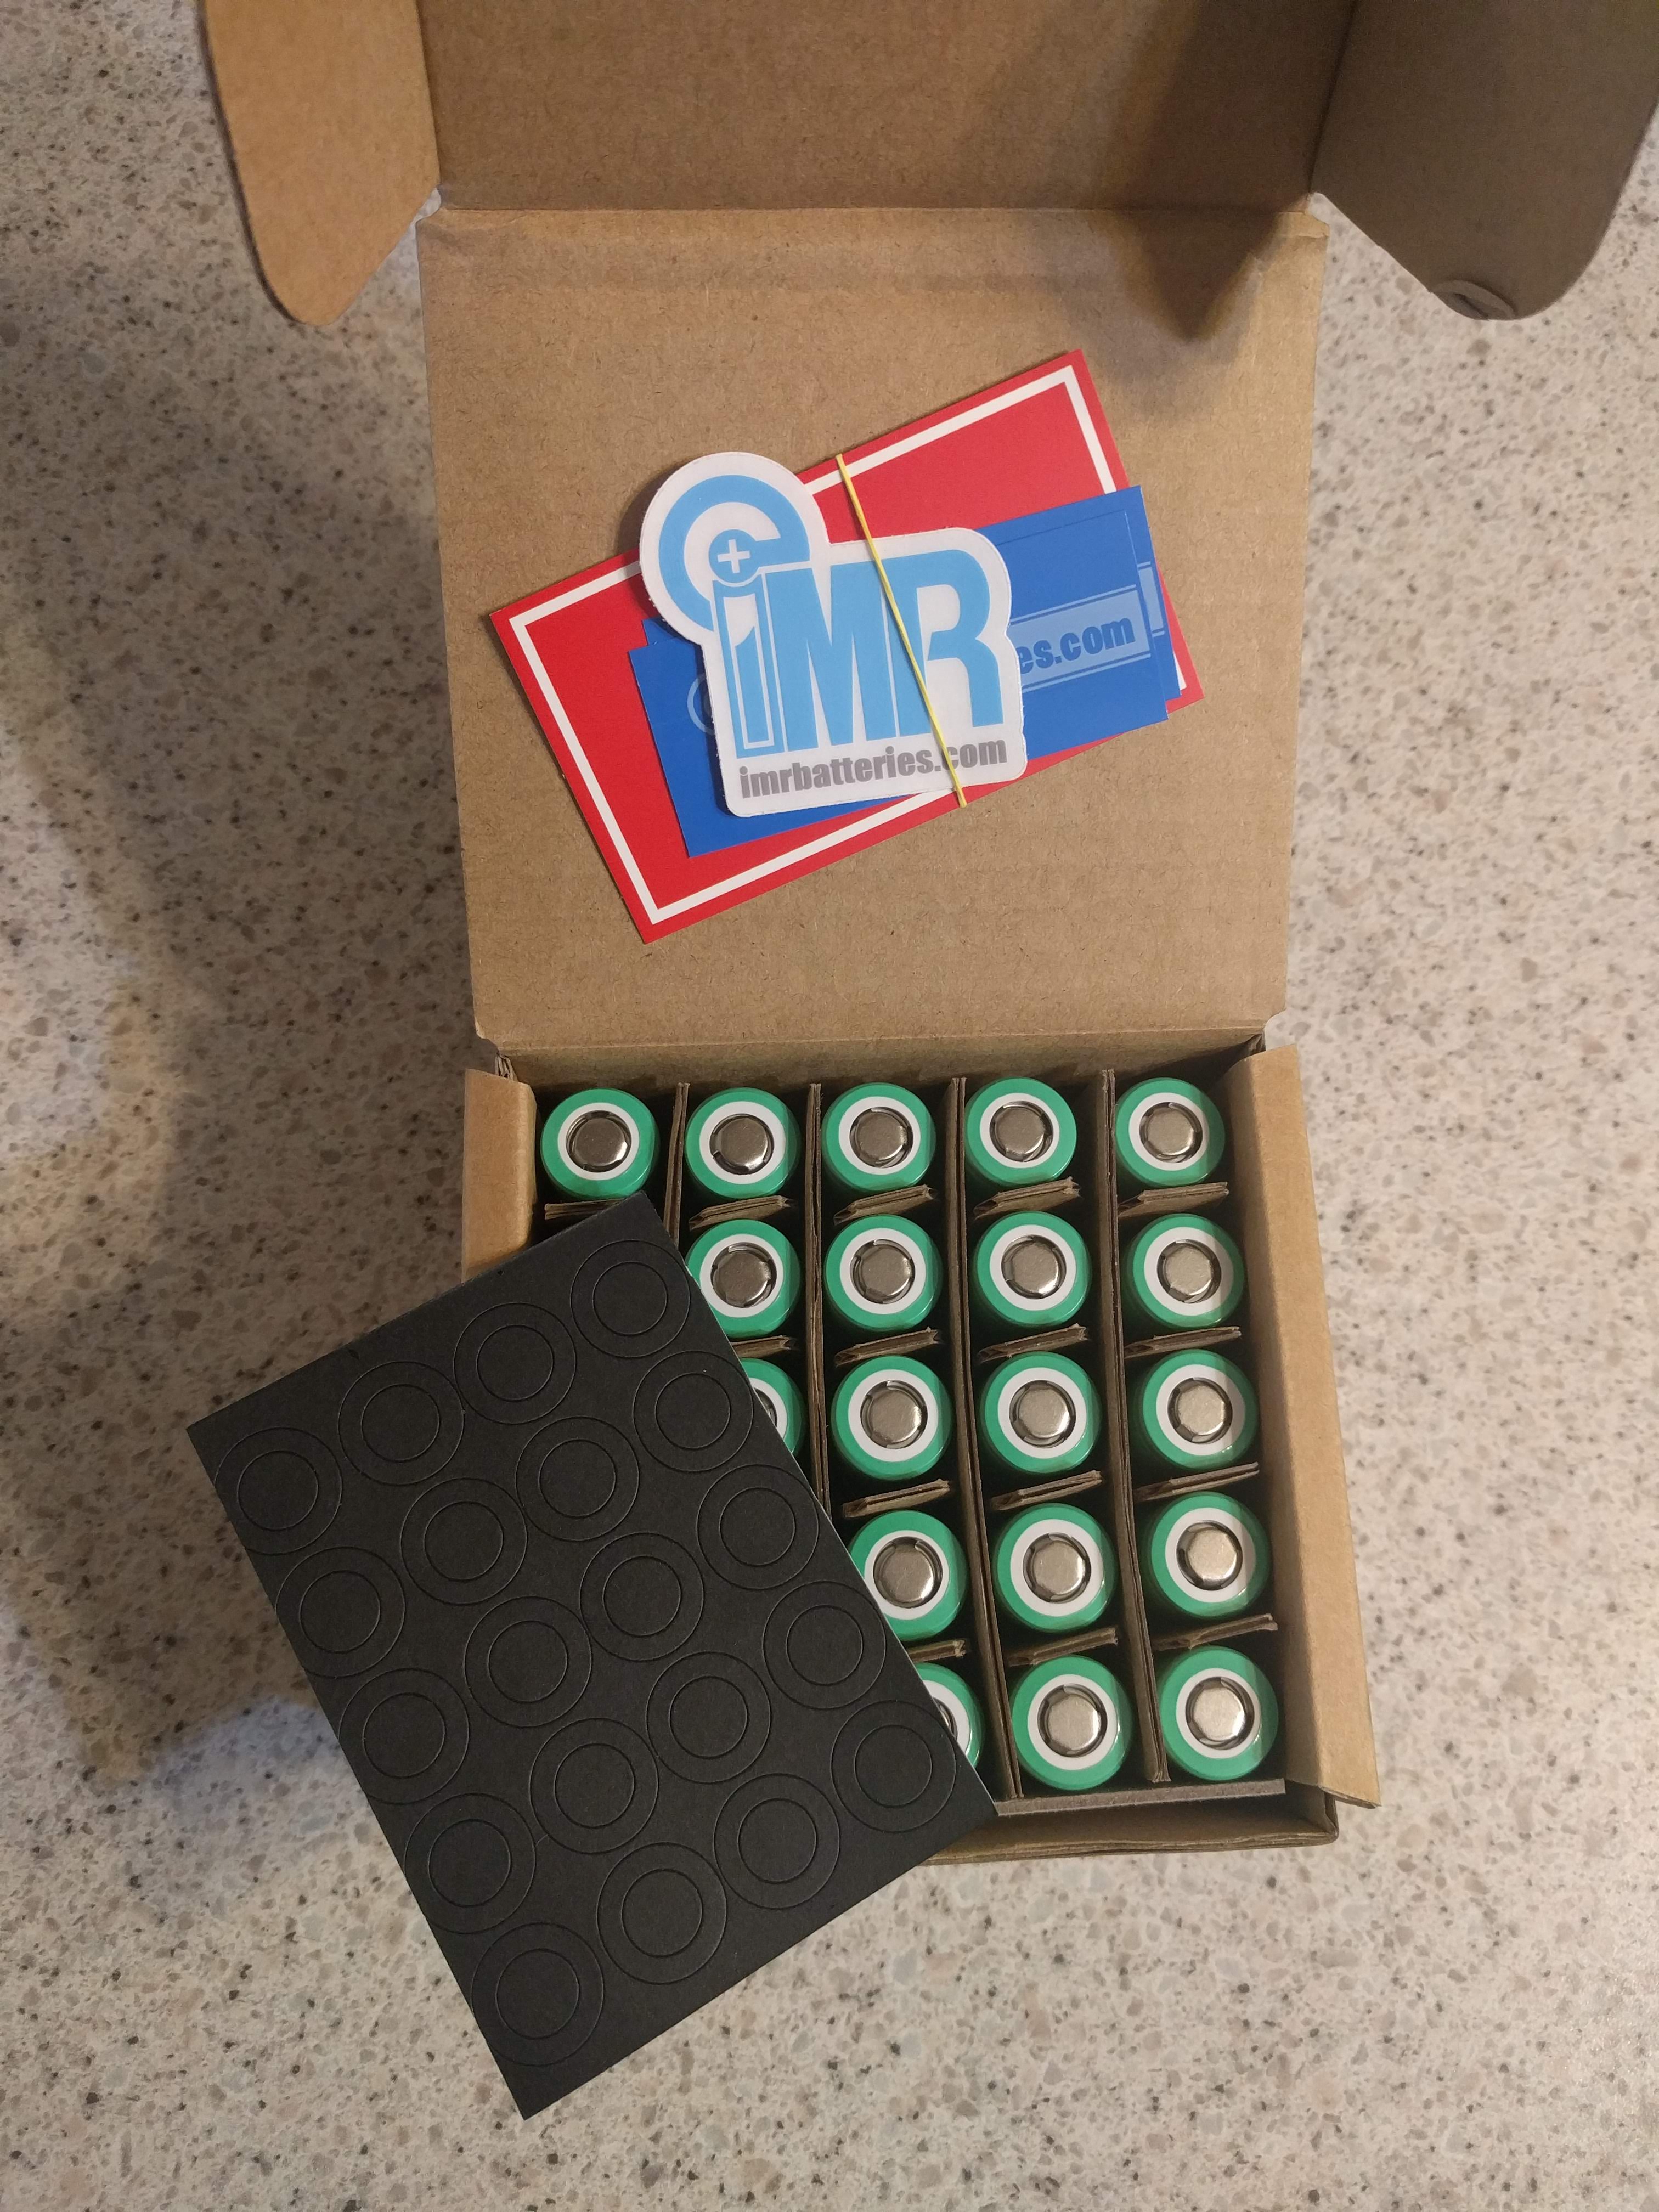
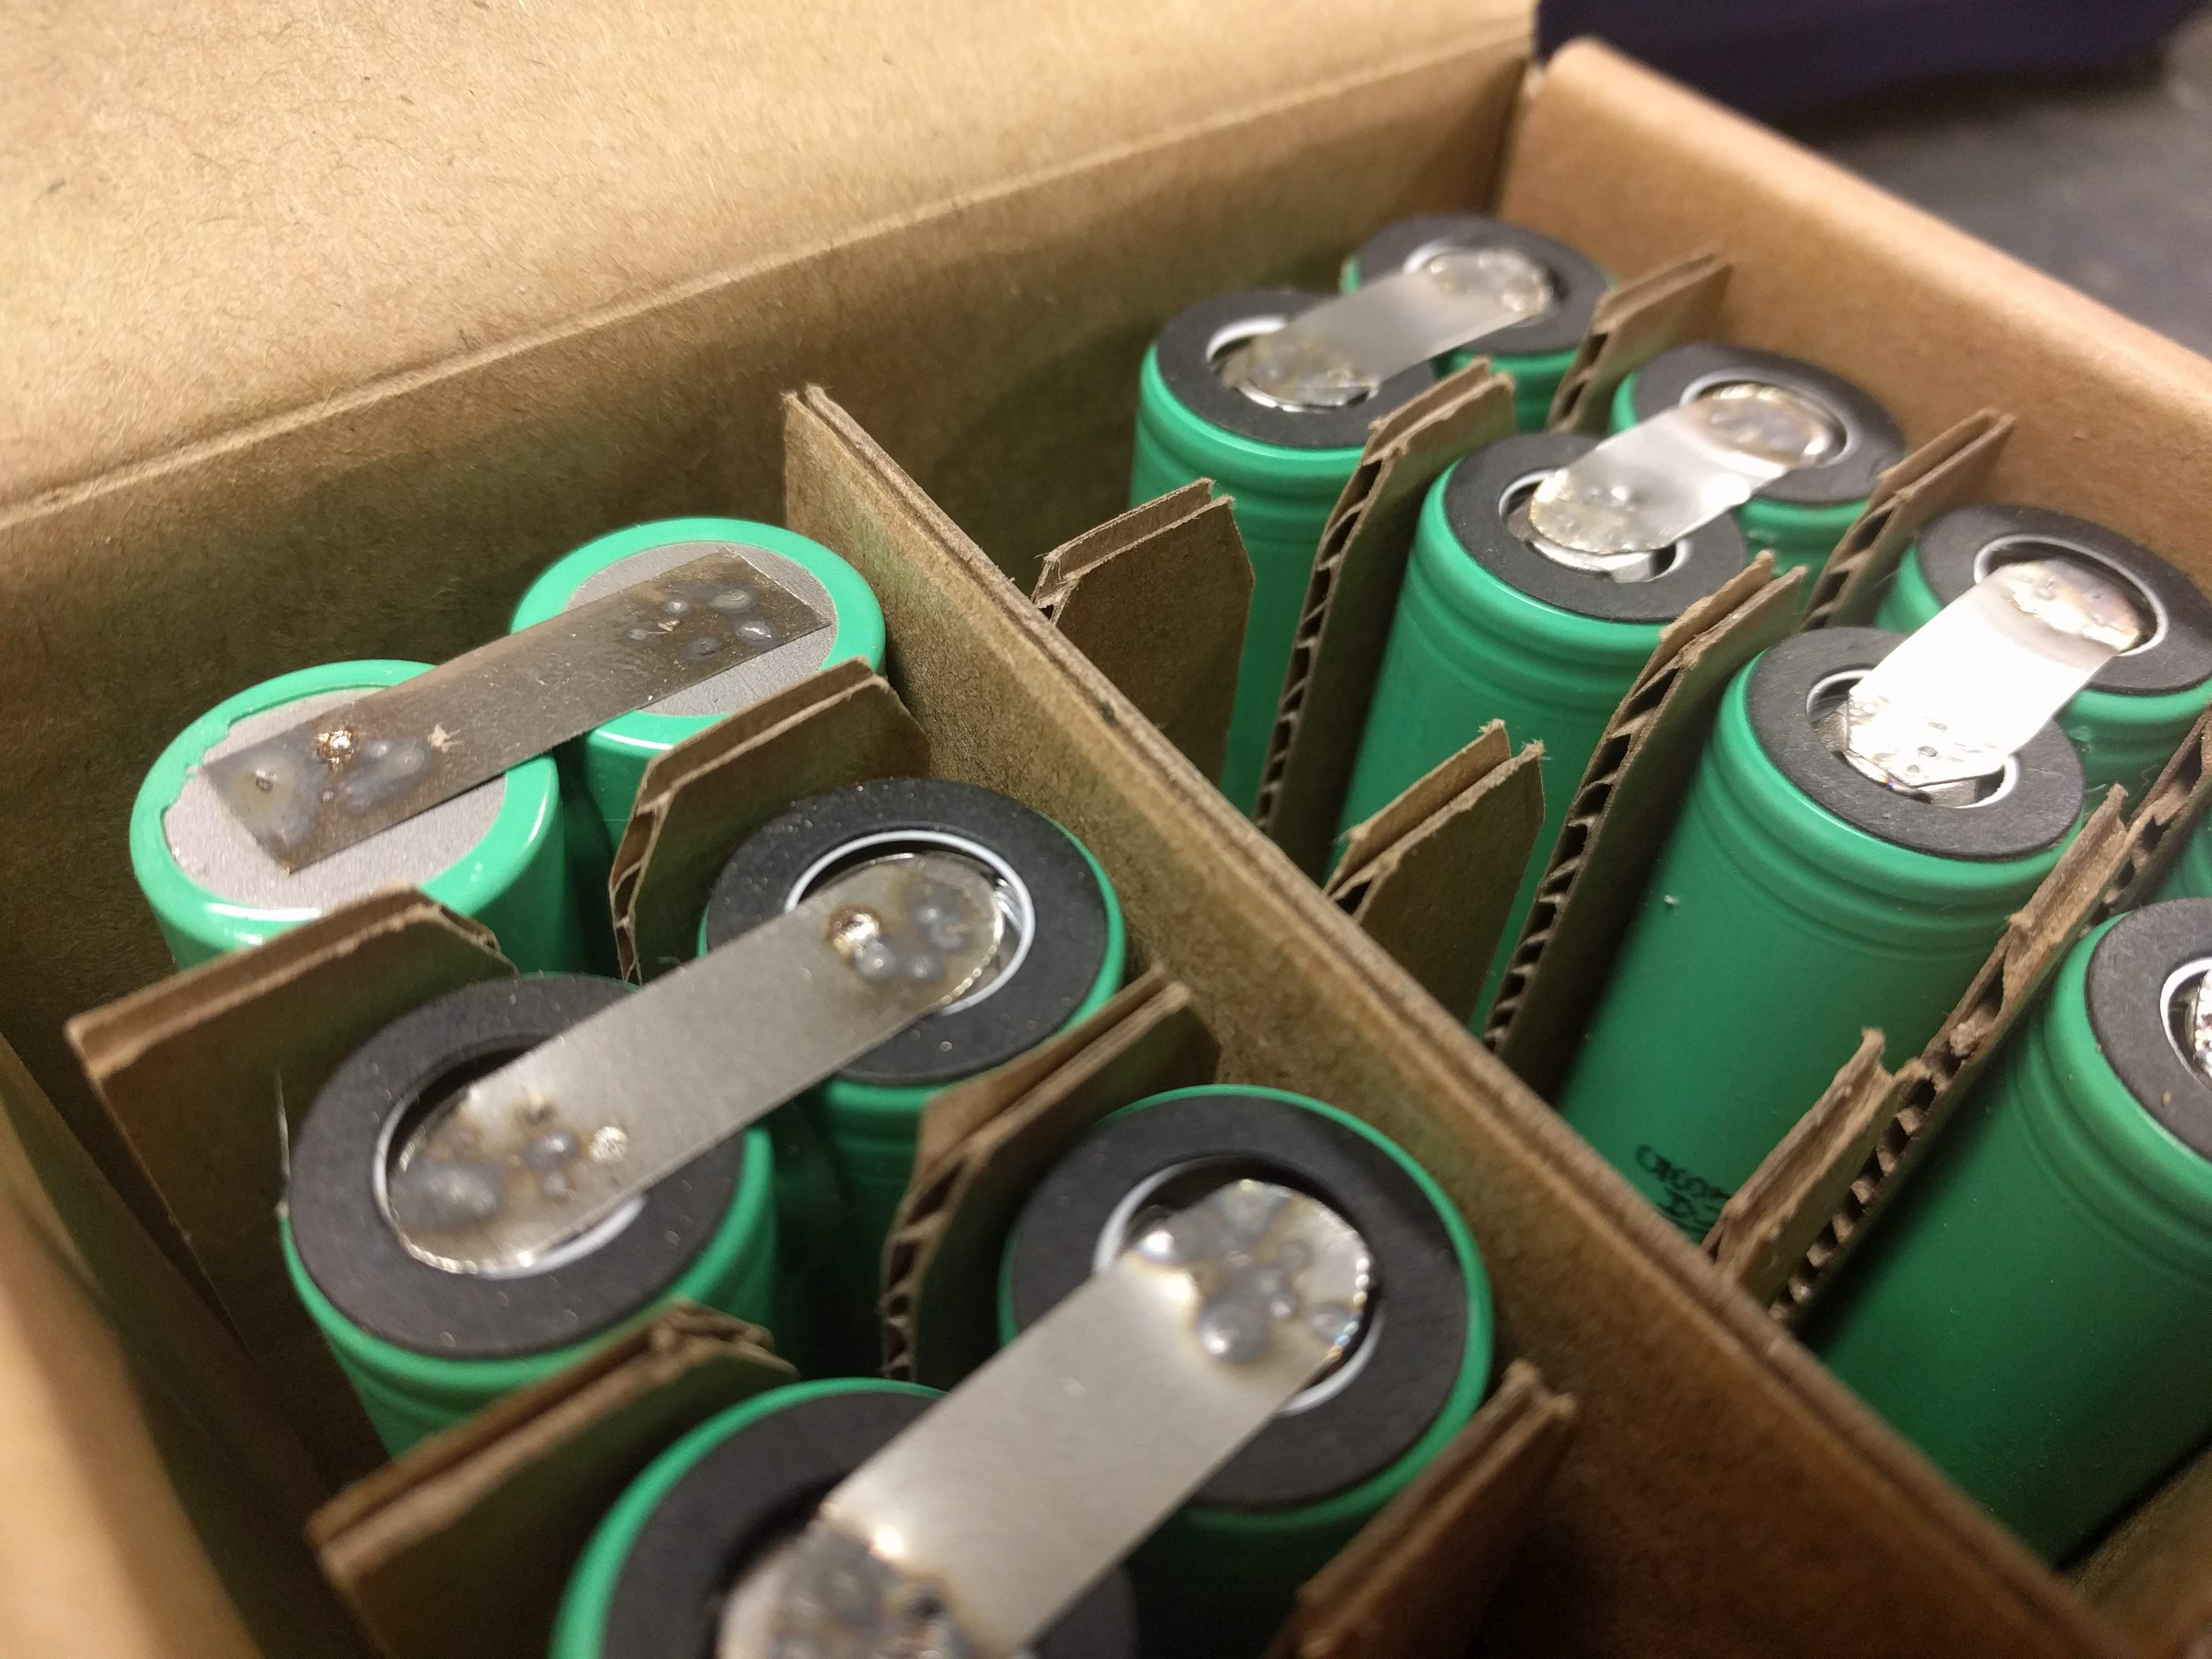
<p>The first step was to build the battery pack. After reading about Tesla and Panasonic’s partnership in developing new batteries, it felt somewhat wrong to order 18650 cells and have them arrive at my door. I held some sort of reverence that building with raw cells was something you didn’t do unless you were in a commercial production environment. This project definitely shifted that perspective…which is exactly why I wanted to do it.</p>

<p align="center">
<img src="/assets/images/posts/electric-longboard/longboard-raw-batteries.jpg" />
</p>
<p align="center">
<em>
The Samsung 18650 cells as they came from the distributor
</em>
</p>

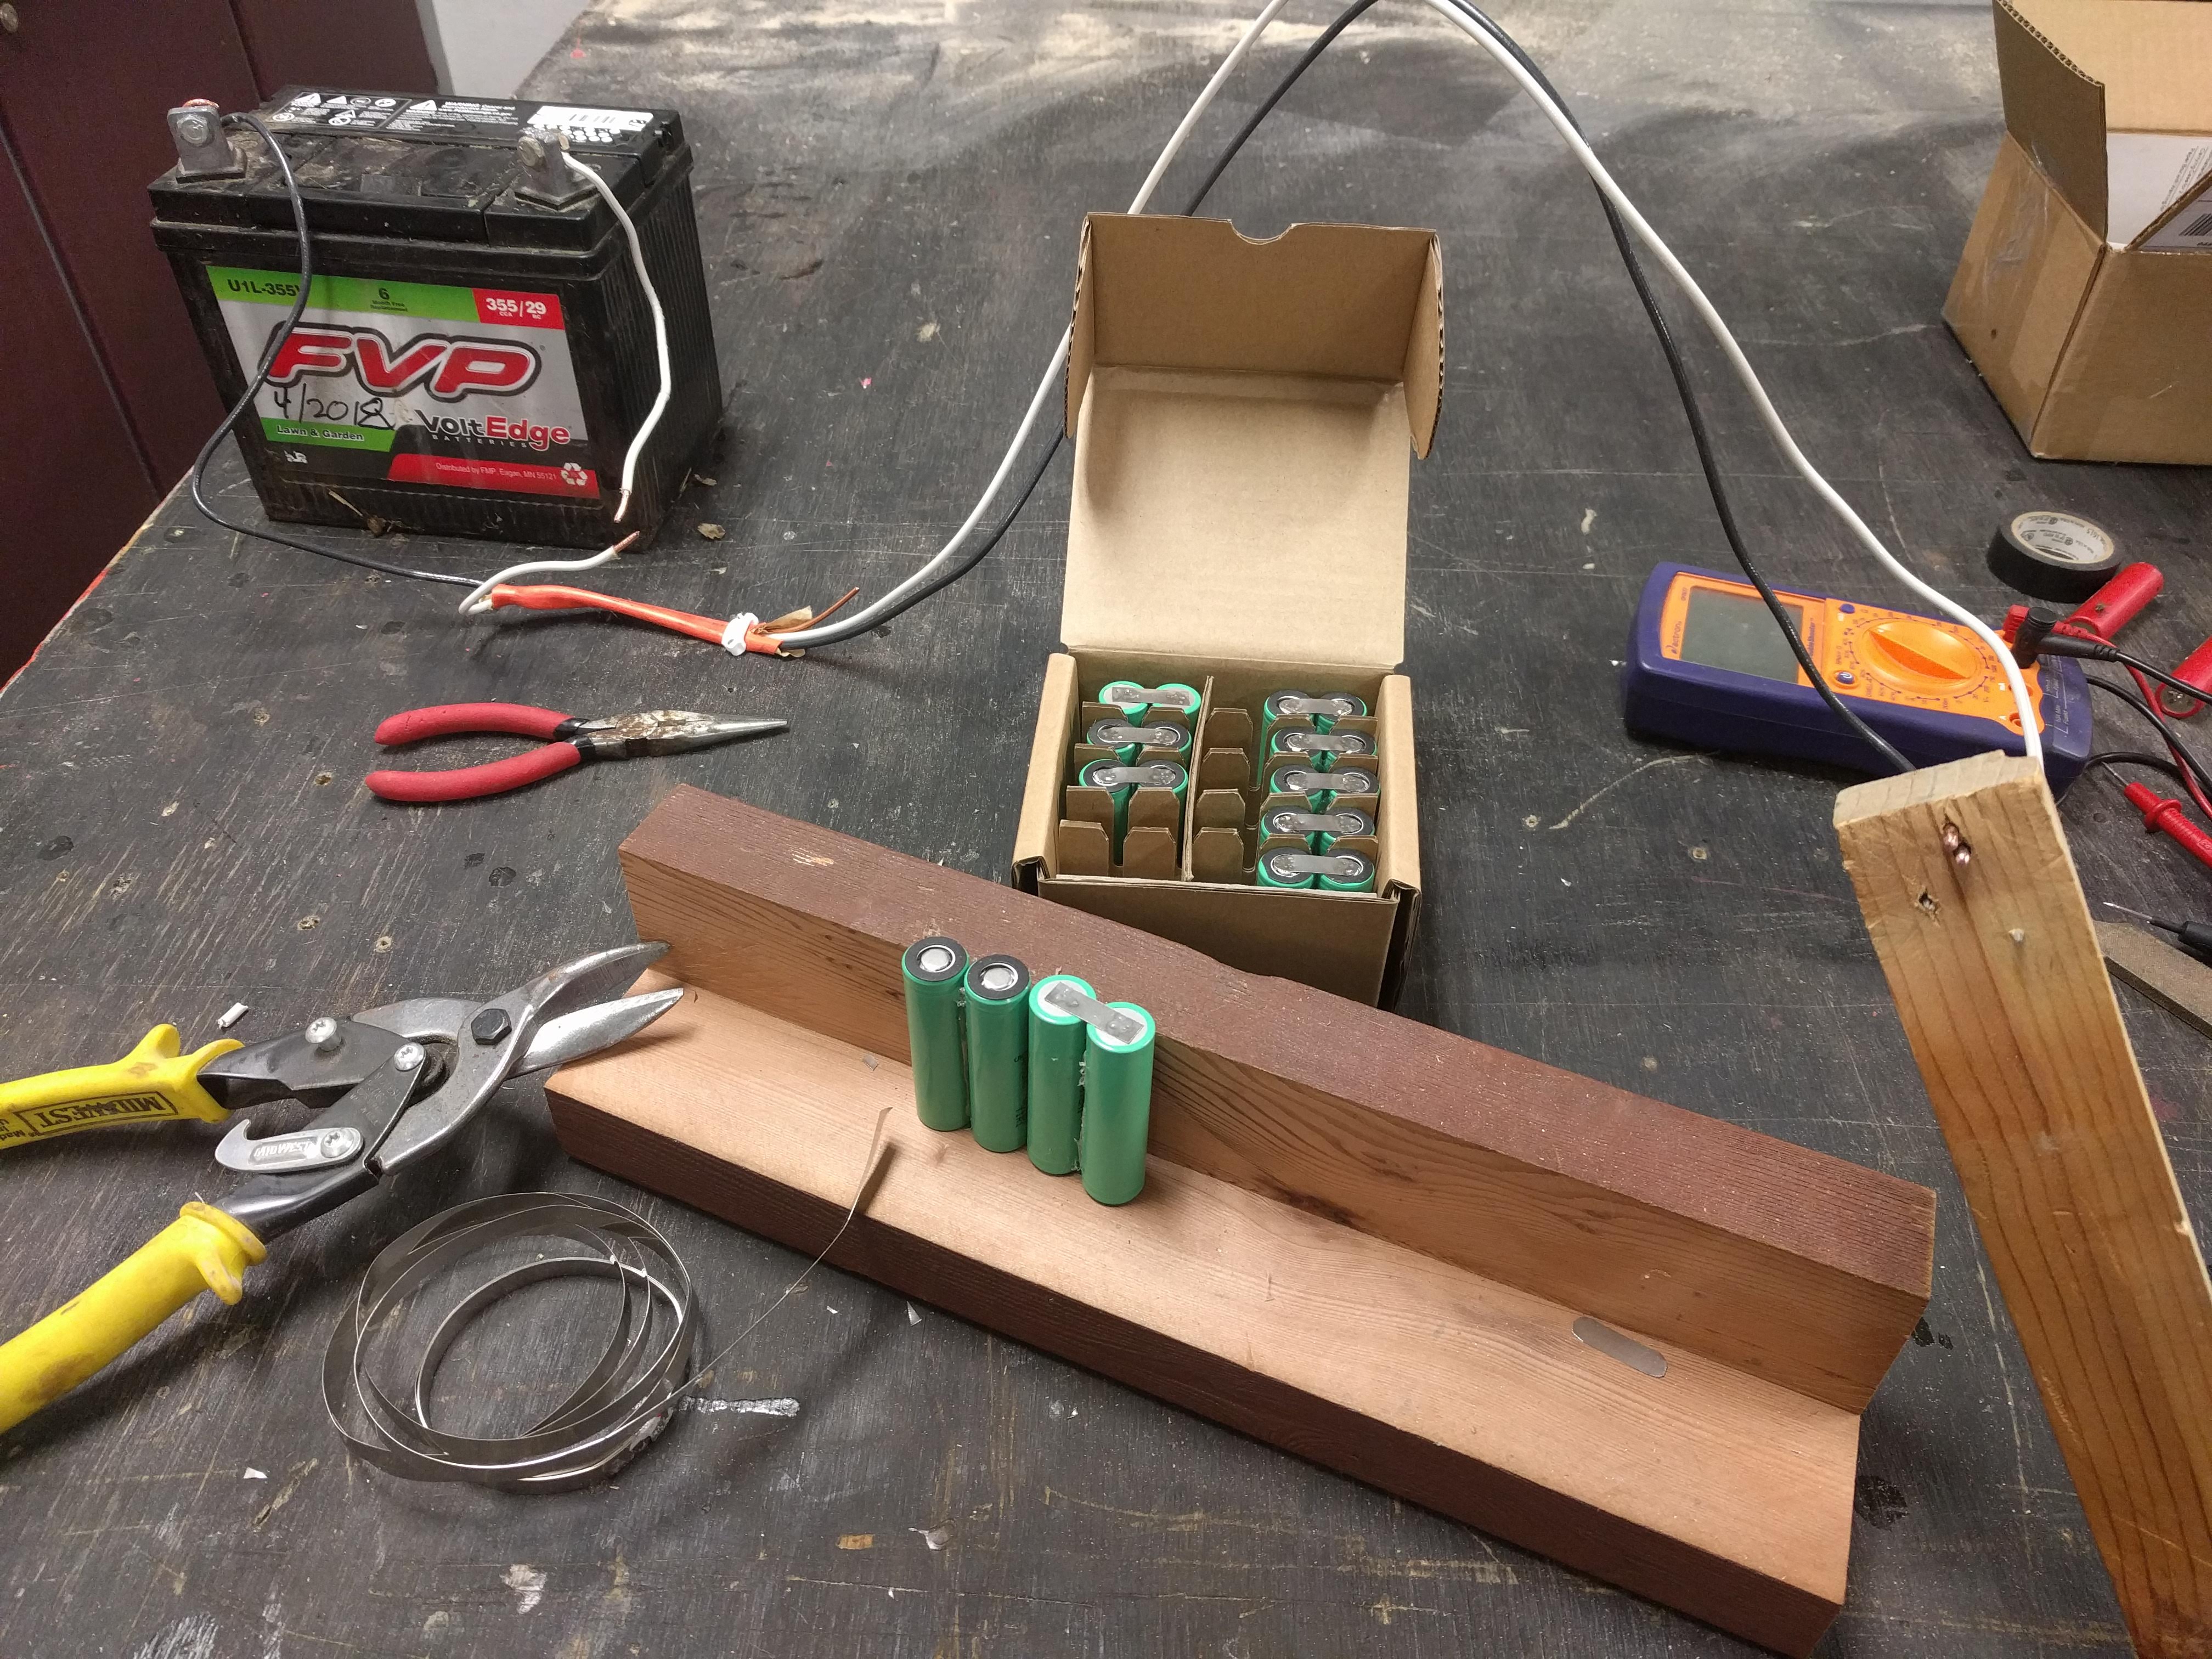
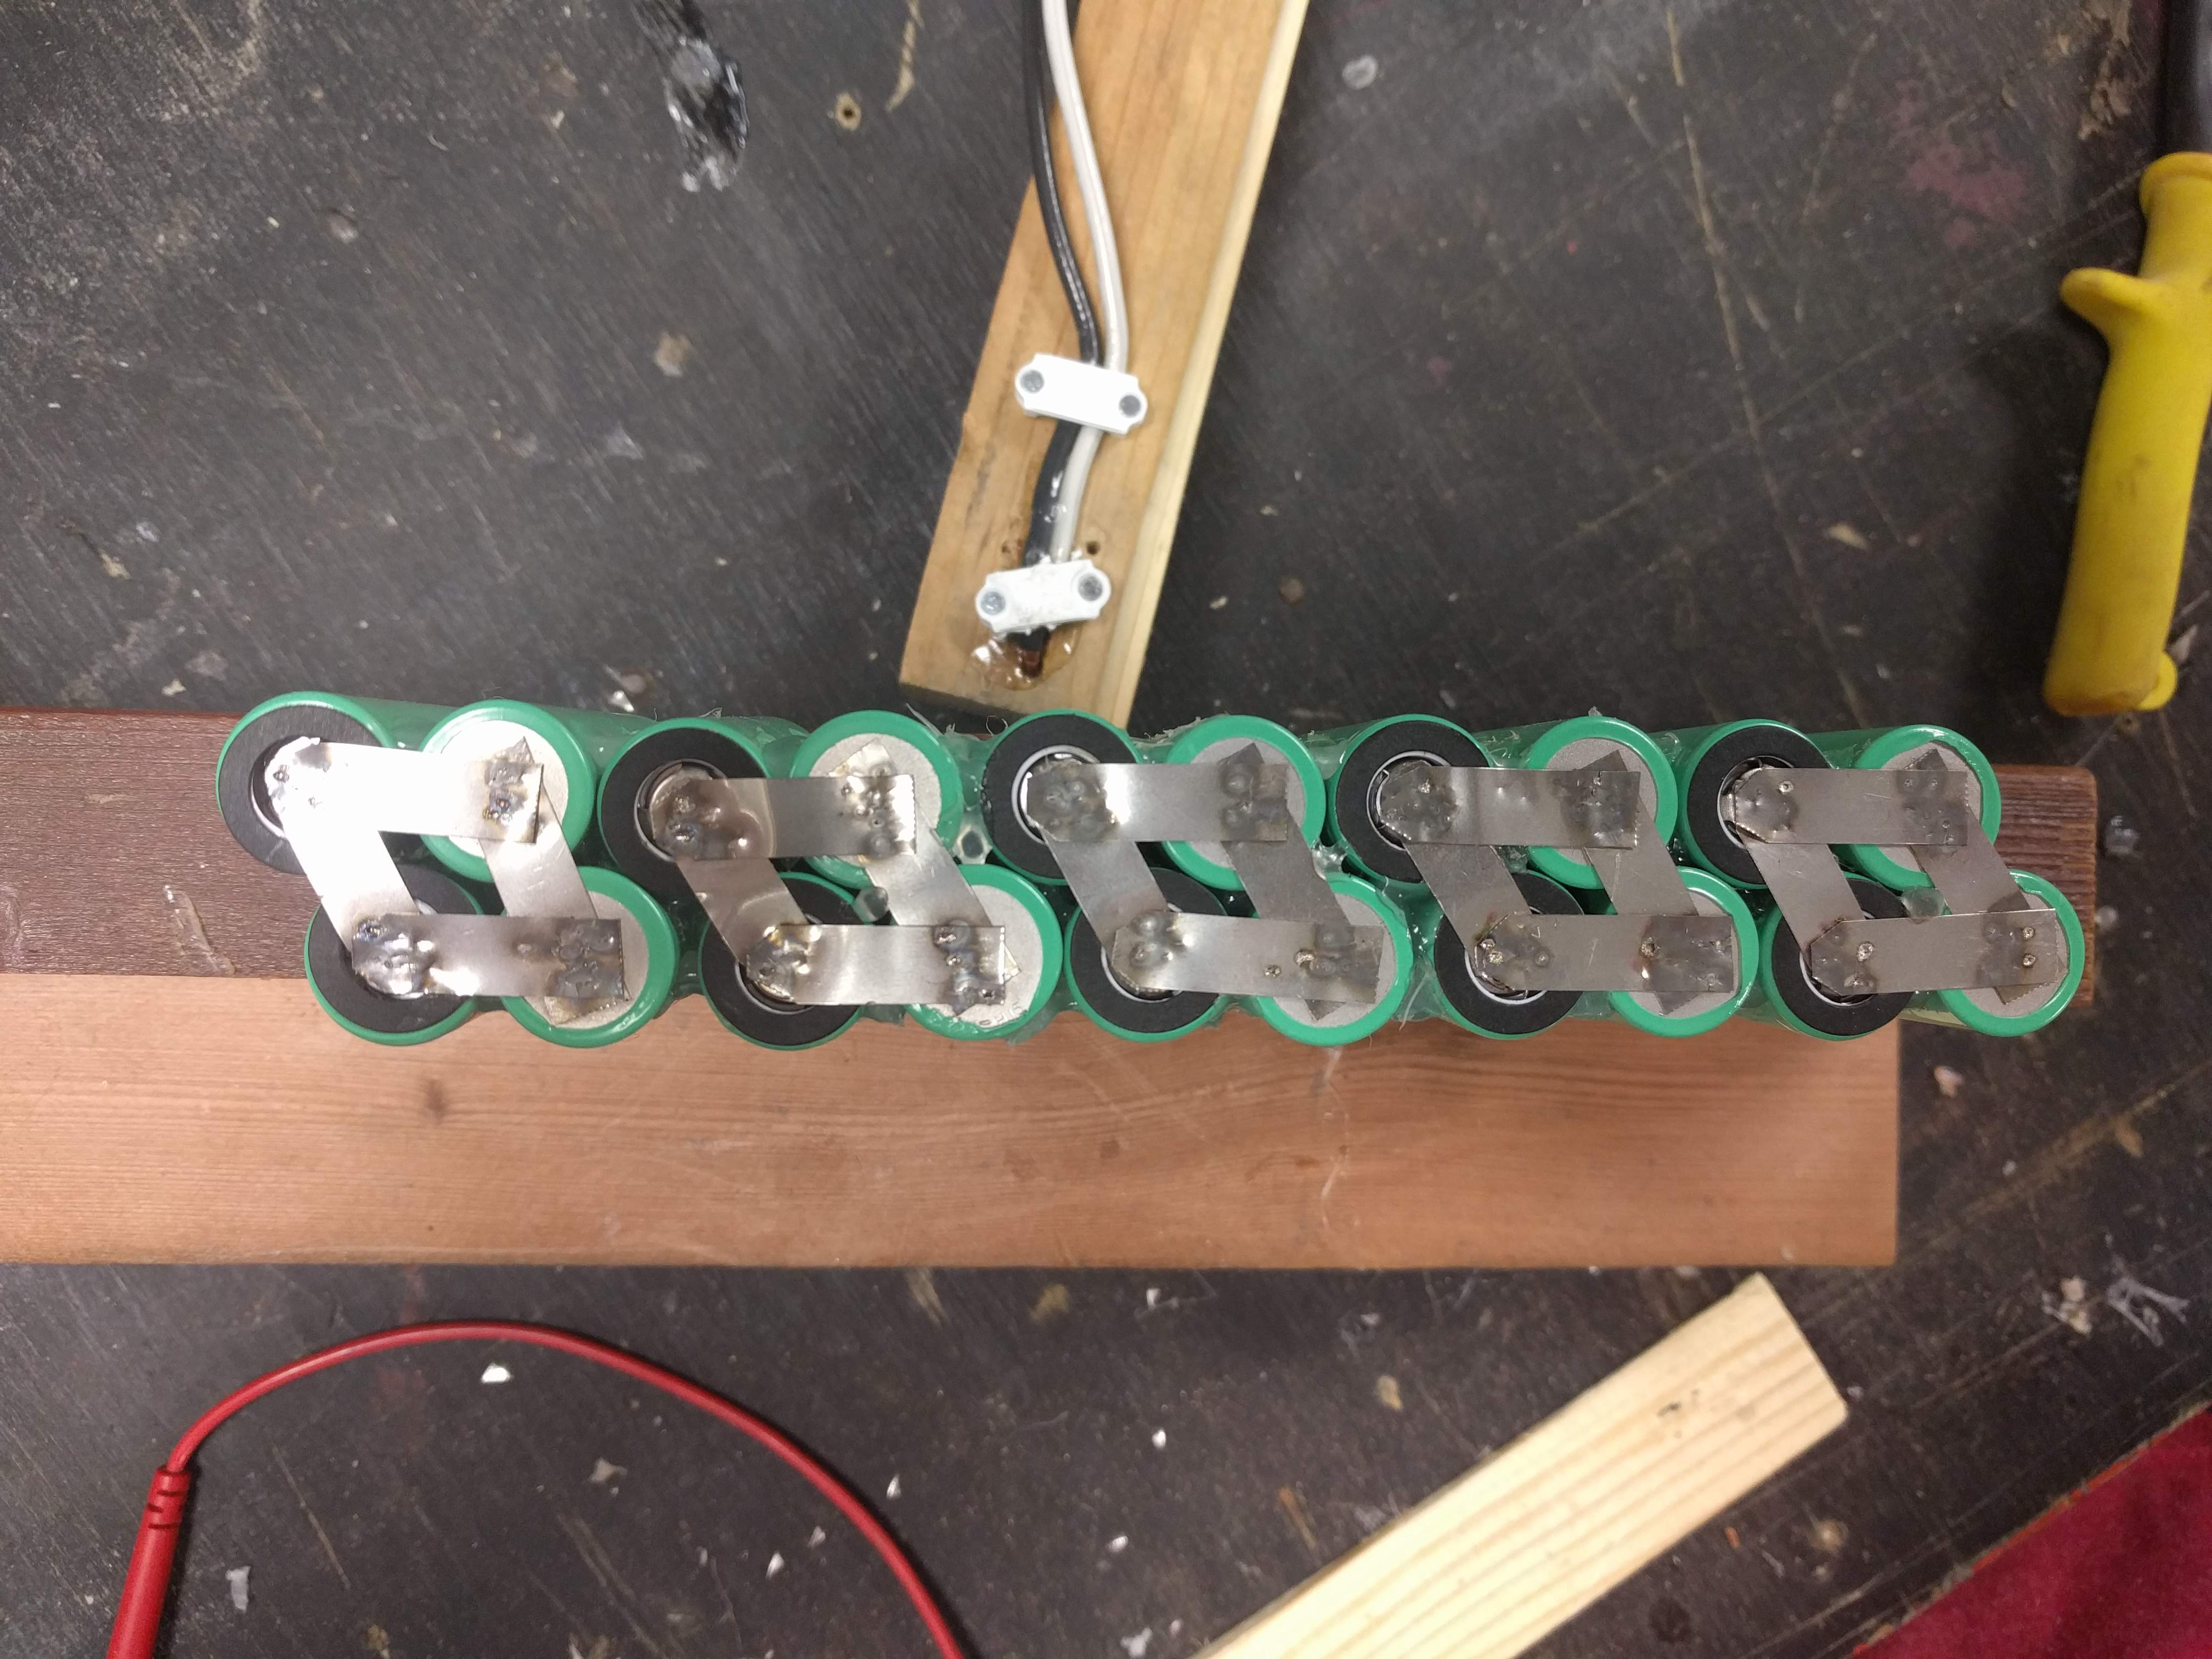
<p>Once the raw cells arrived, they had to be spotwelded together. This is a different process than I was used to after only soldering components for all my previous electrical projects. These batteries can’t be soldered together because it would overheat the cells and not be a very secure connection. Spotwelding introduces less heat because of its more instantaneous nature. To spotweld these cells, I’d cut a length of pure nickel strip, place it on the battery terminals, then press two copper nail tips to the nickel strip.  Next, I’d short a lawnmower battery to cause current to flow through the nickel strip between the copper terminals. This process heats up the nickel just enough to weld it to the battery terminal. I’d repeat this process twice per terminal/nickel strip interface and hot glue the adjacent cells for structural support.</p>

<p align="center">
<img src="/assets/images/posts/electric-longboard/longboard-batteries-1.jpg" />
</p>
<p align="center">
<em>
The spotwelding setup: a lawnmower battery, diy spotwelder terminals, nickel strips, and tin snips. Not pictured: ice cubes to put the terminals in after they heat up.
</em>
</p>

<p>Clearly the setup wasn’t the most advanced. Because of the massive current passing through the circuit each cycle, the cables and nails would heat up. After 3 or so spotwelds, my dad (who helped short the battery while I held the terminals in position) and I would have to wait for the components to cool down - sometimes with the aid of an ice cube from our drinks. The heated copper had a higher resistance and would result in lower currents and thus bad spotwelds.</p>

<figure class="half">
  <a href="/assets/images/posts/electric-longboard/longboard-batteries-2.jpg">
  <img src="/assets/images/posts/electric-longboard/longboard-batteries-2.jpg" /></a>

  <a href="/assets/images/posts/electric-longboard/longboard-batteries-3.jpg">
  <img src="/assets/images/posts/electric-longboard/longboard-batteries-3.jpg" /></a>
</figure>

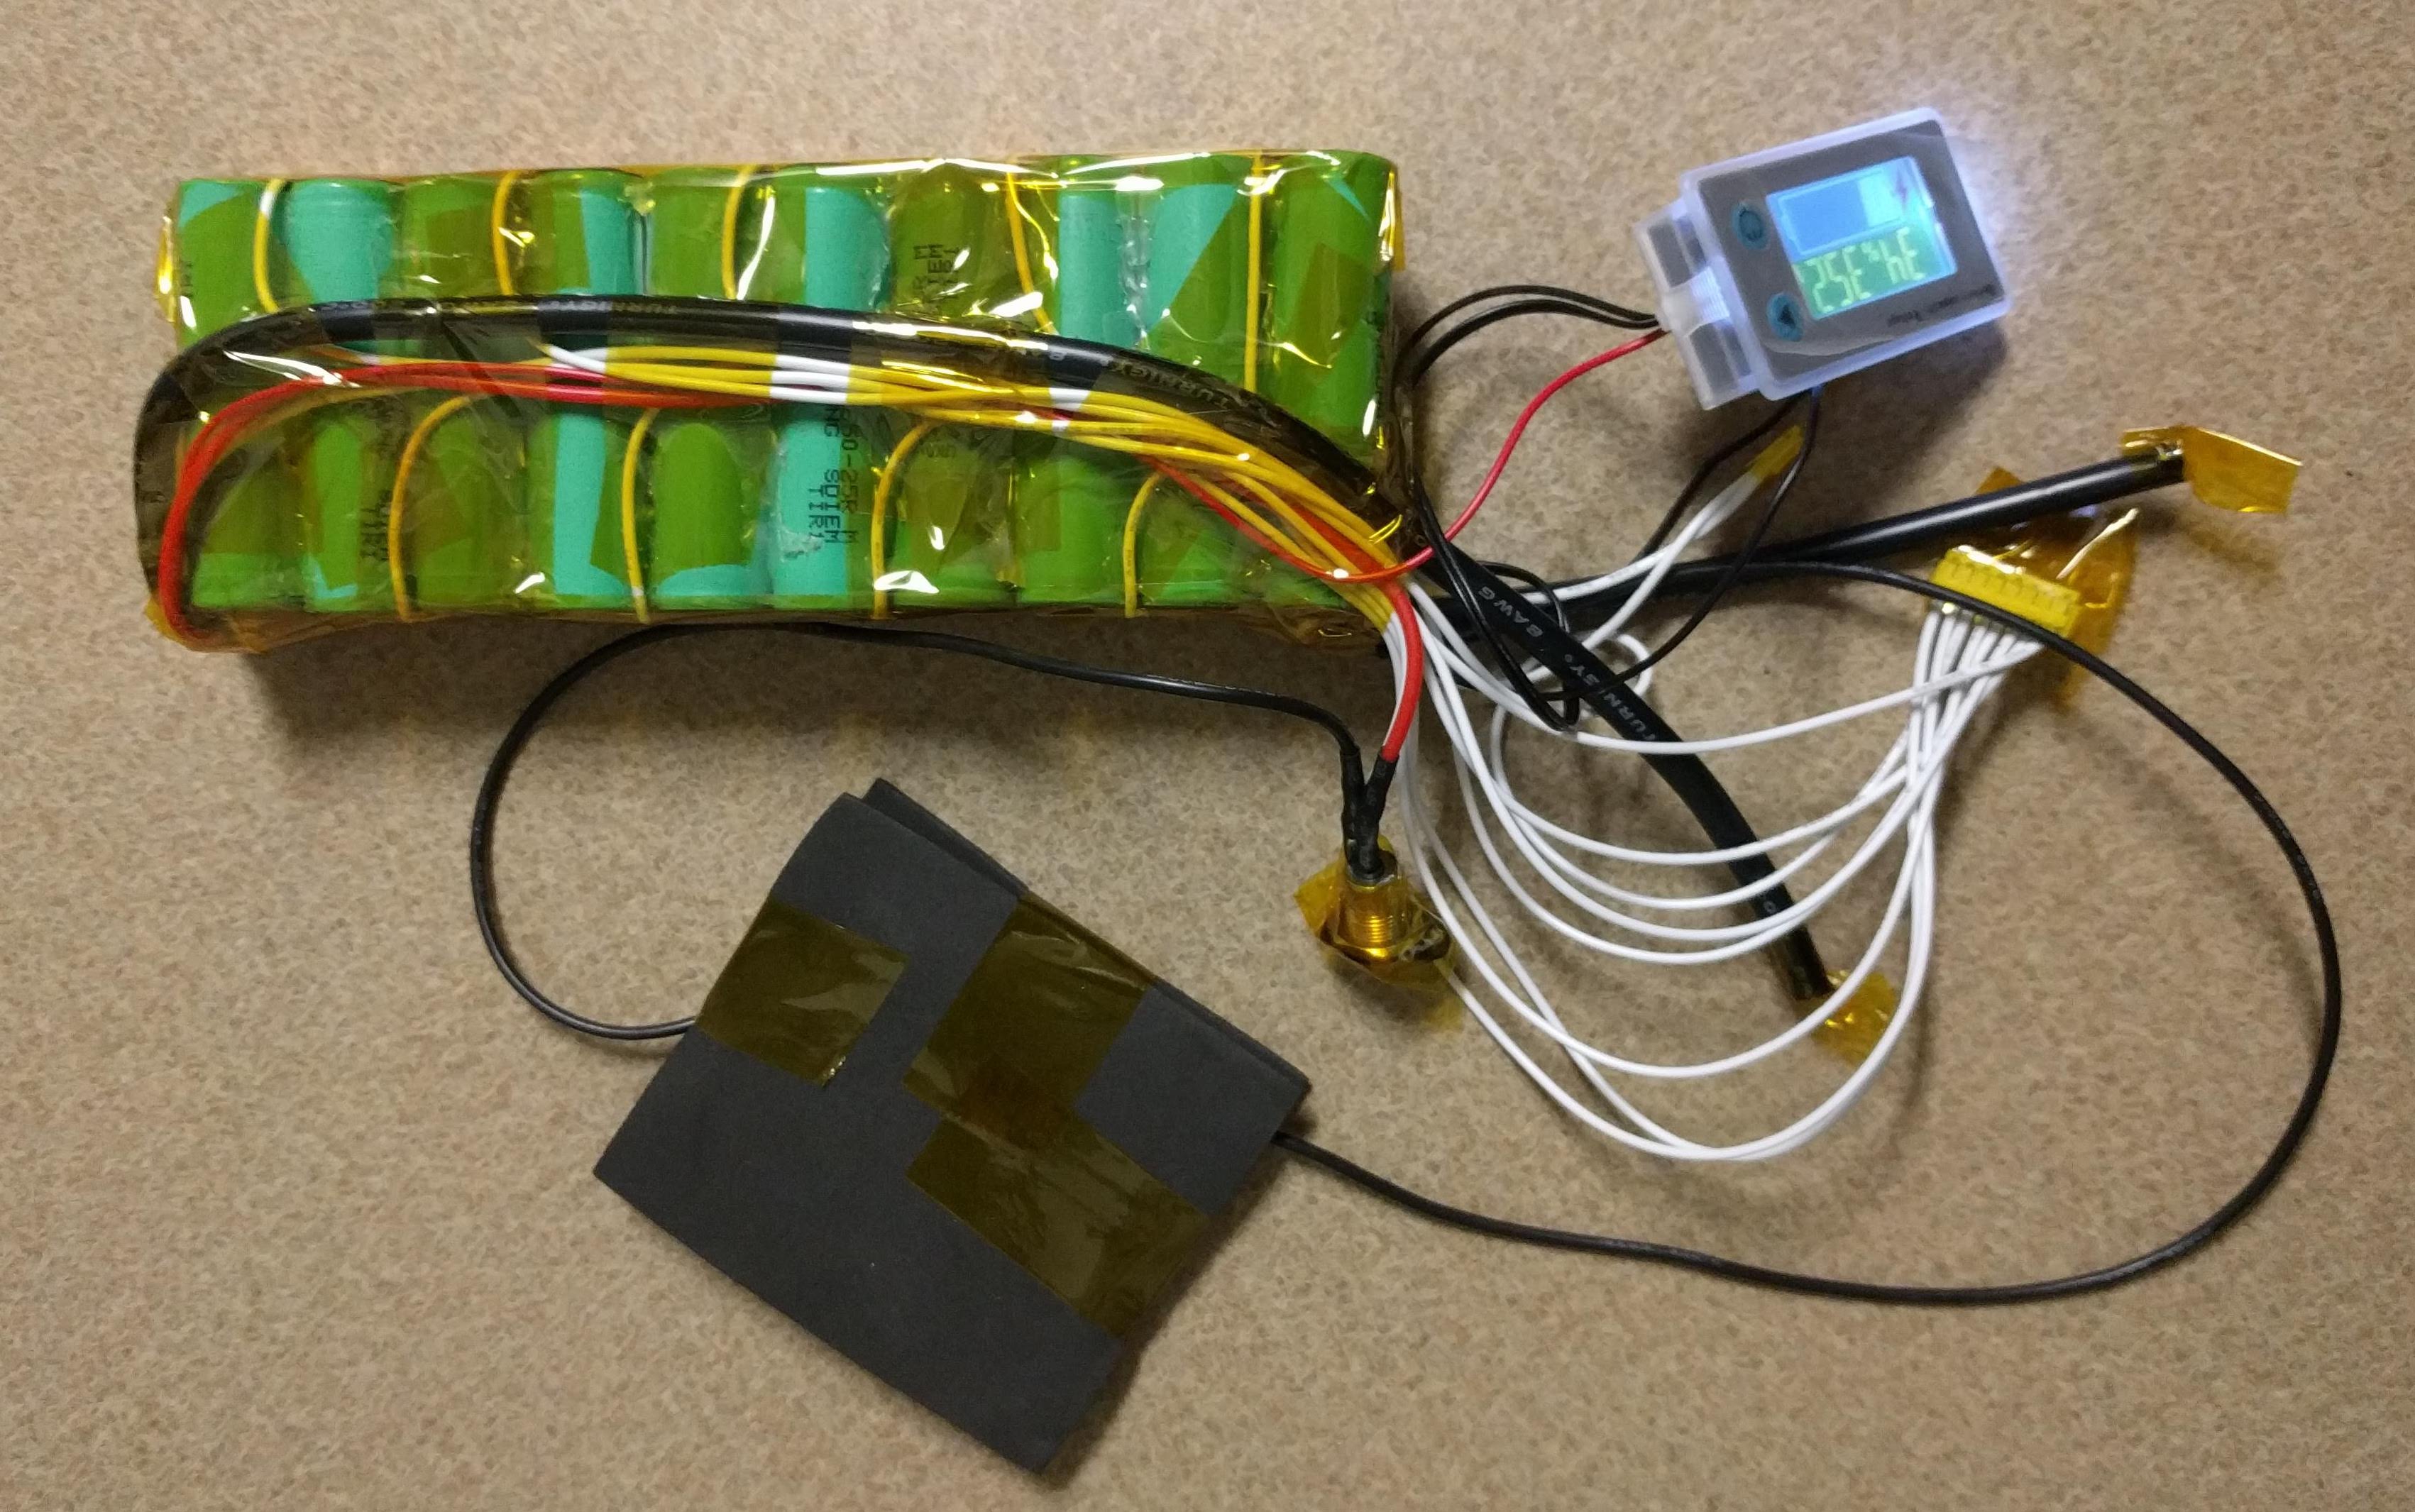
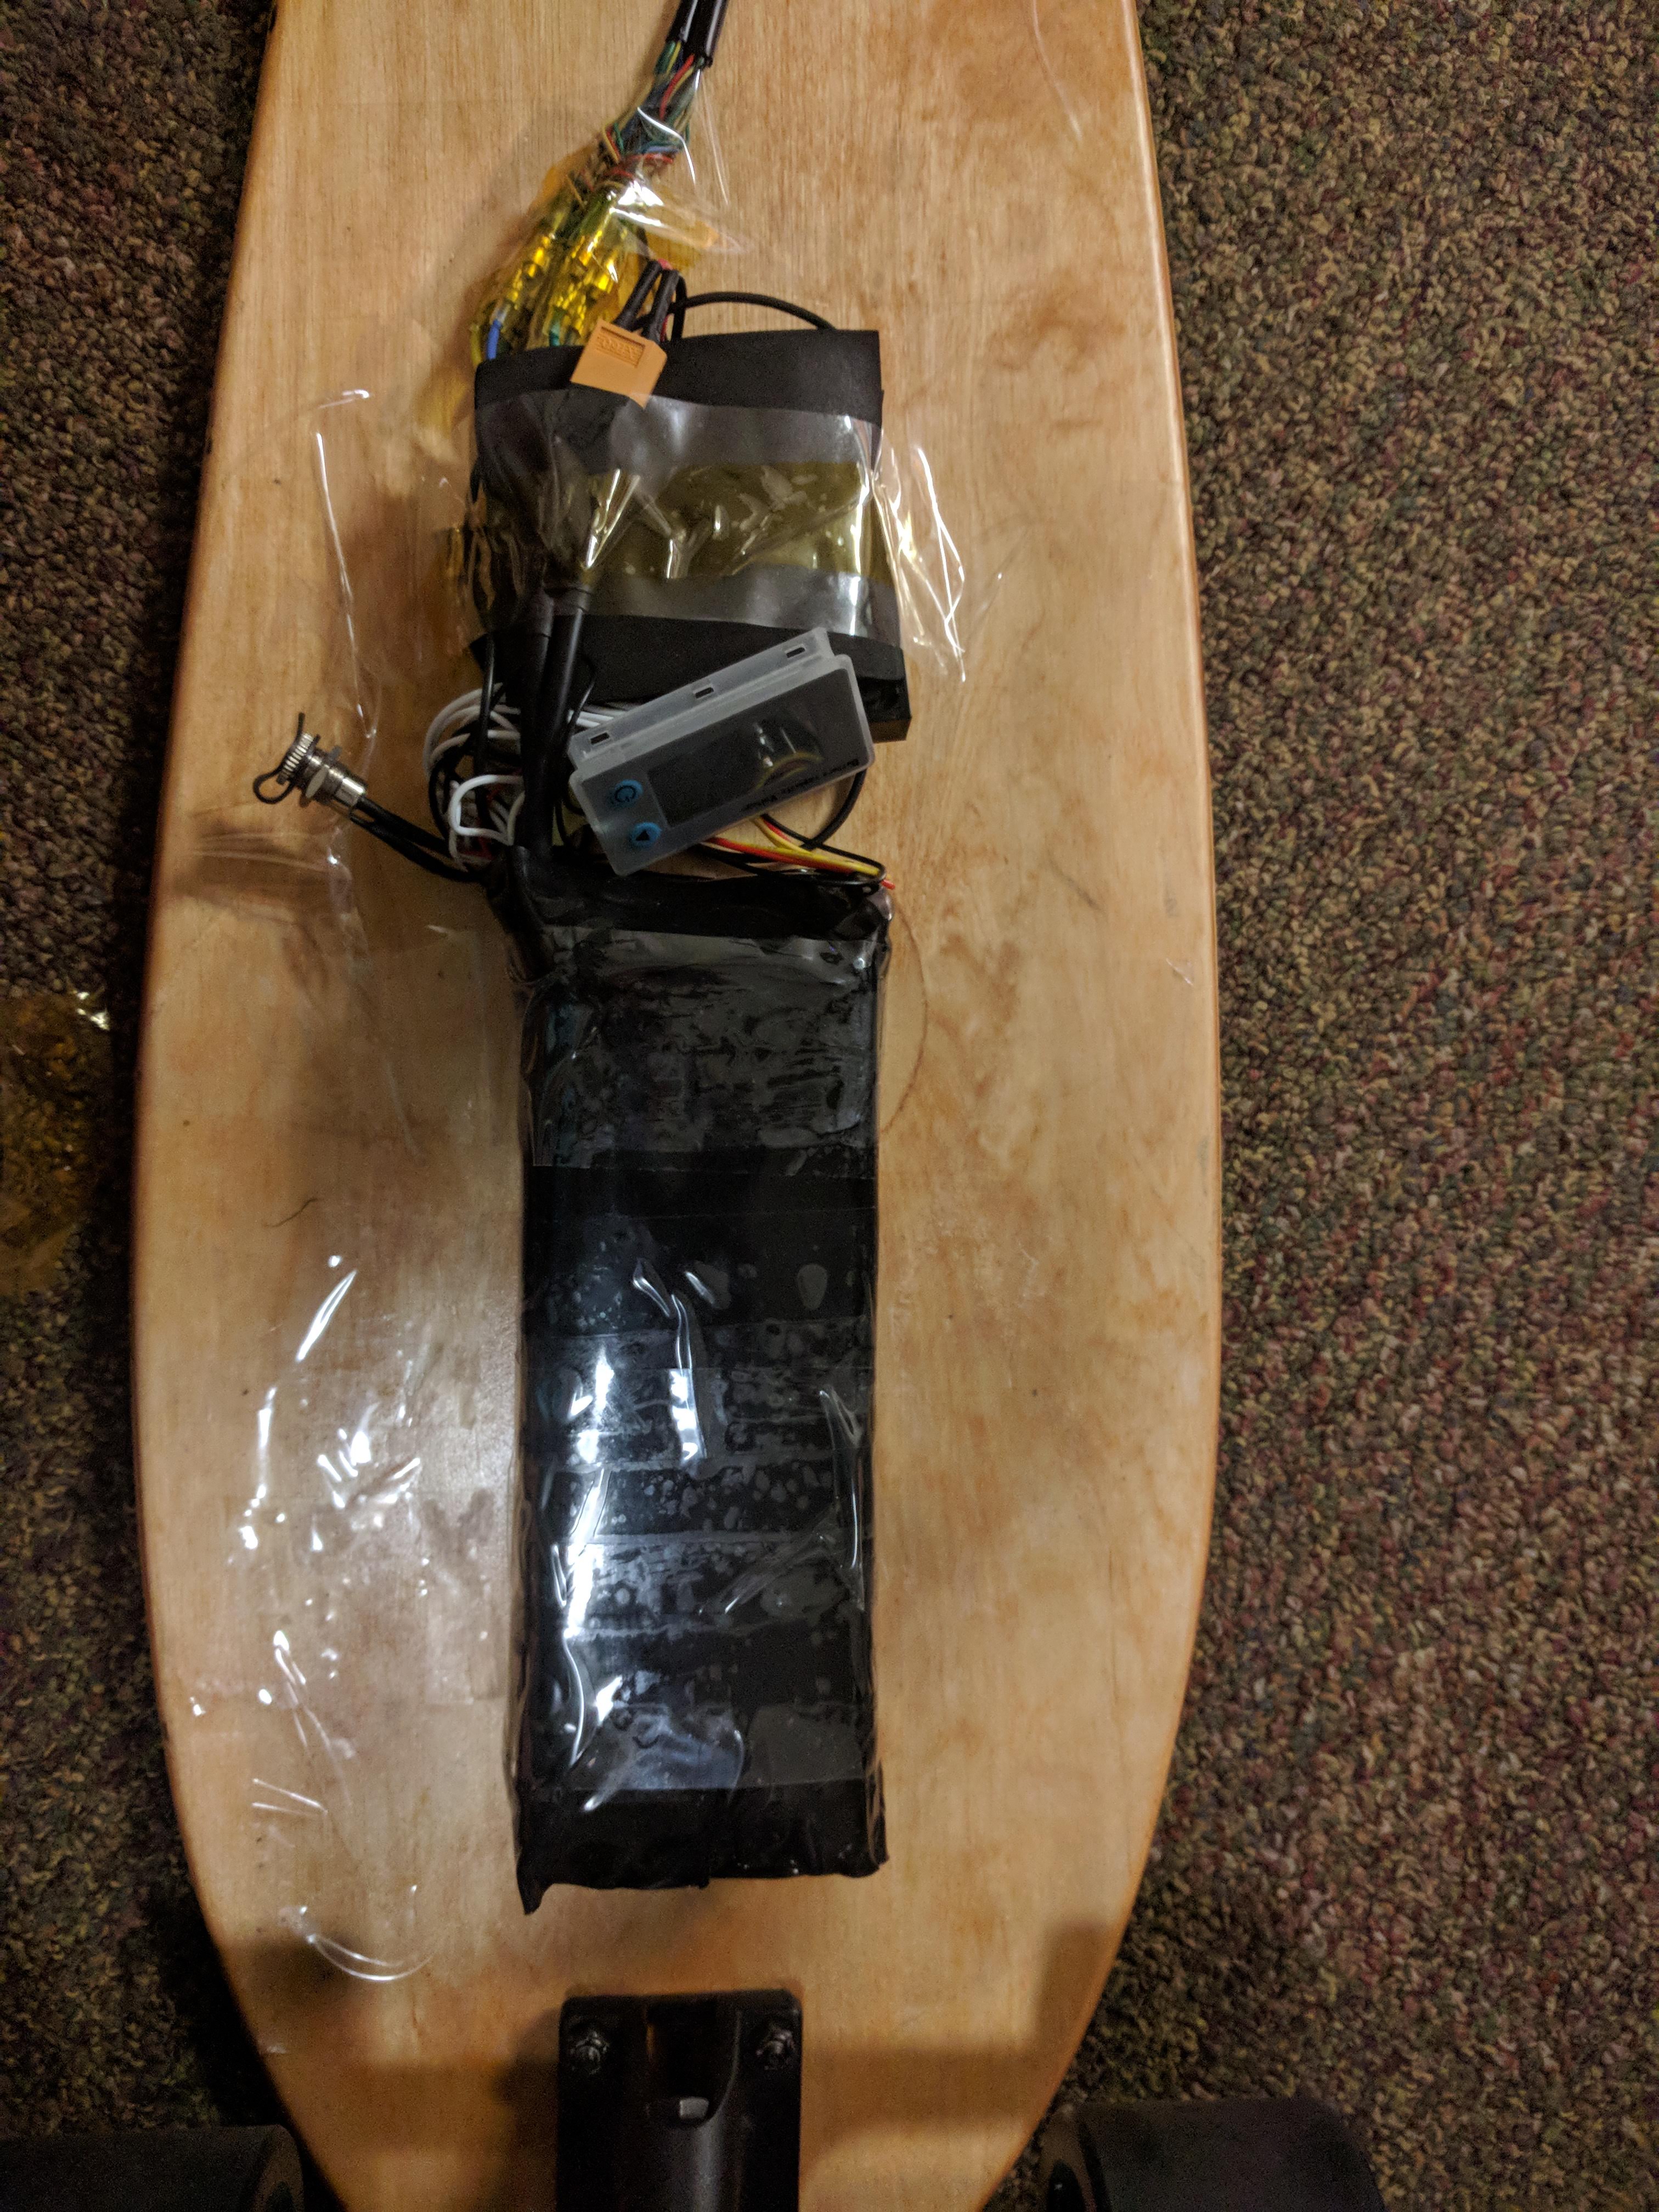
<p>Once the cells were spotwelded and glued together to form the bare batterypack, I used my multimeter to check that the resultant output voltage was correct. After confirming this, I then carefully soldered the output battery leads and individual cell-pair leads for monitoring. Kapton tape (heat-resistant and electrically insulating tape) to further secure and protect the cell terminals. Then I connected the wires up to the power switch, battery management system (BMS), and temperature/voltage monitor and display.</p>

<p align="center">
<img src="/assets/images/posts/electric-longboard/longboard-batterypack.jpg" />
</p>
<p align="center">
<em>
The assembled batterypack and monitoring electronics
</em>
</p>

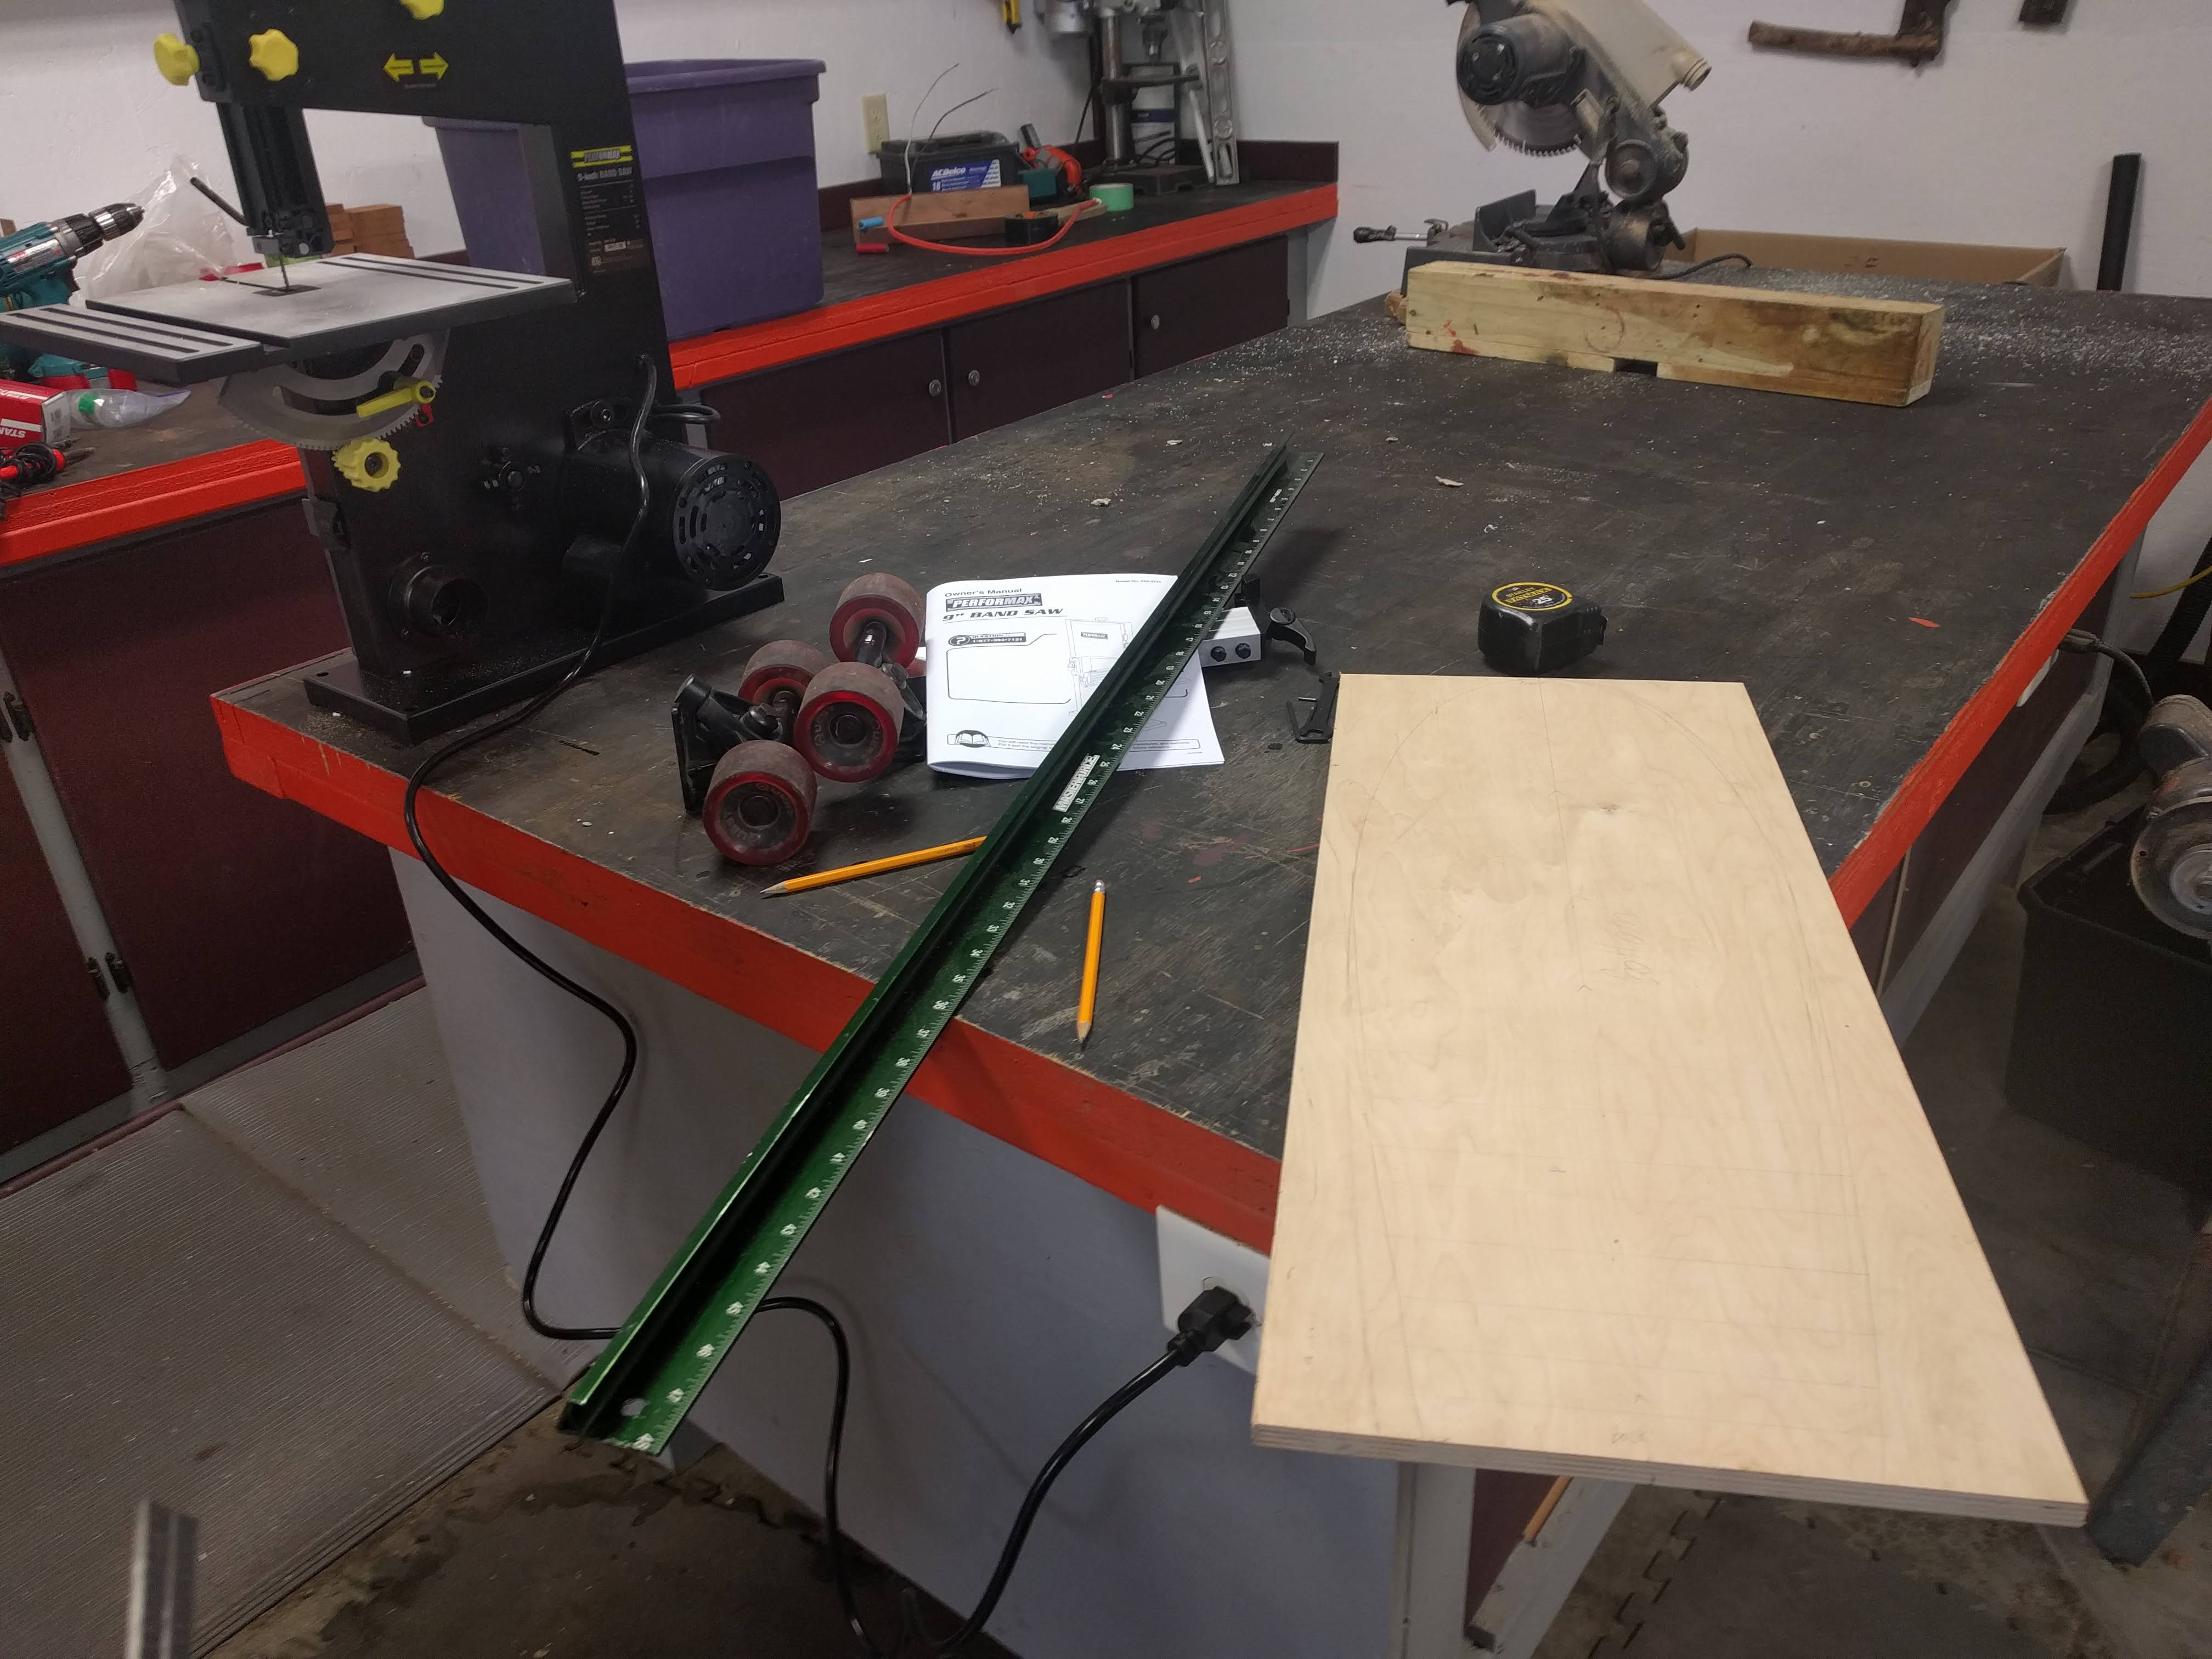
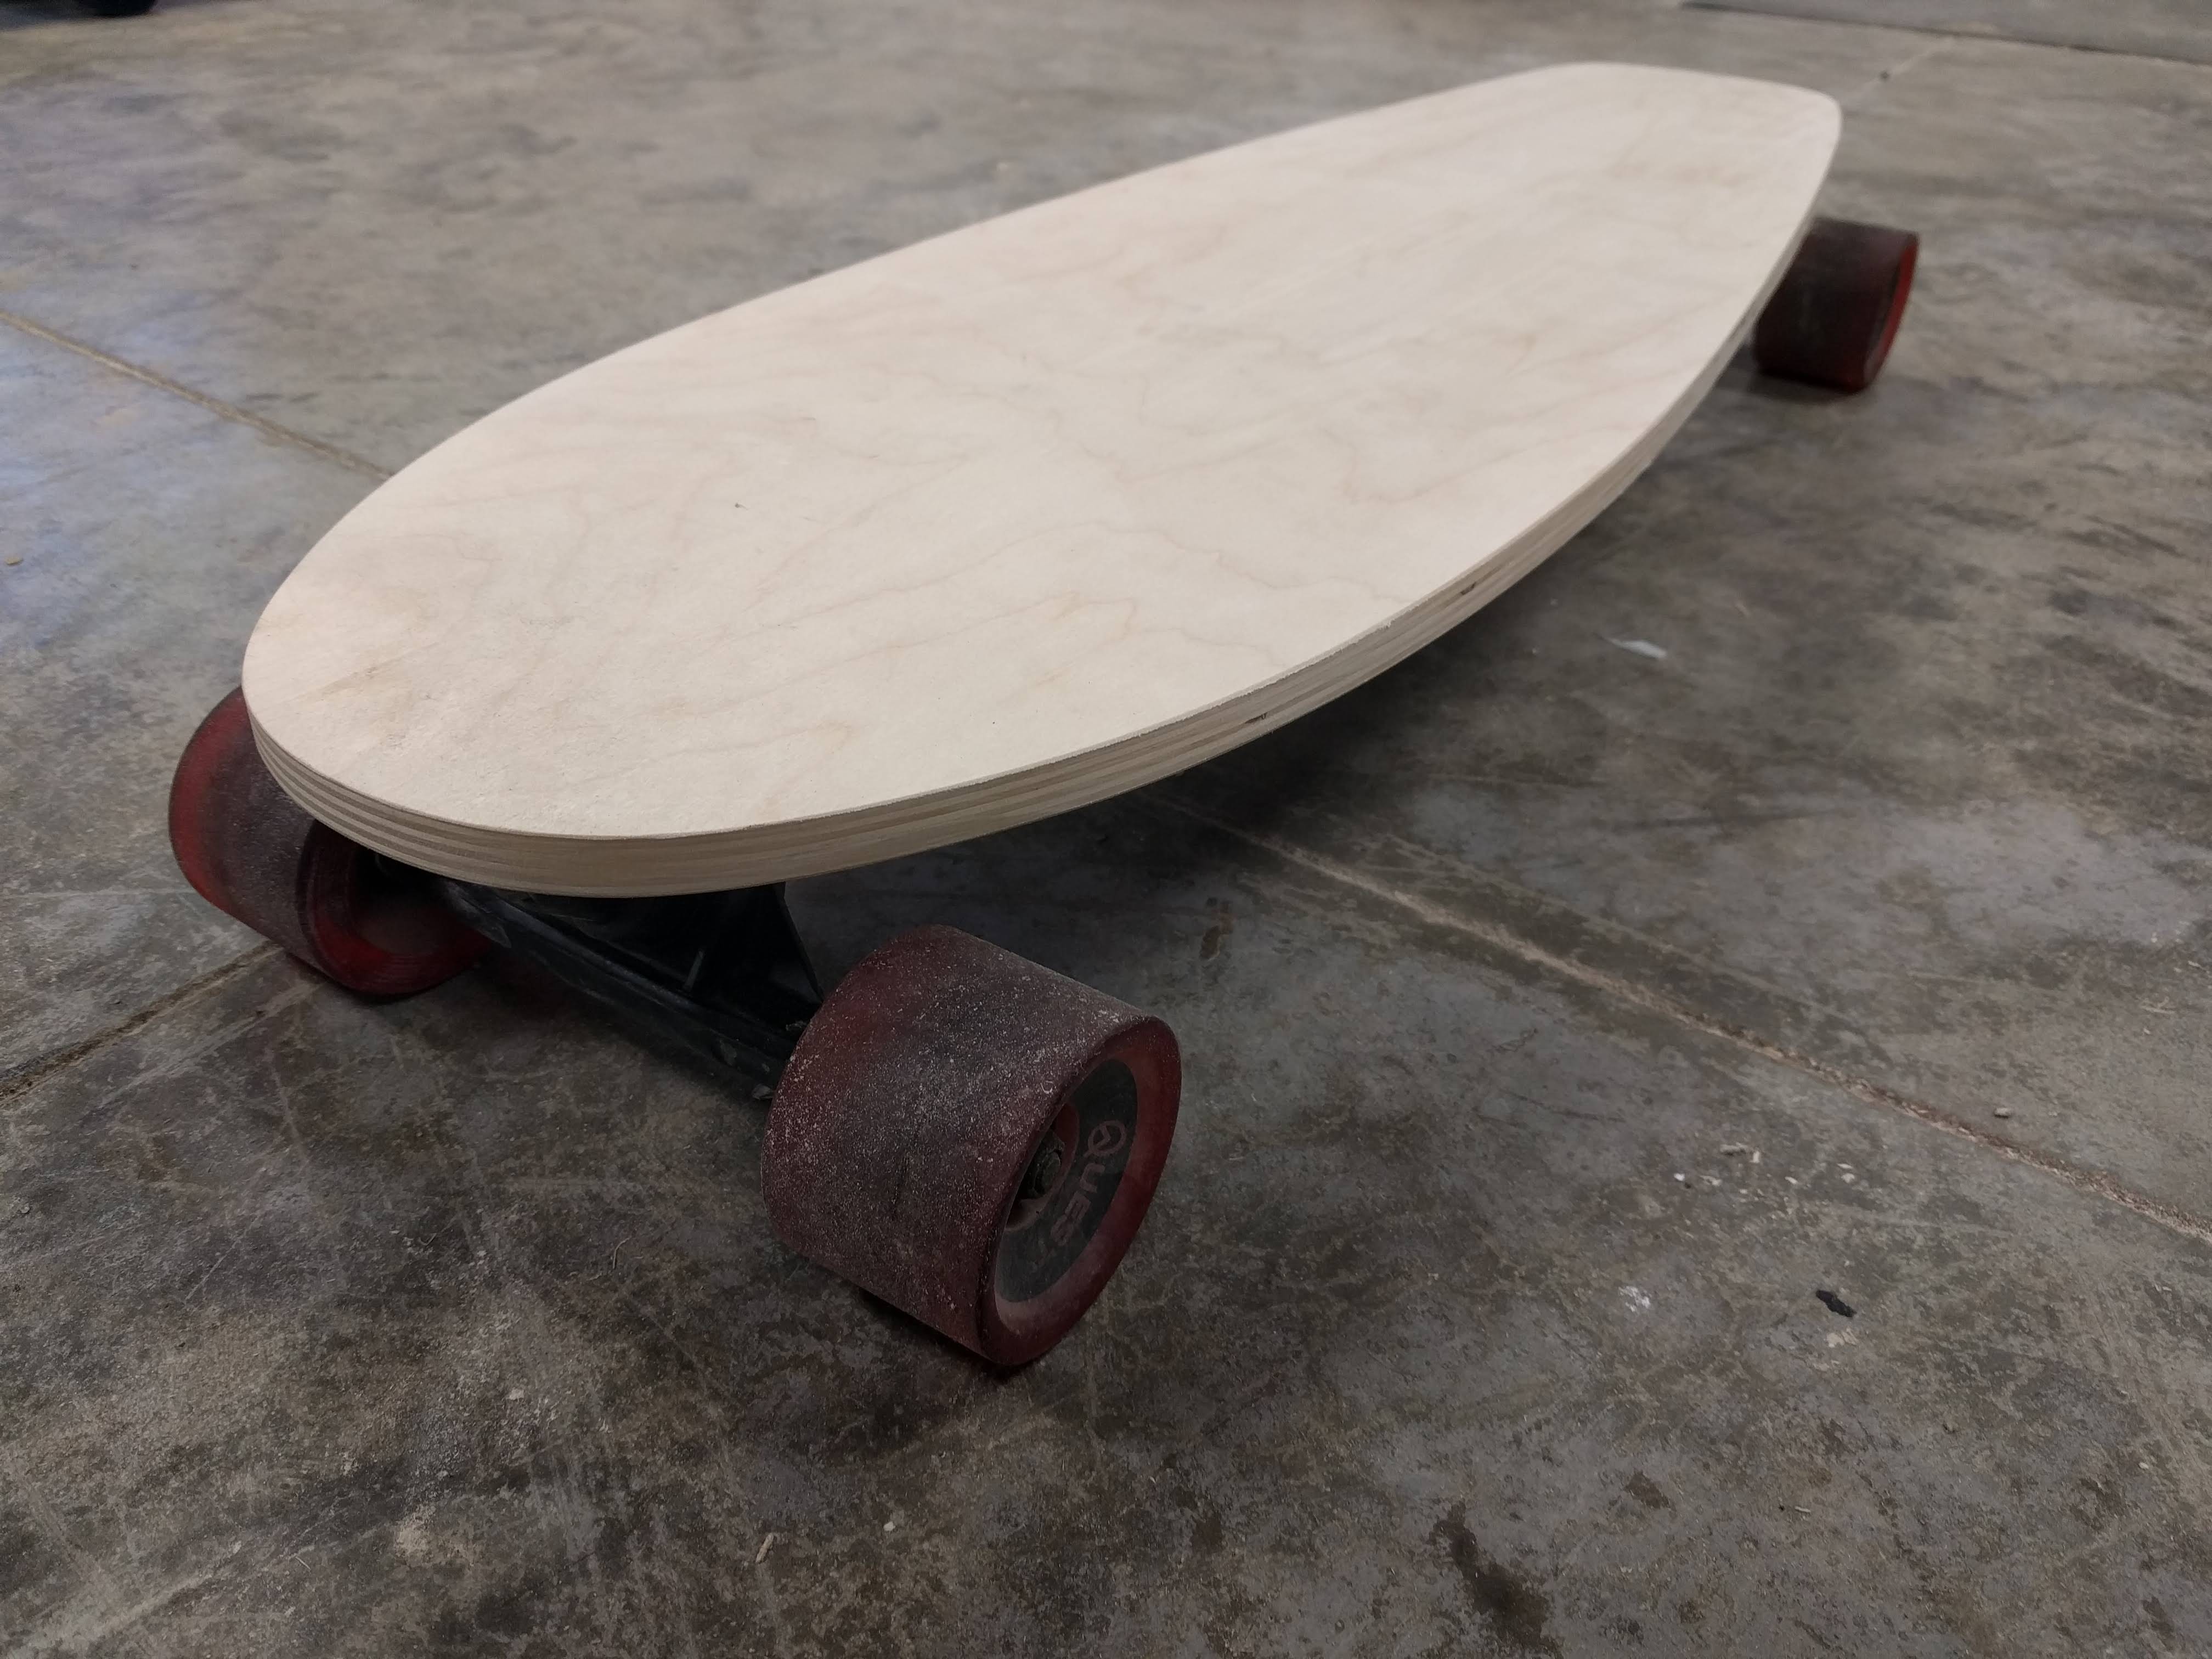
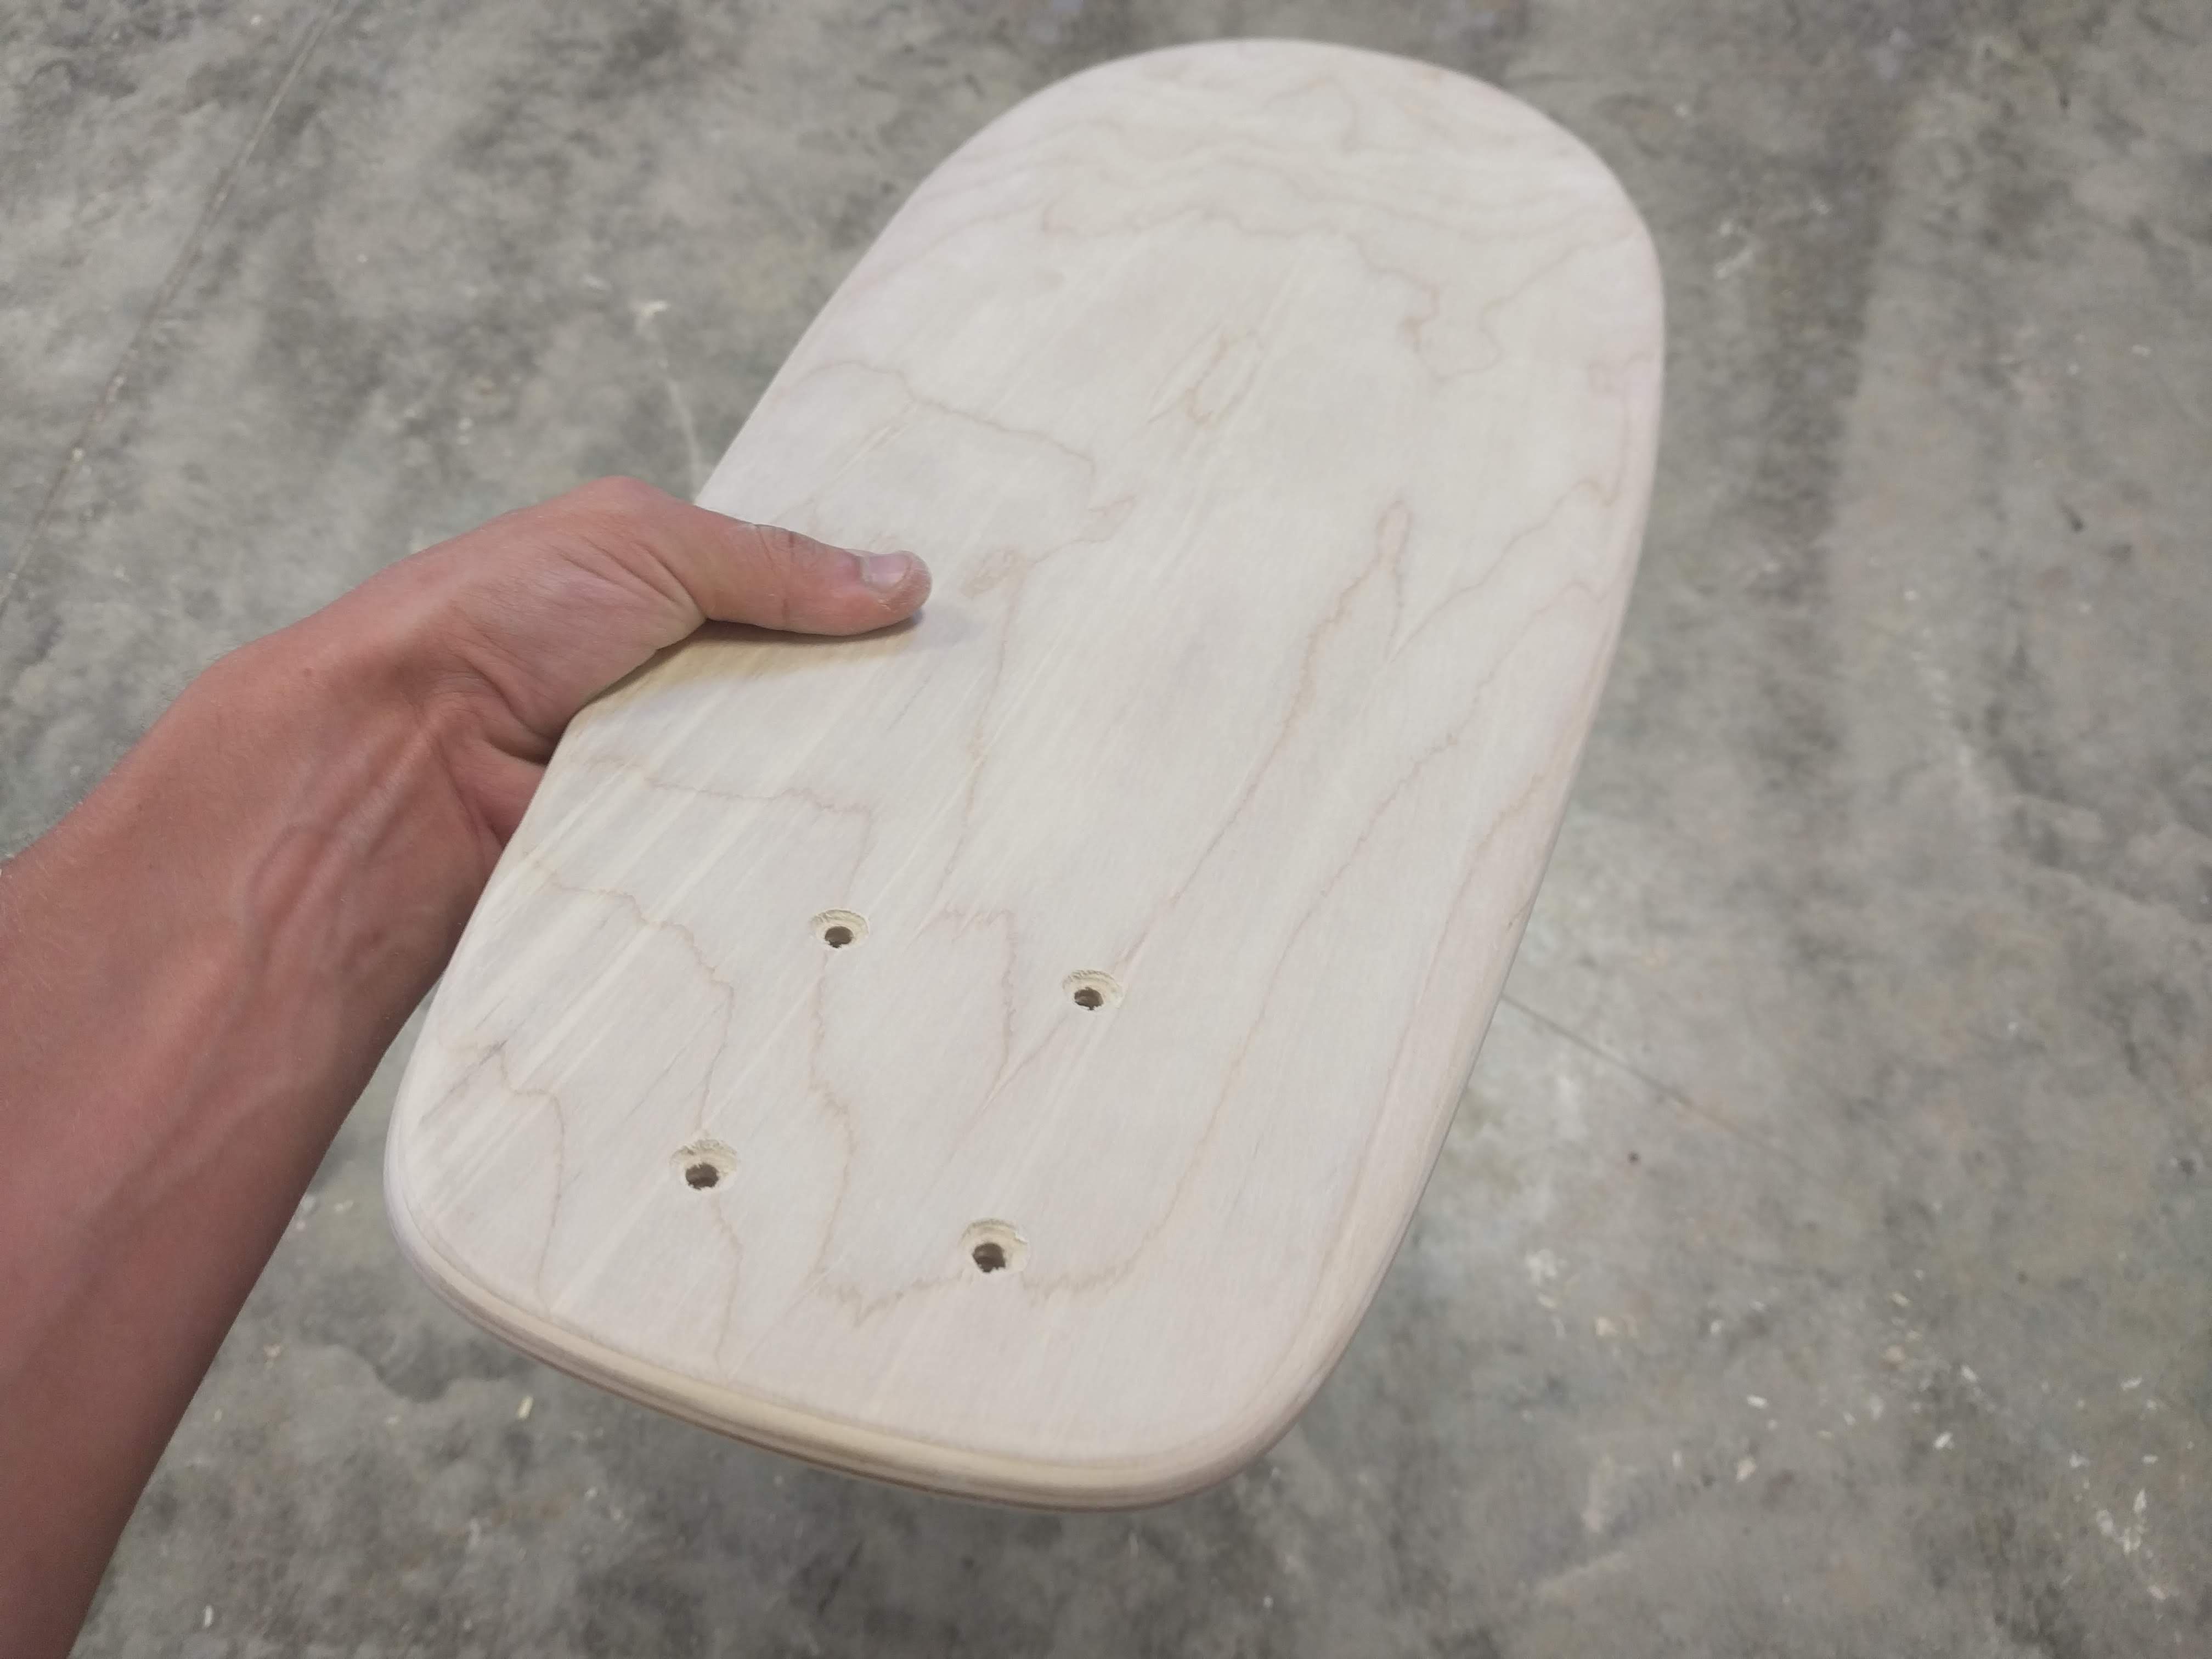
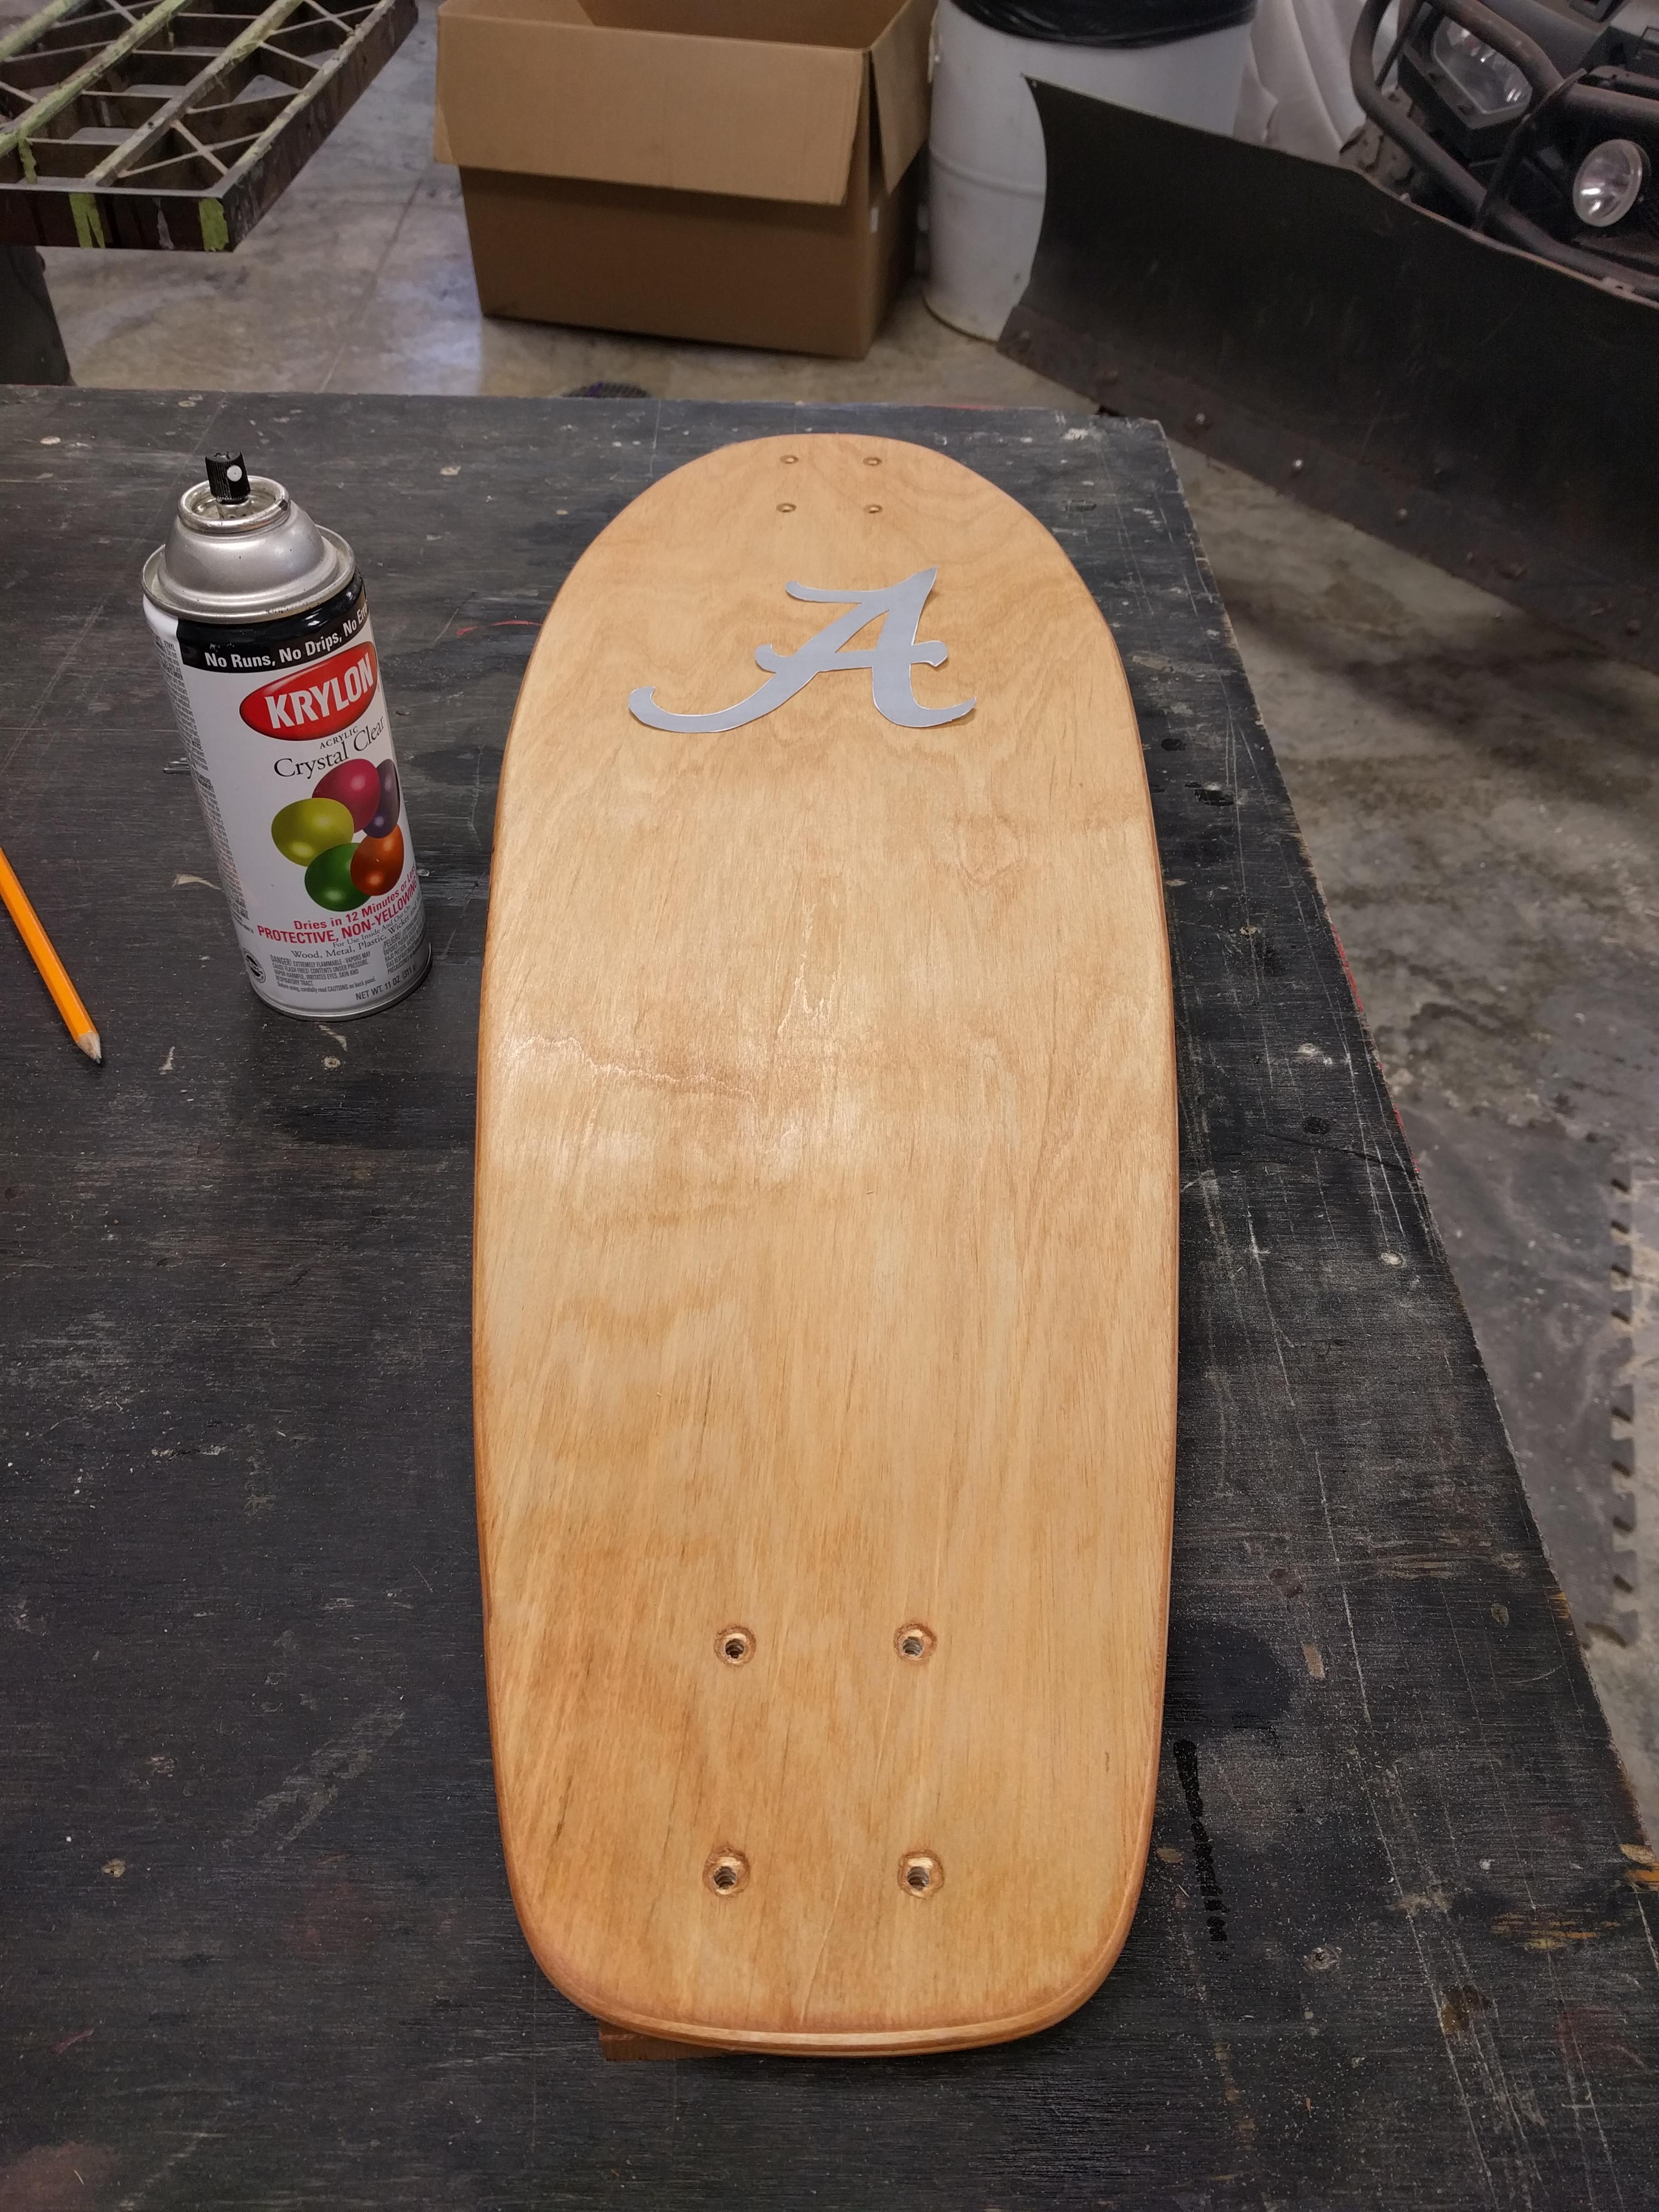
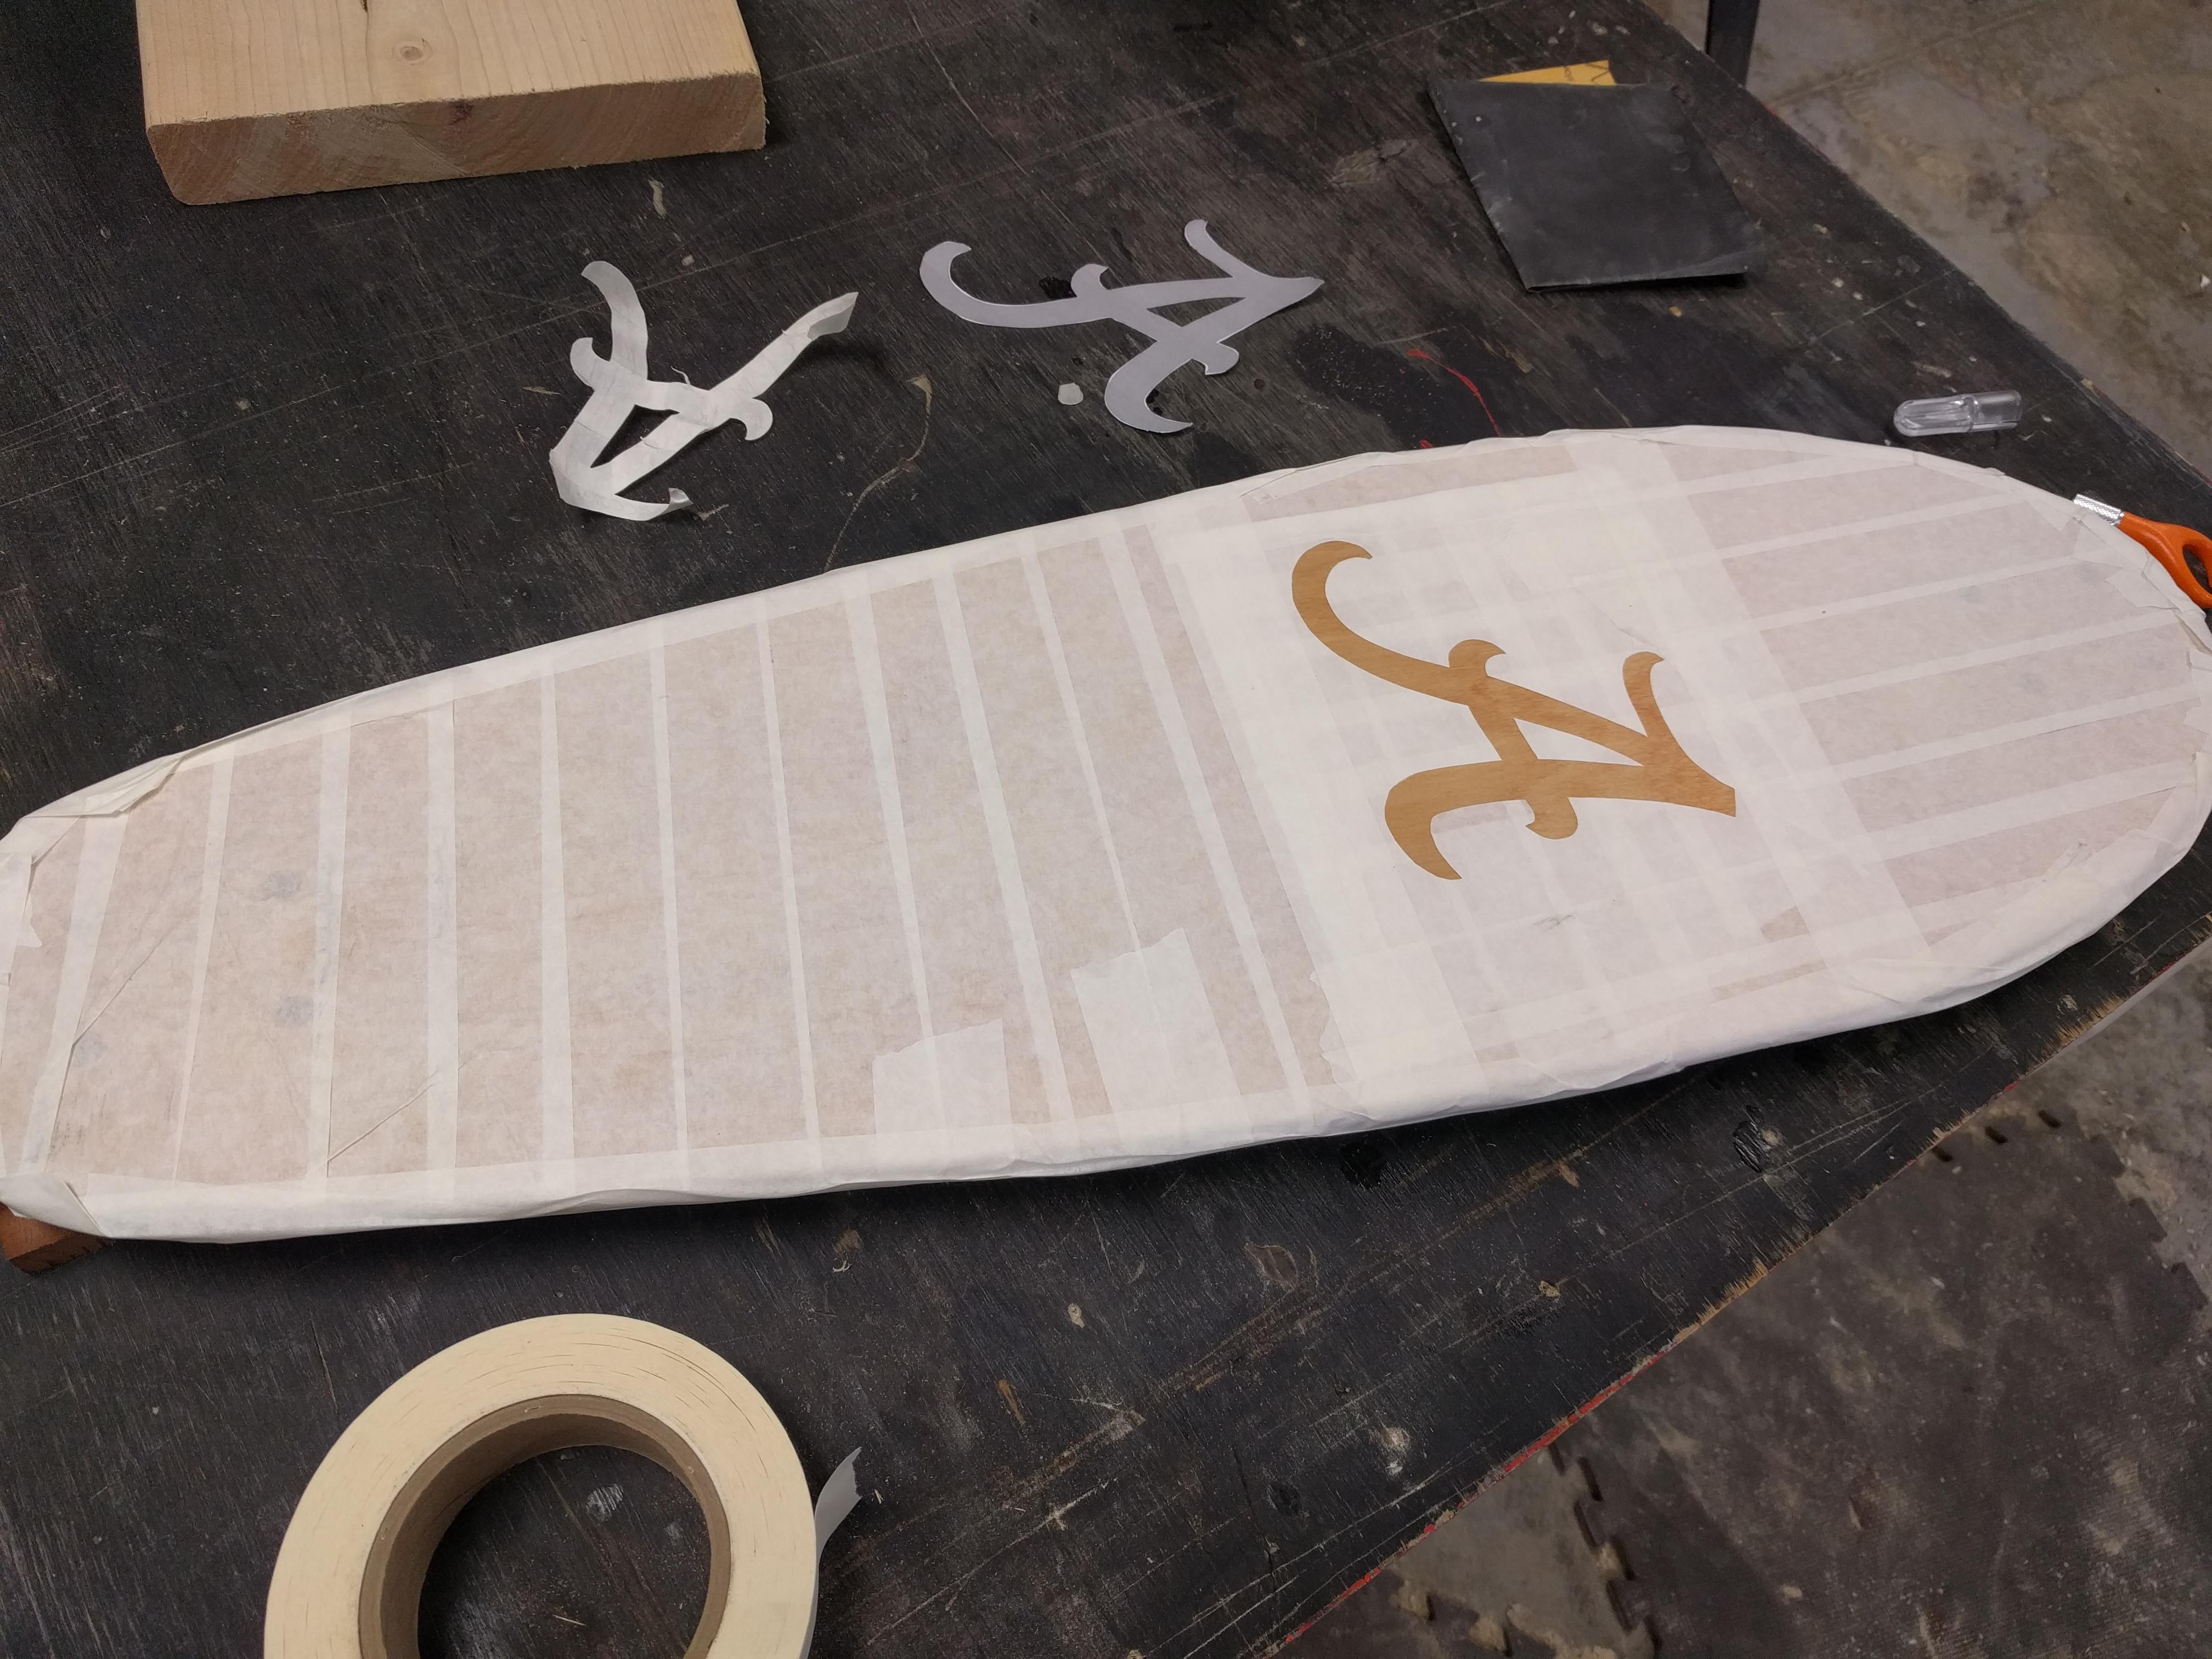
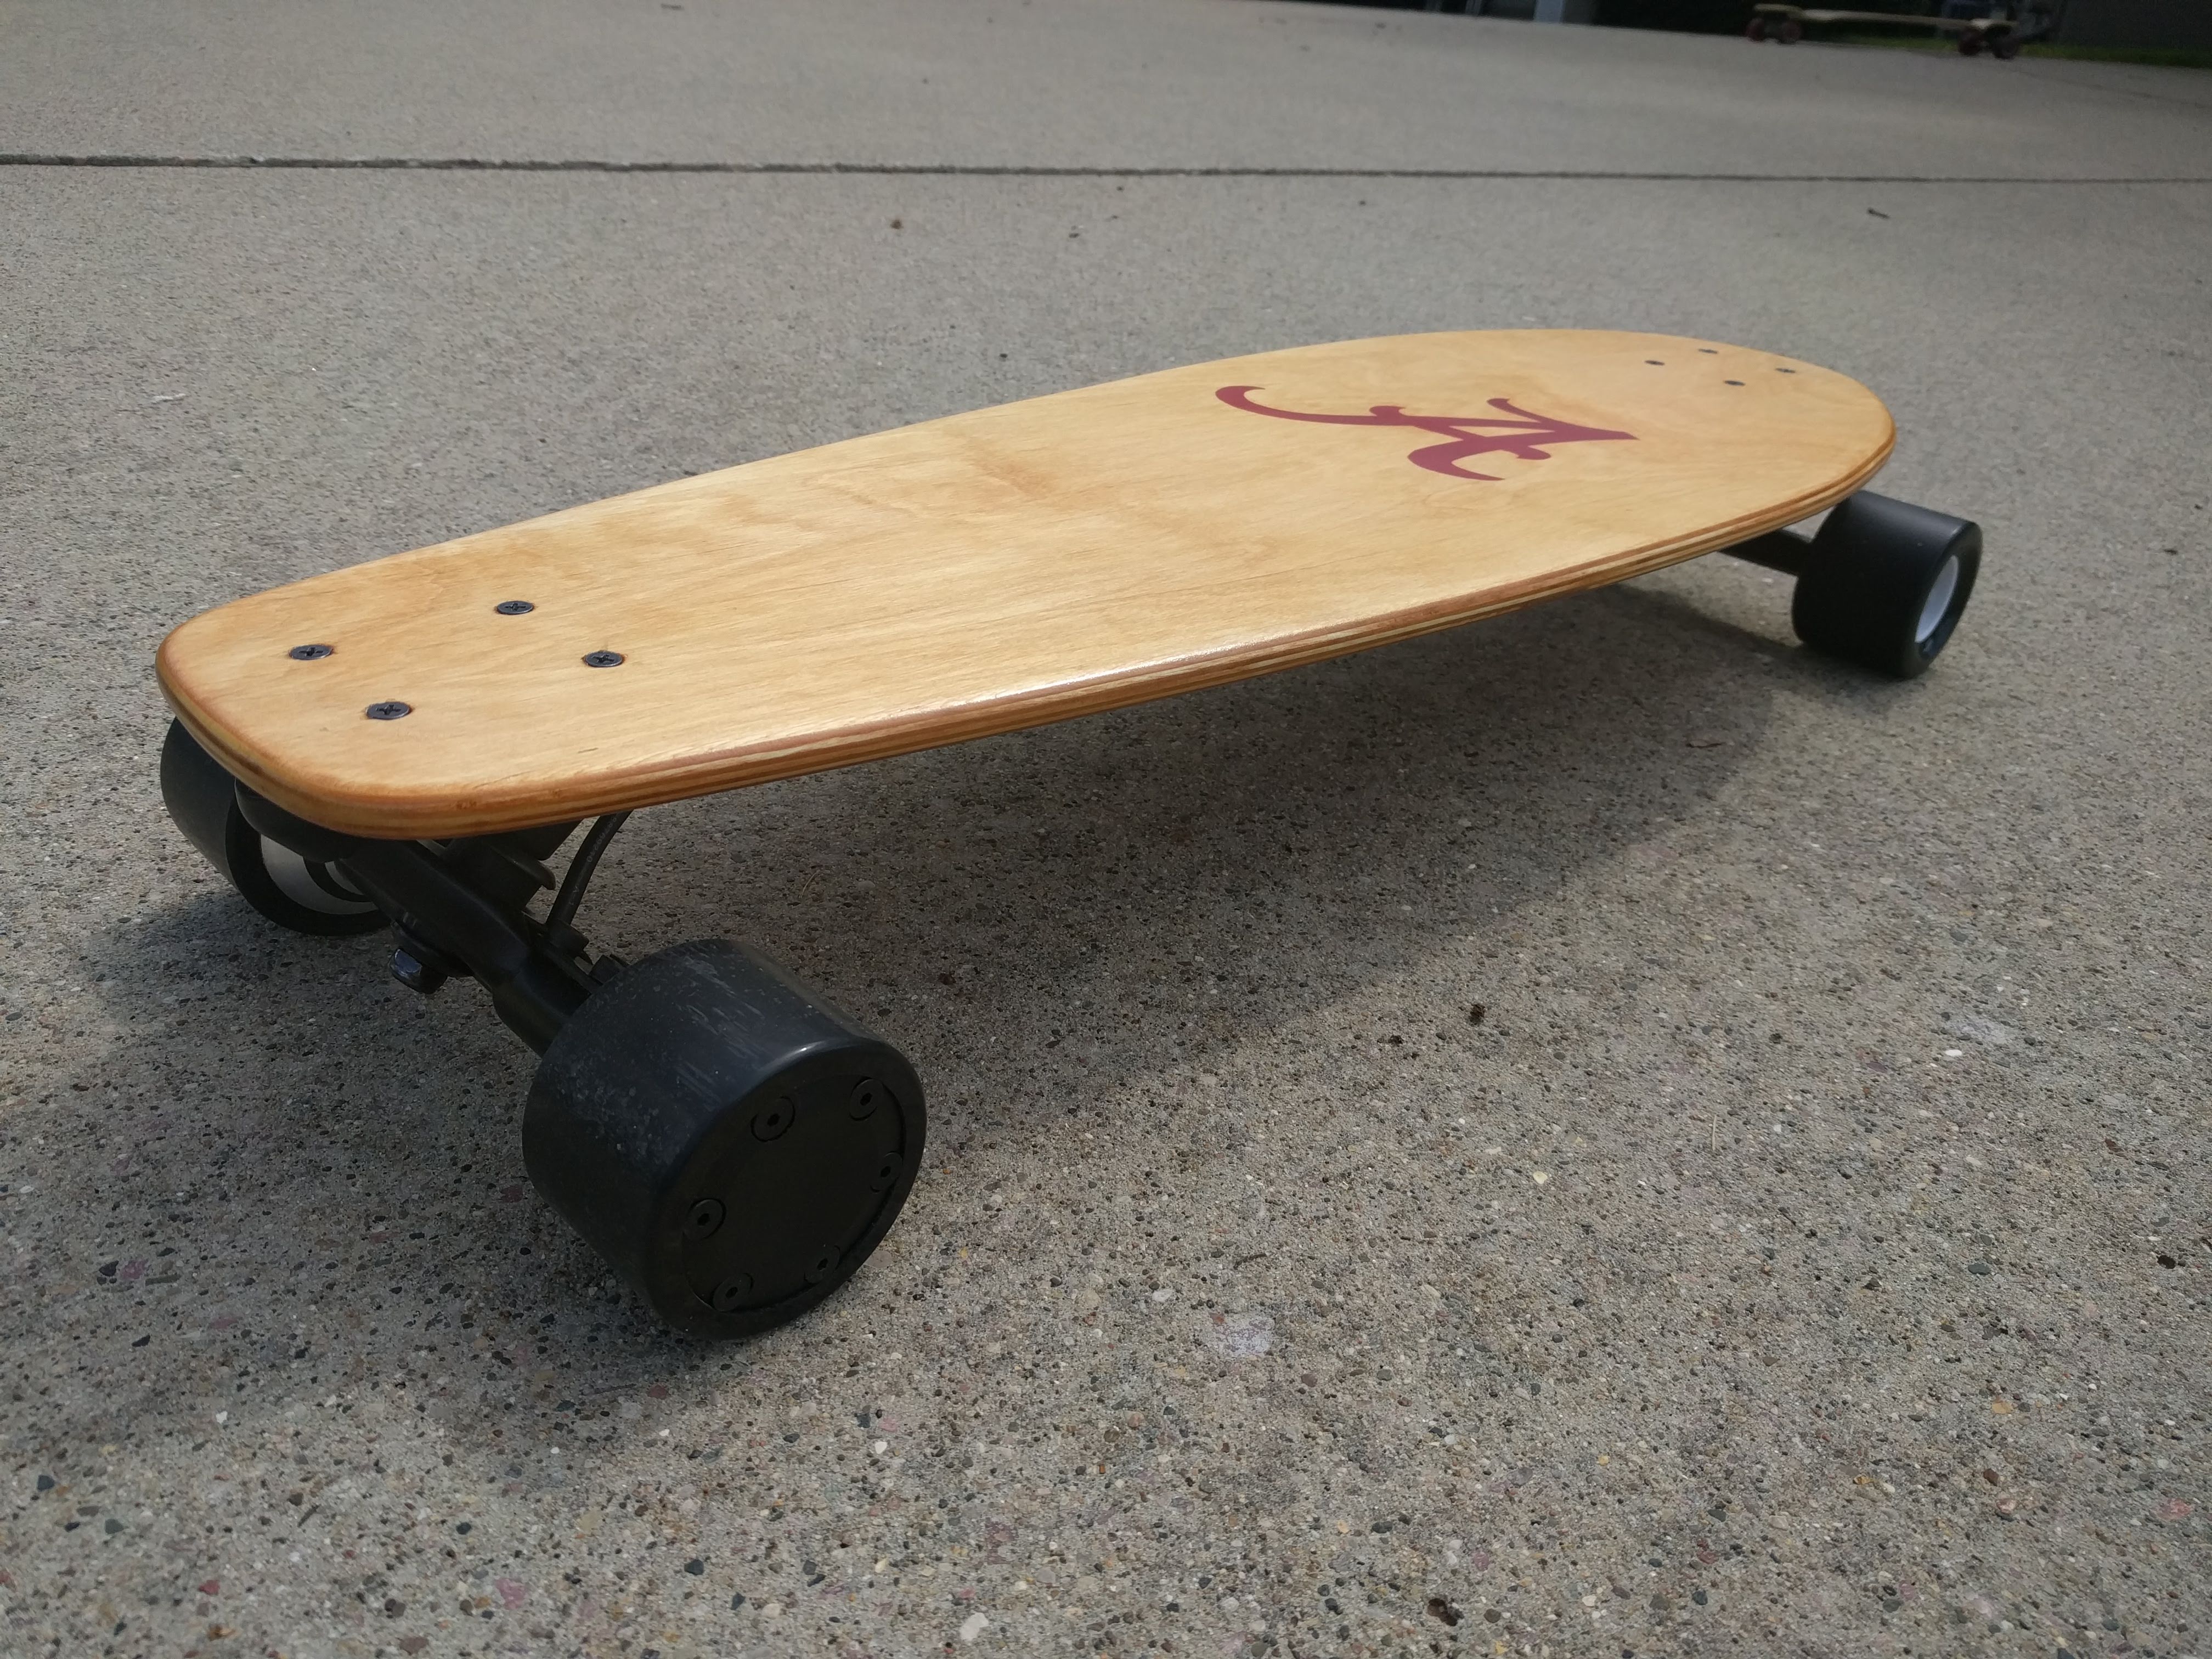
<p>After the batterypack was at a safe state for storage, building the deck was next. It was made from a single piece of maple, so this part didn’t take too long but involved a few carpentry tools to make life easier. After experimenting with different deck sizes with simple paper sketches placed on the ground, I decided on a final design and traced it onto the wood. Then I used a jigsaw to cut out the rough shape, a hand sander to round the edges, a countersink bits for the deck hardware screw-holes, and simple elbow grease for final sanding. Afterwards, the deck was stained, painted with Bama’s script-A (Roll Tide!), and sprayed with sealant.</p>

<p align="center">
<img src="/assets/images/posts/electric-longboard/longboard-materials.jpg" />
</p>
<p align="center">
<em>
Non-electronic hardware
</em>
</p>

<p align="center">
<img src="/assets/images/posts/electric-longboard/longboard-deck-1.jpg" />
</p>
<p align="center">
<em>
Rough longboard setup for initial size/ride testing
</em>
</p>

<figure class="third">
  <a href="/assets/images/posts/electric-longboard/longboard-deck-2.jpg">
  <img src="/assets/images/posts/electric-longboard/longboard-deck-2.jpg" /></a>

  <a href="/assets/images/posts/electric-longboard/longboard-deck-3.jpg">
  <img src="/assets/images/posts/electric-longboard/longboard-deck-3.jpg" /></a>

  <a href="/assets/images/posts/electric-longboard/longboard-deck-4.jpg">
  <img src="/assets/images/posts/electric-longboard/longboard-deck-4.jpg" /></a>
</figure>

<p>Here’s what the intermediate results were. Later, clear griptape was added for better traction.</p>

<p align="center">
<img src="/assets/images/posts/electric-longboard/longboard-painted.jpg" />
</p>
<p align="center">
<em>
The assembled longboard without electronics
</em>
</p>

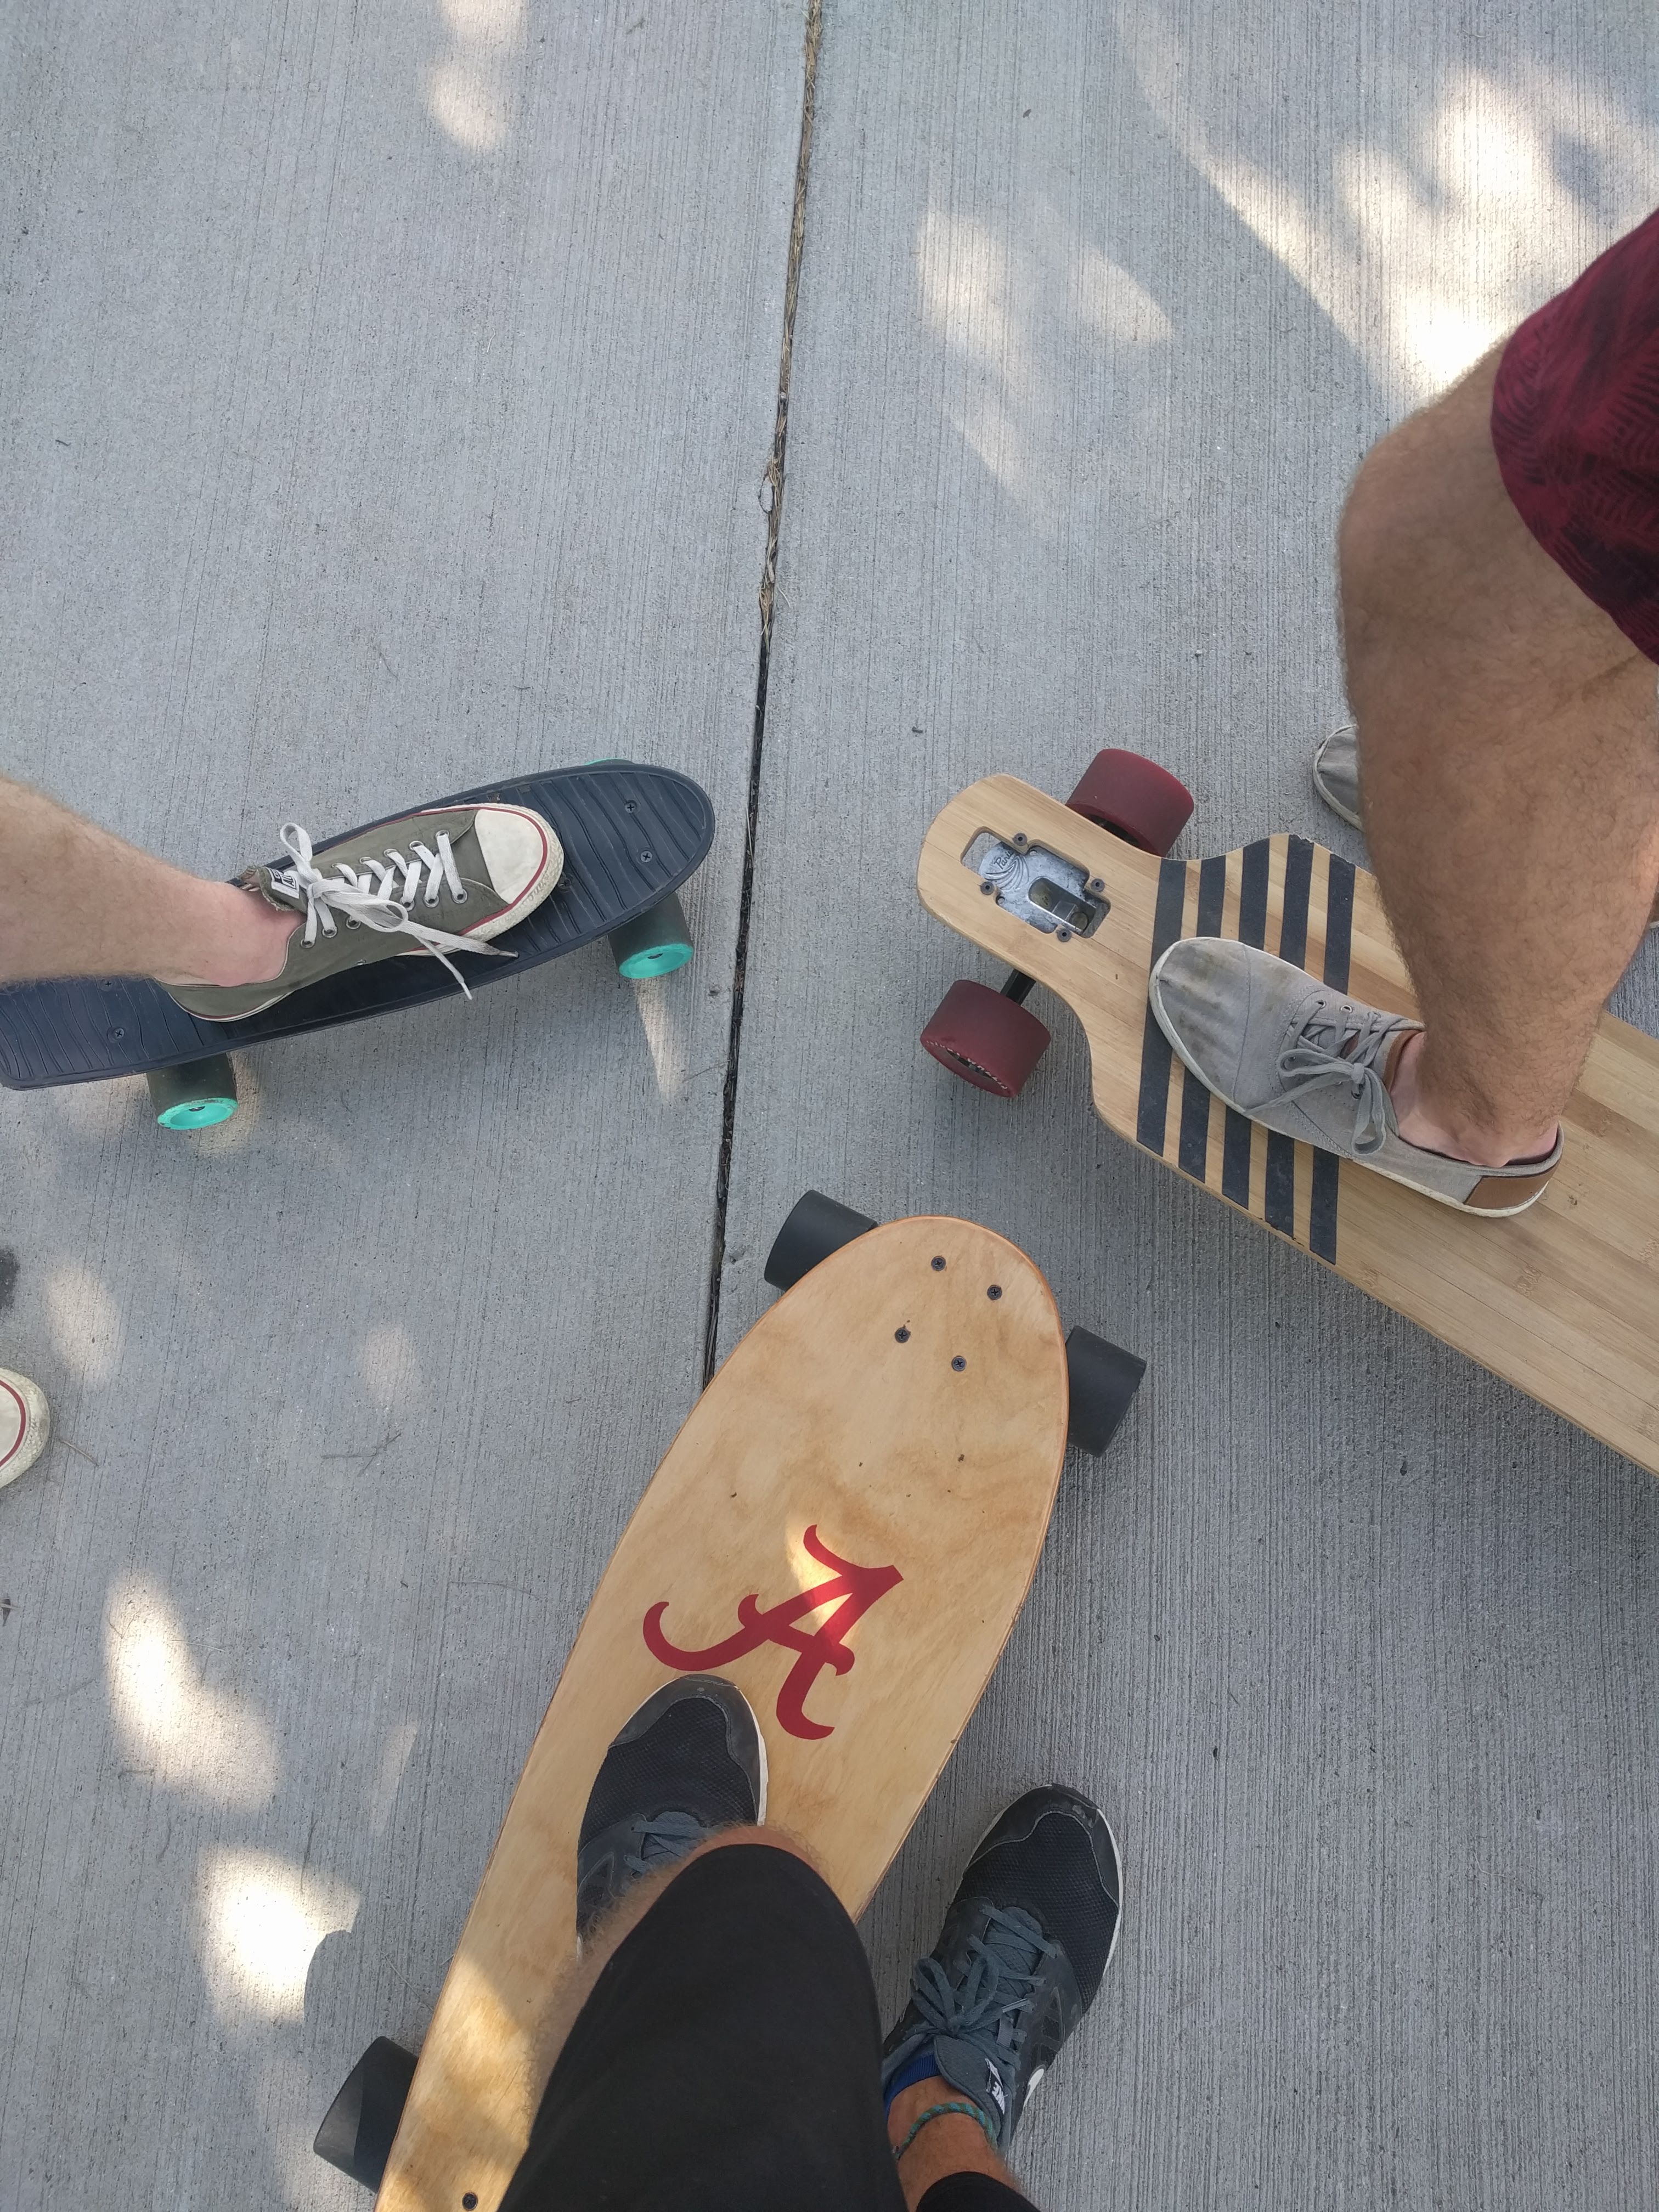
<p>At this point, I took the longboard (currently without electronics) for a ride with friends to test it out and see how it rode. I was new to longboarding at the time, so I couldn’t judge the quality that well. I found it moved well but transmitted more road bump displacement to my ankles than I would’ve liked. That’s what happens when you have a single-piece, inflexible piece of wood for a deck though.</p>

<p align="center">
<img src="/assets/images/posts/electric-longboard/longboard-riding.jpg" />
</p>
<p align="center">
<em>
Riding the longboard with some friends before college
</em>
</p>

<p align="center">
<img src="/assets/images/posts/electric-longboard/longboard-penny-1.jpg" />
</p>
<p align="center">
<em>
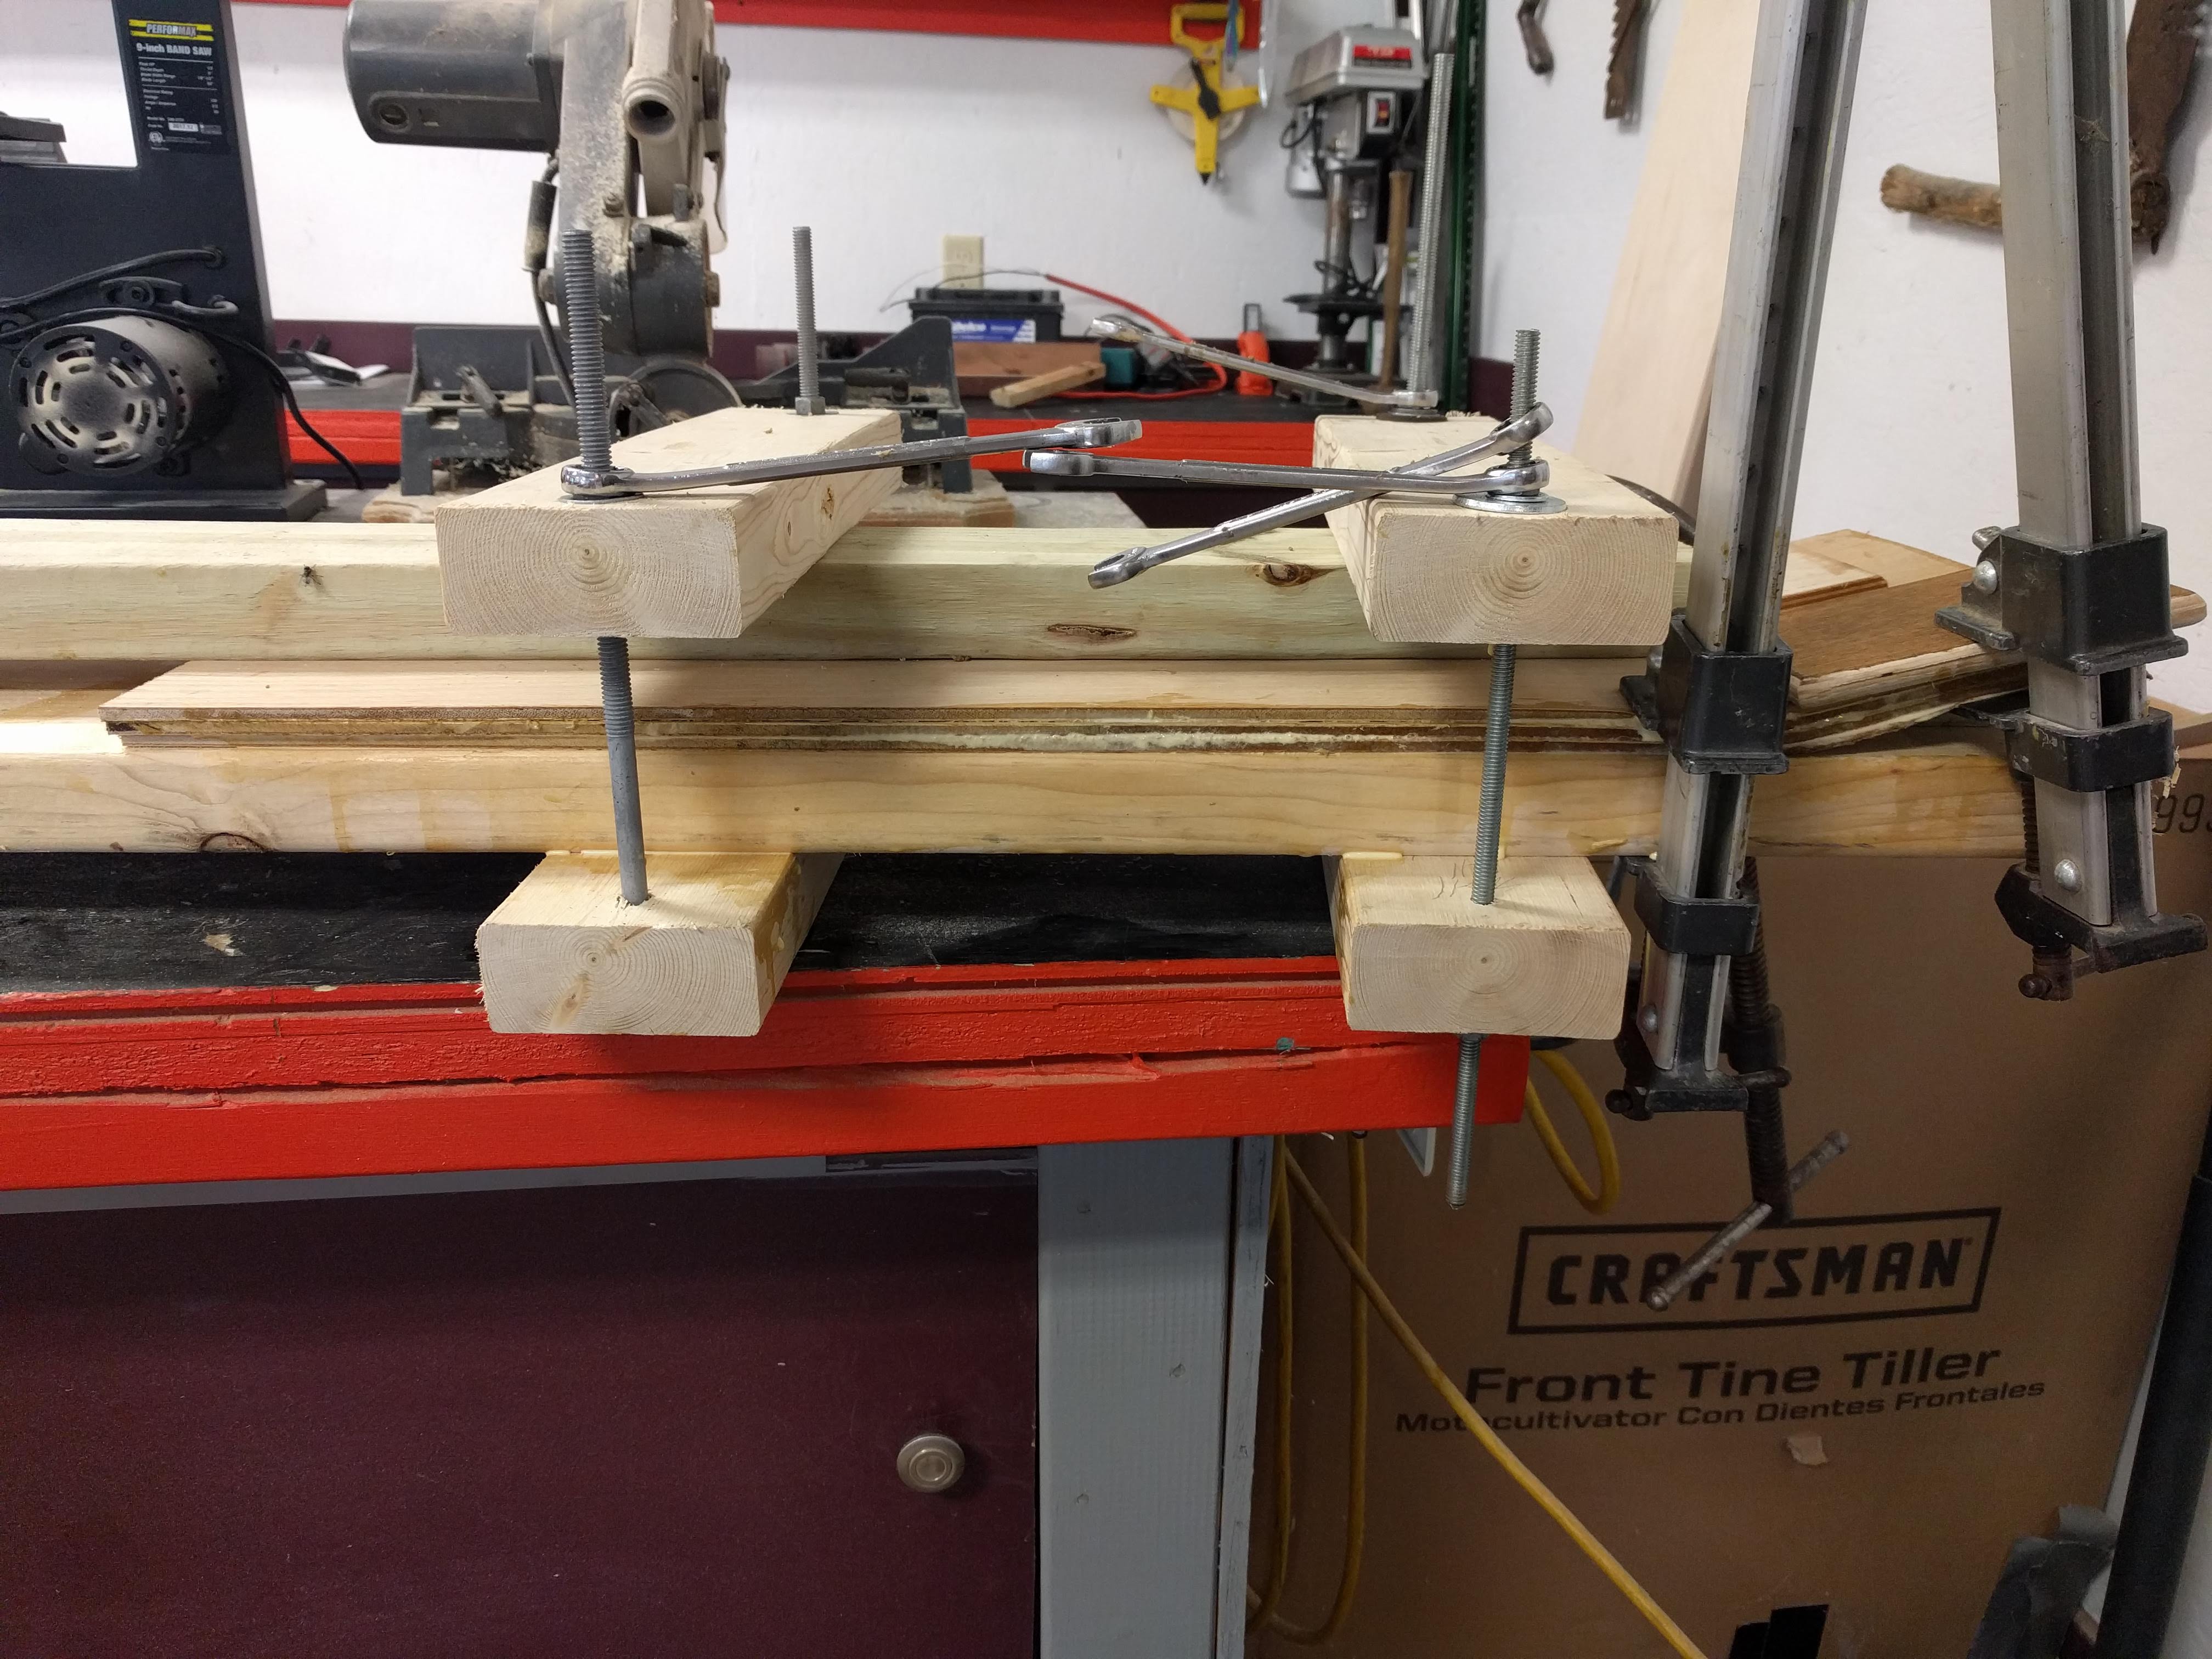
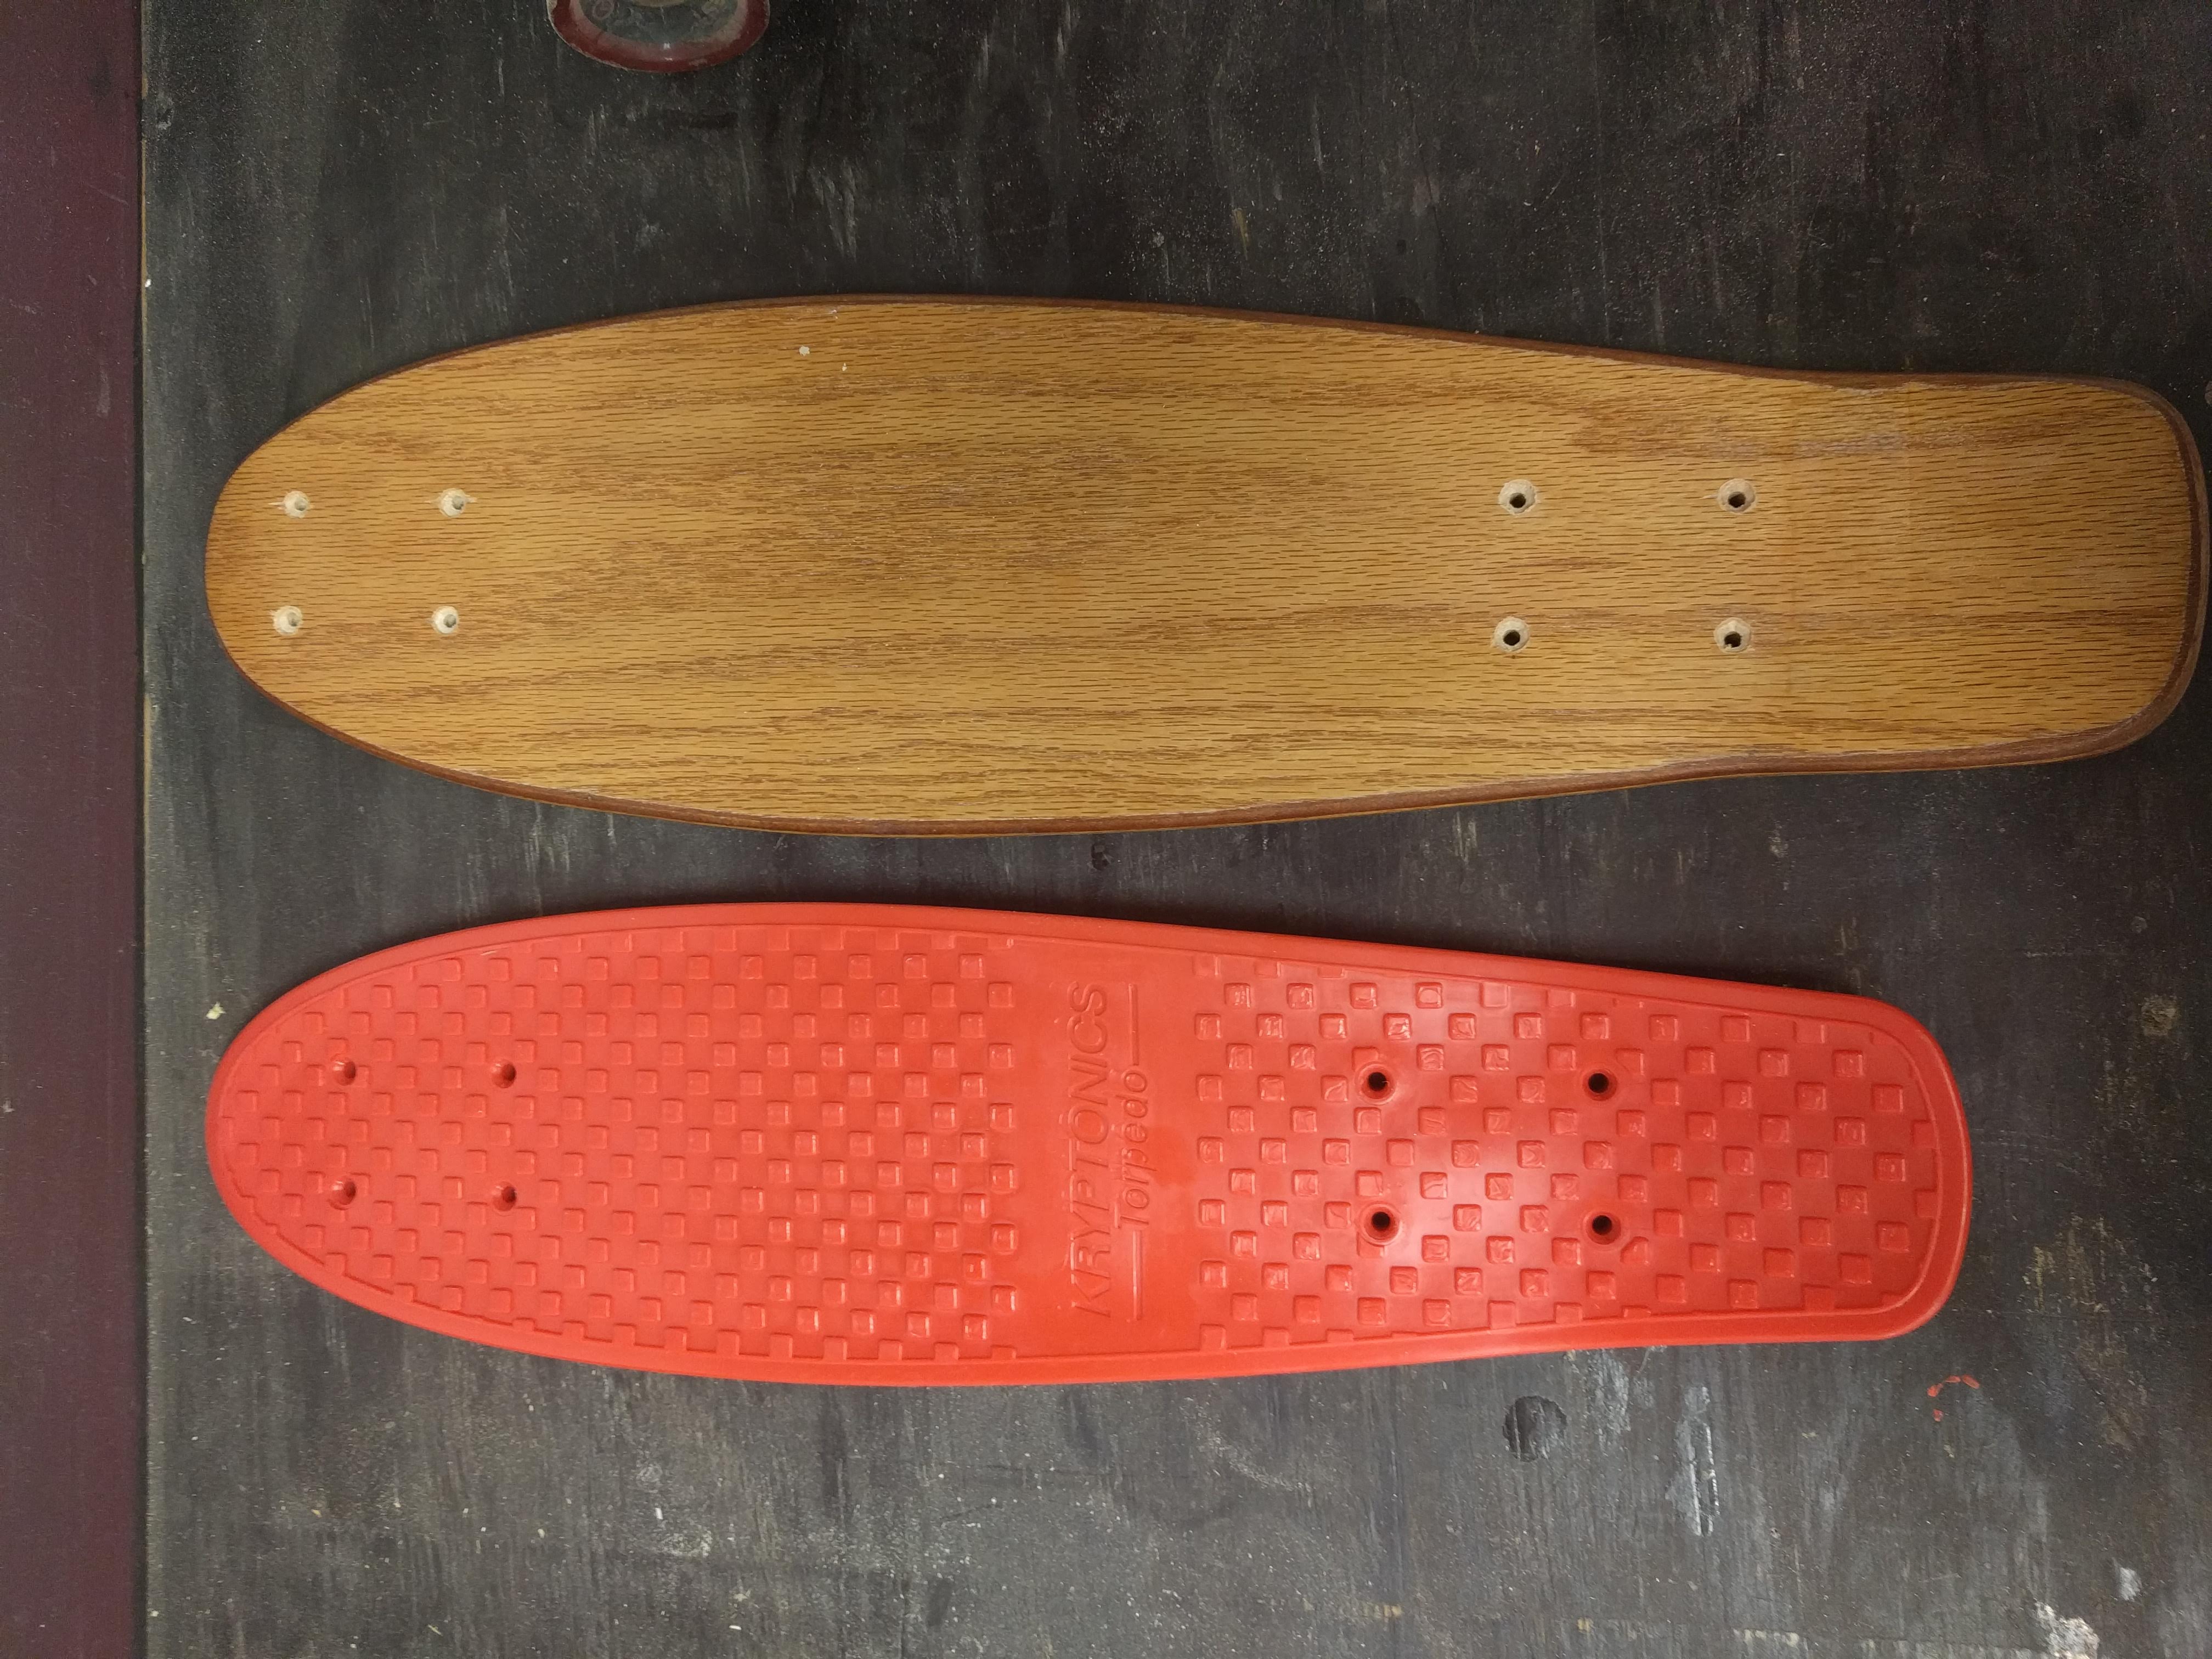
Pennyboard clamp system for an angled 'heel'
</em>
</p>

<p align="center">
<img src="/assets/images/posts/electric-longboard/longboard-penny-2.jpeg" />
</p>
<p align="center">
<em>
</em>
</p>

<p align="center">
<img src="/assets/images/posts/electric-longboard/longboard-batterypack-finished.jpg" />
</p>
<p align="center">
<em>
The assembled batterypack after protection added in my dorm
</em>
</p>

<p align="center">
<img src="/assets/images/posts/electric-longboard/longboard-kydex.jpg" />
</p>
<p align="center">
<em>
The clear Kydex enclosure prior to forming
</em>
</p>

<p align="center">
<img src="/assets/images/posts/electric-longboard/longboard-kydex-hopes.jpg" />
</p>
<p align="center">
<em>
DIY electronics support after Kydex forming failure
</em>
</p>

<!-- Courtesy of embedresponsively.com -->

<div class="responsive-video-container">
    <iframe src="https://www.youtube-nocookie.com/embed/ztYu_bLyKhk" title="YouTube video player" frameborder="0" webkitallowfullscreen="" mozallowfullscreen="" allowfullscreen=""></iframe>
  </div>

<p align="center">
<em>
A video showing the longboard accelerating and decelererating during testing.
</em>
</p>

<p align="center">
<img src="/assets/images/posts/electric-longboard/longboard-knee.jpg" />
</p>
<p align="center">
<em>
The outcome of testing...a good project has to result in injury at some point, right?
</em>
</p>]]></content><author><name>Max Hawkins</name></author><category term="Tech" /><category term="tech" /><category term="diy" /><category term="electric-longboard" /><category term="lithium-battery" /><summary type="html"><![CDATA[A summary document detailing how I made my electric longboard to get experience with batteries and electronics]]></summary></entry><entry><title type="html">World Rainbow Gathering 2018 - Taiwan</title><link href="https://maxhawkins.info/travel/world-rainbow-gathering/" rel="alternate" type="text/html" title="World Rainbow Gathering 2018 - Taiwan" /><published>2018-05-17T00:00:00+00:00</published><updated>2018-05-17T00:00:00+00:00</updated><id>https://maxhawkins.info/travel/world-rainbow-gathering</id><content type="html" xml:base="https://maxhawkins.info/travel/world-rainbow-gathering/"><![CDATA[<h2 id="a-hip-and-happenin-dinner-with-hippies">A Hip and Happenin’ Dinner with Hippies</h2>

<p>Most of our time on this Earth is forgotten seconds after it passes. You don’t remember the feeling of the air five breaths ago, and you won’t remember this website’s layout after you close the browser. But, sometimes you find yourself in circumstances that you know will be remembered for a long time.</p>

<p>I was cooking dinner. Nothing extraordinary there. Except I was stir frying vegetable for 80 people. On a bamboo fueled mud stove. In a kitchen with an explicit “No Nudity” sign. In the middle of Taiwanese farmland. And I was interrupted three times.</p>

<p align="center">
<img src="/assets/images/posts/world-rainbow-gathering/taiwan-forest.jpeg" />
</p>
<p align="center">
<em>
Since technology wasn't allowed, I only took a few pictures. This is a view of some of the forest sights from a public road.
</em>
</p>

<p>A local and I were discussing the weather and absentmindedly stirring vegetables in an industrial wok (the Taiwanese military loaned it to our group). Rain was coming down hard. We talked over the sound of the rain above and the crackling in the fire below. The sounds changed ever so slightly, and we started hearing crackling above us too. We realized the sound was coming from the cracking bamboo roof. The kitchen we occupied was a hastily built tarp-bamboo-and-twine contraption that was giving into the weight of the water above. Before we could react, the rotted bamboo ceiling gave out. Water poured onto us and the stir-fry.</p>

<p>After a mad scramble to repair the roof, we were back to talking and listening to the burning bamboo. A while later, however, we were interrupted again – this time by a human. A fellow hippie walked up to the kitchen and without a trace of worry in his voice asked: “Does anybody know anything about snake bites?”</p>

<p>That’s a question that’s only asked by inquisitive five-year-olds or by someone who needs to treat a snake bite. You can guess which scenario this was.</p>

<p>Just minutes before, a different community member was walking in the dark without a light. He walked into his campsite, but at the same time also intruded into a venomous snake’s territory. The snake was a good host, so its fangs gave him a warm welcome.</p>

<p>After we made sure adequate medical care was called for, we went back to cooking. It didn’t take long though before we were interrupted once again. This time we were asked another oddball question: “Is the dessert spicy?” The head cook brought over the pan of oat porridge spiced with cinnamon and brown sugar. He had a quizzical look on his face and asked us if we’d try the dessert. We each took a spoonful and instantly knew what was wrong. The dessert was indeed spicy. Someone had mislabeled the cinnamon jar, so instead of tasting like sweet goodness, the porridge tasted like soggy chili powder.</p>

<p>I was treated to these peculiar happenings because I decided to attend an international gathering of hippies.</p>

<h2 id="the-2018-world-rainbow-family-gathering-in-hualien-taiwan">The 2018 World Rainbow Family Gathering in Hualien, Taiwan.</h2>

<p>I didn’t initially come to Taiwan to attend the gathering, but when I heard about it, I knew I had to go. I’m glad I did because it was one of the most unique experiences I’ve had. It wasn’t the best, it wasn’t the worst, but I’ve never experienced anything like it.</p>

<p>The Rainbow Gathering is a yearly event that started in the U.S. in the 70s. It’s a month-long gathering of open-minded people to live freely in nature. Anyone is welcome, but alcohol and technology are not. It’s a gathering, not a festival, since music is only used as a celebration for life, and drugs are only discreetly used. There are also very few rules. Clothing is optional, work is voluntary, payment isn’t necessary, anyone can give a workshop, and you can sleep anywhere.</p>

<p align="center">
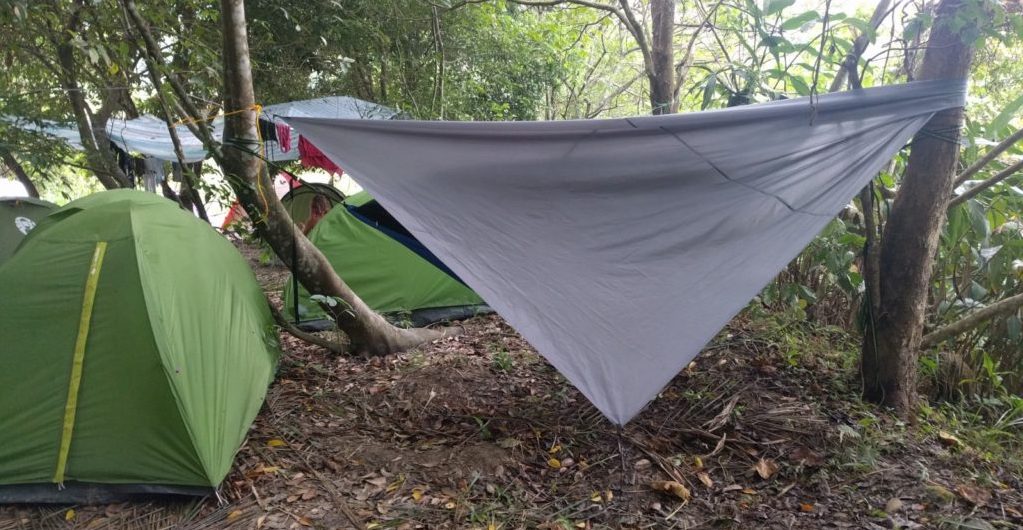
<img src="/assets/images/posts/world-rainbow-gathering/gathering-hammock.jpeg" />
</p>
<p align="center">
<em>
My camping hammock. It really helped to be above the water and mud.</em>
</p>

<p>Continuing with the open mindset, most everything was shared. Excess food, dry sleeping surfaces, and knowledge were all communal. If you had something to give, you gave it. If you needed something, you asked for it. It was the friendliest environment I’ve ever been in. Hugs were standard greeting procedure, and everyone was always willing to talk.</p>

<p>However, sometimes the open and lawless circumstances led to undesirable outcomes. Along with shared food and lackluster sanitary services, sickness was also freely distributed. Although I didn’t get sick, many people had upset stomachs and diarrhea. Nature also over-shared its love. The snake shared its venom with one camper, sand mites frequently gave us itching bites, and rain turned our walking paths into de facto slip-n-slides. It certainly was an adventure.</p>

<h2 id="activities">Activities</h2>

<p>Contrary to popular stereotypes, the days were filled with high energy activity. Campers constantly announced new workshops. Calligraphy, tea making, fire dancing, deep tissue massage, tarot card reading, and swing dancing are just a few examples. We also sang and danced before every meal. After the food was prepared, we linked hands, formed a circle, and danced and sang together for half an hour. The songs often tied nature and humans together. Here are two simple songs:</p>
<blockquote>I love my Family, I love my Life <br />

And now I live in a coconut tree<br />

It’s good. It’s good.<br />

It’s good to be me.<br />

Swinging in the trees,<br />

And swimming in the sea<br />

<hr />

Put your roots down<br />

Put your feet on the ground<br />

You can hear the earth move<br />

If you’re listening<br />

Are you listening<br />

It’s the sound of the river<br />

As it moves across the stones<br />

It’s the same sound as the blood in your body<br />

As it moves across your bones<br />

If you’re listening<br />

Are you listening?</blockquote>

<p>While we were singing, we also “passed around” kindness. One person would hug his neighbor or kiss her hand, and the action would spread around the circle. It initially seemed very strange, but soon I saw it as a great community building activity. Everyone there came to the gathering for exactly that sort of community.</p>

<h2 id="cacao-ceremony">Cacao Ceremony</h2>

<p>My first night, we held an important ceremony. The cacao ceremony happens at every Family Gathering, so most of the campers knew what they were in for. I didn’t.</p>

<p align="center">
<img src="/assets/images/posts/world-rainbow-gathering/gathering-forest-river.jpeg" />
</p>
<p align="center">
<em>
Our gathering site was just near this river up near the bend.
</em>
</p>

<p>For a few reasons, I decided to fast for my first 24 hours there, so in addition to my lack of knowledge, I lacked energy. After dinner we gathered wood, sat around the bonfire, and waited. After a while, the ceremony leader brought down a pot filled with brown liquid. He told us that he added a kilogram of highly potent cacao (which I didn’t know could be potent) to the boiling water to make the ceremonial drink. We sat in silence after he explained the procedure. Then, when we each were ready, we made our way to the fire, picked a cup of cacao drink, placed an offering in the fire, and sat down for another 20 minutes of silent contemplation. Only then did we drink the cacao.</p>

<p>What followed was an interesting mix of music, dancing, and free expression.</p>

<p>It was just getting dark when we drank the cacao, but when the fire became the sole source of light, one person brought out a drum. He started with a simple beat, but soon others joined. Next came a few other drums, then a guitar or two followed by a jaw harp, and finally everyone was adding to the cacophony – even if it was just by smacking their belly.</p>

<p>A consistent beat managed to manifest itself, so the music naturally led to dancing. Everyone danced alone in his own little world. Soon the music gained intensity and the clothing optional aspect became increasingly apparent. At one point there was more clothing on the ground and in the trees than on people’s bodies. It was an environment without judgment or self-consciousness. Just music, dancing, and nearly 100 half-naked humans in a forest clearing.</p>

<p>Thinking back on it, it satisfied nearly every stereotype I held about “hippie gatherings.”</p>

<p>After a few hours of non-stop dancing, people started sitting on the ground. Some talked, others meditated, and a few even brought out their fire dancing equipment and put on a show. Later, a few dozen people created a massage circle. That’s when I decided to go for a walk.</p>

<p>I heard earlier in the day that the river bank contained glowing mushrooms, so that’s where I went. After walking a few hundred meters along the bank, I shut off my headlamp and just stared. It’s one thing to listen and read about bioluminescent fungus, but the sight of pale blue, glowing mushrooms is as awe-inspiring as a summer’s first firefly sighting.</p>

<p>When I came back to the fire, things had died down a bit, so I talked with a Parisian about French for an hour before heading to bed. Before I fell asleep, I saw the first rays of the next day’s sunlight.</p>

<h2 id="sanitation">Sanitation</h2>

<p>There’s a unique smell I will remember from my time at the gathering. It’s the mixture of a few things: wet forest, drying mud, humans who bathe in a river and use clay as soap, and a slight vinegar scent.</p>

<p>Harsh chemicals weren’t allowed outside the kitchen, so most “hand-washing stations” consisted of a spray bottle with a water and vinegar mixture. One person though had a clever idea: to better clean the hands, he added baking soda to the mixture. That lasted one day. It’s a miracle more people didn’t get sick.</p>

<p>The bathroom was also stationed far from any public area. It was simply a few dirt trenches with simple bamboo rain protection. We affectionately called them the “shit pits.” The entire forest was open for pee though, and I was out of the loop when it came to common pee spots. I unknowingly hung my hammock near one of the most frequented locations.</p>

<p align="center">
<img src="/assets/images/posts/world-rainbow-gathering/gathering-flipflops.jpeg" />
</p>
<p align="center">
<em>
It stopped raining as I was walking back to town, so I couldn't help but smile.
</em>
</p>

<h2 id="looking-back">Looking Back</h2>

<p>My few days at the International Rainbow Gathering clearly weren’t normal, but that’s why I loved it. Everyone was nice, the surroundings were beautiful, sanitary conditions made life interesting, and the food was delicious. If these stories seemed odd, that’s because they were. But if given the chance, I would’ve stayed for even longer.</p>

<p><em>Note: This story was originally posted on my old blog (theclimategap.com) but was edited slightly and moved here in 2022.</em></p>]]></content><author><name>Max Hawkins</name></author><category term="Travel" /><category term="world-rainbow-gathering" /><category term="taiwan" /><category term="travel" /><category term="hualien-taiwan" /><summary type="html"><![CDATA[My experience at the 2018 World Rainbow Gathering in Hualien, Taiwan: rain, sharing, nature, snake bites, and a cacao ceremony.]]></summary></entry><entry><title type="html">Switzerland - Farmwork, Mountains, and Science</title><link href="https://maxhawkins.info/travel/switzerland-farm/" rel="alternate" type="text/html" title="Switzerland - Farmwork, Mountains, and Science" /><published>2018-04-26T00:00:00+00:00</published><updated>2018-04-26T00:00:00+00:00</updated><id>https://maxhawkins.info/travel/switzerland-farm</id><content type="html" xml:base="https://maxhawkins.info/travel/switzerland-farm/"><![CDATA[<p>Imagine a stereotypical Swiss chalet. A quaint cottage plopped on the side of a forested hill. With views of the mountains, the inhabitants are treated to the sight of undisturbed nature. Every morning the sleepy surroundings are woken by a rooster’s crow, and every evening the hearth quietly crackles into the night. During the day, animals of all kinds enjoy their fenced, natural playground. Deer prance about on the hillside, sheep stare blankly at the grass, and shaggy humans worry themselves with a fence. This all taking place amidst clanking cowbells and occasional yodeling - background music even the edgiest of SoundCloud playlists can’t provide. Luckily, you don’t have to imagine this wonderful place. It actually exists outside a small village near Bern, Switzerland.</p>

<p>A week after creating my Workaway account, I was contacted by an elderly Swiss lady asking if I wanted to help at her house. Doesn’t it happen regularly? Since I had no other plans at the time, I decided to accept her offer. After leaving Bruno and Ursula in France, I made my way to Switzerland. On the way, however, I’d stop off in Lyon to visit some historical sites.</p>

<p>I stayed in the center of Lyon near China Town. It’s a nice, bustling city subdued with its French attitude. On a hill overlooking a river is Lyons most famous attraction: a Roman amphitheater. It’s a relic worth visiting - especially since the first Roman emperor born outside of Italy was instead born near Lyon. In an effort to condense these articles, that’s all I’ll say about Lyon. You’ll have to ask me in person if you want to know how I found myself in a situation where a duck led to a stolen iPhone.</p>

<p align="center">
<img src="/assets/images/posts/switzerland-farm/swiss-nice-overlook.jpeg
" />
</p>
<p align="center">
<em>
</em>
</p>

<p align="center">
<img src="/assets/images/posts/switzerland-farm/swiss-nice-chapel.jpeg
" />
</p>
<p align="center">
<em>
</em>
</p>

<p align="center">
<img src="/assets/images/posts/switzerland-farm/swiss-nice-chapel-interior.jpeg
" />
</p>
<p align="center">
<em>
</em>
</p>

<p align="center">
<img src="/assets/images/posts/switzerland-farm/swiss-nice-amphitheater.jpeg
" />
</p>
<p align="center">
<em>
</em>
</p>

<p>Then I rode the train to Bern - or rather a small station a few dozen kilometers outside of Bern. That’s where my new Swiss grandma picked me up.</p>

<p>This grandma is the type of person you meet and immediately want to emulate their perception of life. She was always looking for the positive. The overcooked pastry wasn’t ruined, it just “has a little something extra.” Her injured knee wasn’t burdensome, it made “life interesting,” and not being able to walk her dog really was disappointing, but only until she could watch the birds for an hour longer. She was as exuberant about life as her rabbits were about apples.</p>

<p align="center">
<img src="/assets/images/posts/switzerland-farm/swiss-grandma.jpeg
" />
</p>
<p align="center">
<em>
</em>
</p>

<p>When it was time for a meal, you’d hear her yodels pierce the mountain air. I can still hear her voice pitching up and down saying “Already ready!” She has many interesting phrases like that. The meals that were already ready were always delicious. And while eating them, she’d casually talk about her childhood and how her life changed first under Nazi occupation then communist takeover - all the while forgetting what language she should use. She might start in Czech, then realize her mistake and switch to French, Swiss German, and then English. It certainly made the stories more interesting. When you’re fluent in that many languages past 70 years old, you get a pass on mistakes like that.</p>

<p align="center">
<img src="/assets/images/posts/switzerland-farm/swiss-view.jpeg
" />
</p>
<p align="center">
<em>
A view from a walking path near where I was staying</em>
</p>

<h2 id="work">Work</h2>

<p>As for the work, it was monotonous fun. Monotonous because it was removing kilometers of fence. Fun because I worked alongside a Belgian lumberjack. It’s impossible to have a bad time with one of those beside you! This particular Belgian was named Yoan. He was a certified lumberjack and tree surgeon (yes, they do exist), and was searching for a job in Switzerland. After meeting Yoan, I quickly realized he wasn’t the stereotypical millennial. He had only just bought a cell phone, he tried not to use electronics, and he once lived alone in a cabin without running water or electricity in Norway for three months – Walden style. Yoan was a nature hippie and proud of it.</p>

<p align="center">
<img src="/assets/images/posts/switzerland-farm/swiss-yoan.jpeg
" />
</p>
<p align="center">
<em>
Yoan is just like bigfoot – we only have blurry photographic evidence of his existence.
</em>
</p>

<p align="center">
<img src="/assets/images/posts/switzerland-farm/swiss-fence.jpeg
" />
</p>
<p align="center">
<em>
There used to be a second fence here.
</em>
</p>

<p align="center">
<img src="/assets/images/posts/switzerland-farm/swiss-duck-gate.jpeg
" />
</p>
<p align="center">
<em>
We also built another pen to separate the ducks from the geese.
</em>
</p>

<p>Working beside Yoan was great. He taught me the best ways of removing fence posts and rolling up wire, and once I asked him a technical question about his beloved chainsaw and got an hour long response. Yoan rarely tired, and if you gave him enough coffee and chocolate, he’d work from dawn ‘till dusk. In short, he was a French-speaking beast.</p>

<p>The only thing that outdid Yoan was the powered wheelbarrow. The grandma had a motorized wheelbarrow that she let us use to haul the fence materials up the hill (look at the middle picture above to get an idea of the incline). Without that thing, the work would’ve taken much longer. Carrying wet, green treated posts up an inclined hill slicked with deer droppings is a job I happily relinquished to our robotic servant. There were more than a few near tip-overs going up and down the hill, but they weren’t anything mine and Yoan’s combined bodyweight couldn’t handle. And we only stepped in one underground wasp nest, so I’d say that’s pretty good.</p>

<p align="center">
<img src="/assets/images/posts/switzerland-farm/swiss-wheelbarrow.jpeg
" />
</p>
<p align="center">
<em>
</em>
</p>

<p>After work, there were many fun little happenings. For the sake of brevity, I’ll simply list them:</p>

<ul>
  <li>When I walked grandma’s dog every morning and evening, we’d pass by two young cows. Just as we’d go by, they’d react very energetically and start hopping on their gangly legs as gracefully as a young cow does. It’s a hilarious sight.</li>
</ul>

<p align="center">
<img src="/assets/images/posts/switzerland-farm/swiss-cows.jpeg
" />
</p>
<p align="center">
<em>
</em>
</p>

<ul>
  <li>
    <p>To buy milk, we’d simply go to the farmer 100 meters up the road (see above bullet point). Grandma would give me a pale with some money in it, and in the morning I’d hang it on a specific fence post. Then after the evening walk, I’d pick up the same pale now full of milk. I don’t know how the farmer transmuted the coins to milk, but however he did it, the milk tasted fresh and clean.</p>
  </li>
  <li>
    <p>The chalet had a fallout shelter. It turns out that nearly every Swiss residence has one, and Switzerland has the world’s strictest fallout shelter requirements. It really fits the Swiss stereotype.</p>
  </li>
  <li>
    <p>A week into my stay, we had rabbit soup. I commented on how delicious it was, and grandma responded that “her” meat is always very good. We had been eating fantastic meat meals the whole week, so I smiled and simply asked her to clarify. That’s when she told me she never buys meat. It’s all from the animals she raises. That was a bit of a surprise to me, but not so much as the next day when I heard a strange popping sound, went to the rabbits’ pen and saw a friend of grandma’s cleaning a rabbit with a pistol beside her.</p>
  </li>
</ul>

<p>Yoan and grandma had plenty of catchphrases. They’re more significant than they seem because I remember them vividly, and they always elicited a laugh.</p>

<p>Yoan frequently said (in French), “Keep cool you sack of shit.”</p>

<p>Grandma said:</p>

<ul>
  <li>
    <p>“Downstairs” instead of “below.”</p>
  </li>
  <li>
    <p>“Already ready!”</p>
  </li>
  <li>
    <p>“We shall see what will be” when referring to the future.</p>
  </li>
  <li>
    <p>“It is something and something” when referring to a meal.</p>
  </li>
  <li>
    <p>“It is something between the teeth” when referring to a snack.</p>
  </li>
  <li>
    <p>“It makes life interesting” when referring to her increasingly immobile state.</p>
  </li>
</ul>

<h2 id="bern">Bern</h2>

<p>I went to Bern to learn about Einstein. From 1903 to 1905, he lived there in a small apartment near the Zytglogge clock tower. These years are especially important because this was when Einstein wrote his most famous papers. You can even walk in the apartment where Einstein developed his Theory of Relativity.</p>

<p align="center">
<img src="/assets/images/posts/switzerland-farm/swiss-clock.jpeg
" />
</p>
<p align="center">
<em>
The Zytglogge Clock Tower in Bern
</em>
</p>

<p align="center">
<img src="/assets/images/posts/switzerland-farm/swiss-stark.jpeg
" />
</p>
<p align="center">
<em>
Johannes Stark – Ft. His Version of a Smile
</em>
</p>

<p align="center">
<img src="/assets/images/posts/switzerland-farm/swiss-einstein.jpeg
" />
</p>
<p align="center">
<em>
Inside Einsteins Apartment. A room where he wrote on his Theory of Relativity.
</em>
</p>

<p align="center">
<img src="/assets/images/posts/switzerland-farm/swiss-bears.jpeg
" />
</p>
<p align="center">
<em>
The famous bears of Bern
</em>
</p>

<h2 id="lucerne">Lucerne</h2>

<p>During my stay in Switzerland, I also saw three other places worth mentioning. The first is Lucerne. I met a Swiss family there that offered to show me the city and give me a free bed. They showed me their family’s farm in the mountains. And the next morning back at the base of the mountain, they gave me a sack breakfast before I headed to Geneva to visit just a little, underground science project.</p>

<p align="center">
<img src="/assets/images/posts/switzerland-farm/swiss-family-farm.jpeg
" />
</p>
<p align="center">
<em>
The family farm
</em>
</p>

<p align="center">
<img src="/assets/images/posts/switzerland-farm/swiss-lake-lucerne.jpeg
" />
</p>
<p align="center">
<em>
Lake Lucerne
</em>
</p>

<h2 id="cern">CERN</h2>

<p>CERN is now a household name because it represents what’s possible through international cooperation. At CERN scientists are delving into some of the natural world’s most mysterious secrets. The research topics span nearly any physics buzzword you’ve heard recently: antimatter, Higgs boson, dark matter, big bang…etc. If investigating science is wonderful, then CERN is where the wonderers do the wondering…and the experimenting.</p>

<p>I scheduled a guided tour of the facilities. The tour started in the visitor center with a brief presentation and a Q&amp;A session with a CERN engineer. Then we headed to the control room of the Large Hadron Collider’s ATLAS detector - the largest and most famous detector. Along the way, there were explanations, diagrams, and models of various LHC components. My brain never had to look far for new information.</p>

<p>It’s impossible to go down into the actual LHC chamber (radiation and cryogenic helium aren’t exactly human-friendly), so the tour instead takes you to CERN’s first particle accelerator. After it was decommissioned it was sealed with thick concrete and sat for decades to dissipate the harmful radiation. Now its radiation levels have dropped to acceptable levels, so tourists can gawk at the ancient machine.</p>

<p>Fun Fact: The inventor of the first circular particle accelerator, Ernest Lawrence, was born in Canton, South Dakota - just a ten-minute drive from where I’m from.</p>

<p>In short, CERN and Switzerland are both amazing.</p>

<p><em>Note: This story was originally posted on my old blog (theclimategap.com) but was edited slightly and moved here in 2022.</em></p>]]></content><author><name>Max Hawkins</name></author><category term="Travel" /><category term="travel" /><category term="cern" /><category term="switzerland" /><category term="workaway" /><summary type="html"><![CDATA[My two week stay near Bern helping on a hobby farm - beautiful scenery, farmwork, and CERN amazingness.]]></summary></entry><entry><title type="html">Falcon 9’s History Explained - SpaceX’s Upgrades that Led to Block 5</title><link href="https://maxhawkins.info/tech/falcon9-evolution/" rel="alternate" type="text/html" title="Falcon 9’s History Explained - SpaceX’s Upgrades that Led to Block 5" /><published>2018-04-08T00:00:00+00:00</published><updated>2018-04-08T00:00:00+00:00</updated><id>https://maxhawkins.info/tech/falcon9-evolution</id><content type="html" xml:base="https://maxhawkins.info/tech/falcon9-evolution/"><![CDATA[<h2 id="the-end-of-falcon-9-history">The End of Falcon 9 History?</h2>

<p>After nearly a decade of development, SpaceX will soon debut the final design of its Falcon 9 rocket. SpaceX’s primary launch vehicle has advanced a long way from its early beginnings, but now its continual improvement will stop for the foreseeable future. In order to be human-rated for NASA crew flights, a rocket must have at least seven launches using the same design. SpaceX can no longer pencil-in changes with every launch. Now it has to finalize a blueprint. That design is the so-called “Falcon 9 v1.2 Block 5.”</p>

<p>The upcoming Bangabandhu-1 launch debuting Block 5 has electrified SpaceX fans but has also clouded the details surrounding Falcon 9’s development history. This post is intended to clear the skies by aggregating the publicly-available details of previous rocket versions. I wasn’t satisfied by general reports of “uprated thrust” and “redesigned engines,” so I set out to find the specific changes that evolved a Dragon-launching Falcon 9 v1.0 into the rapidly reusable Falcon 9 v1.2 Block 5.</p>

<h2 id="v10-block-1">V1.0 Block 1</h2>

<p align="center">
<img src="/assets/images/posts/falcon9-history/falcon9-falcon1.jpeg" />
</p>
<p align="center">
<em>
A Falcon 9 v1.0 Block 1 launching a Dragon capsule.
(Photo by By Tony Gray and Robert Murray)
</em>
</p>

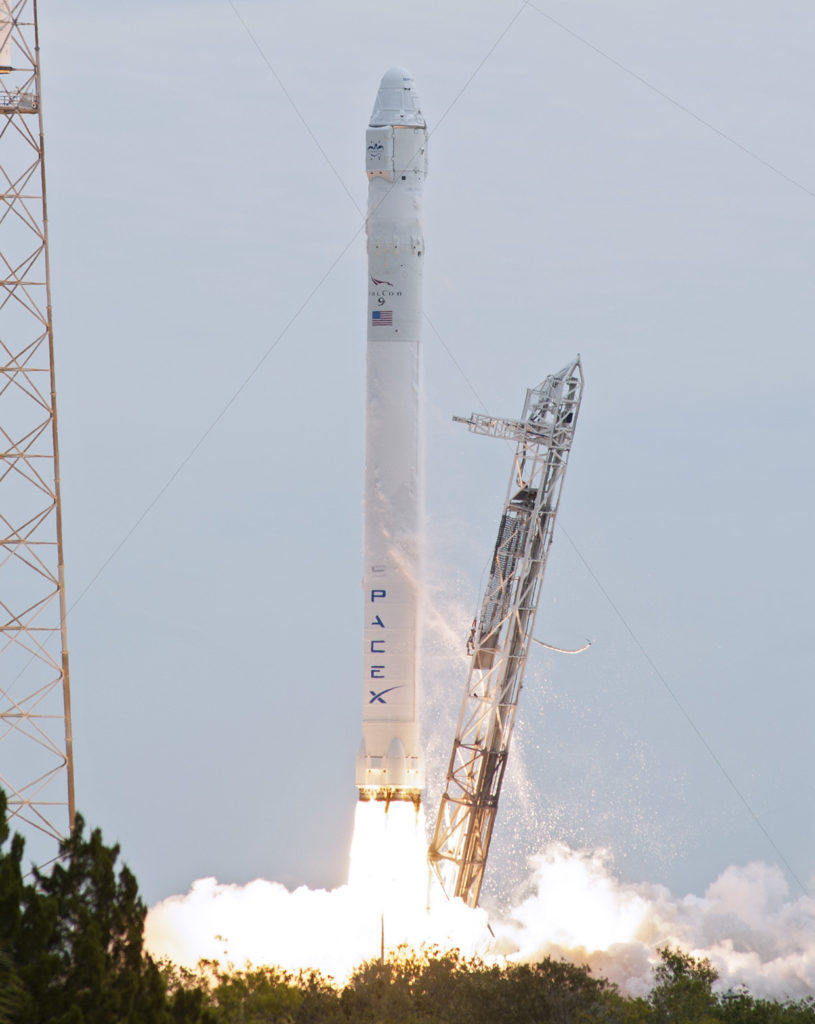
<p>Falcon 9’s story starts with version v1.0 Block 1. It only flew five times - three demonstration launches to meet NASA requirements, and two Dragon launches to the ISS. Yet even at this early stage, SpaceX was eyeing reusability. V1.0 tested out a recovery system intended to gently splashdown the first stage in the ocean using parachutes. However, the plan failed when the boosters and accompanying parachutes were destroyed on reentry. The waiting recovery boats only ever recovered pieces of the first stage <a href="https://www.newscientist.com/blogs/shortsharpscience/2011/09/falcon-rockets-to-land-on-thei.html" target="_blank" rel="noopener">[1]</a>.</p>

<h2 id="v10-block-2-never-built">V1.0 Block 2 (Never Built)</h2>

<p>Before v1.1 was designed, SpaceX planned to <a href="https://web.archive.org/web/20120309094402/http://www.spacex.com/Falcon9UsersGuide_2009.pdf">extend v1.0’s length to 180ft (55m) but still rely on Merlin 1C engines</a>. This version of Falcon 9 never flew after SpaceX pivoted to v1.1, an even larger and more improved rocket.</p>

<h2 id="v11">V1.1</h2>

<p>After meeting NASA requirements using v1.0, SpaceX went back and upgraded the design to v1.1 - increasing payload lift capacity by 80% and marching ever closer to full reusability <a href="https://spaceflightnow.com/falcon9/006/130928preview/" target="_blank" rel="noopener">[2]</a>.</p>

<h3 id="upgrades">Upgrades:</h3>

<ul>
  <li>
    <p>Switched from Merlin 1C engine to Merlin 1D <a href="https://spaceflightnow.com/falcon9/006/130928preview/" target="_blank" rel="noopener">[2]</a><span style="font-weight: 400;"><a href="https://www.nasaspaceflight.com/2013/06/testing-times-spacexs-new-falcon-9-v-1-1/">[3]</a></span></p>
  </li>
  <li>
    <p>Stretched first and second stages <a href="https://www.nasaspaceflight.com/2013/09/spacex-debut-falcon-9-v1-1-cassiope-launch/" target="_blank" rel="noopener">[4]</a></p>
  </li>
  <li>
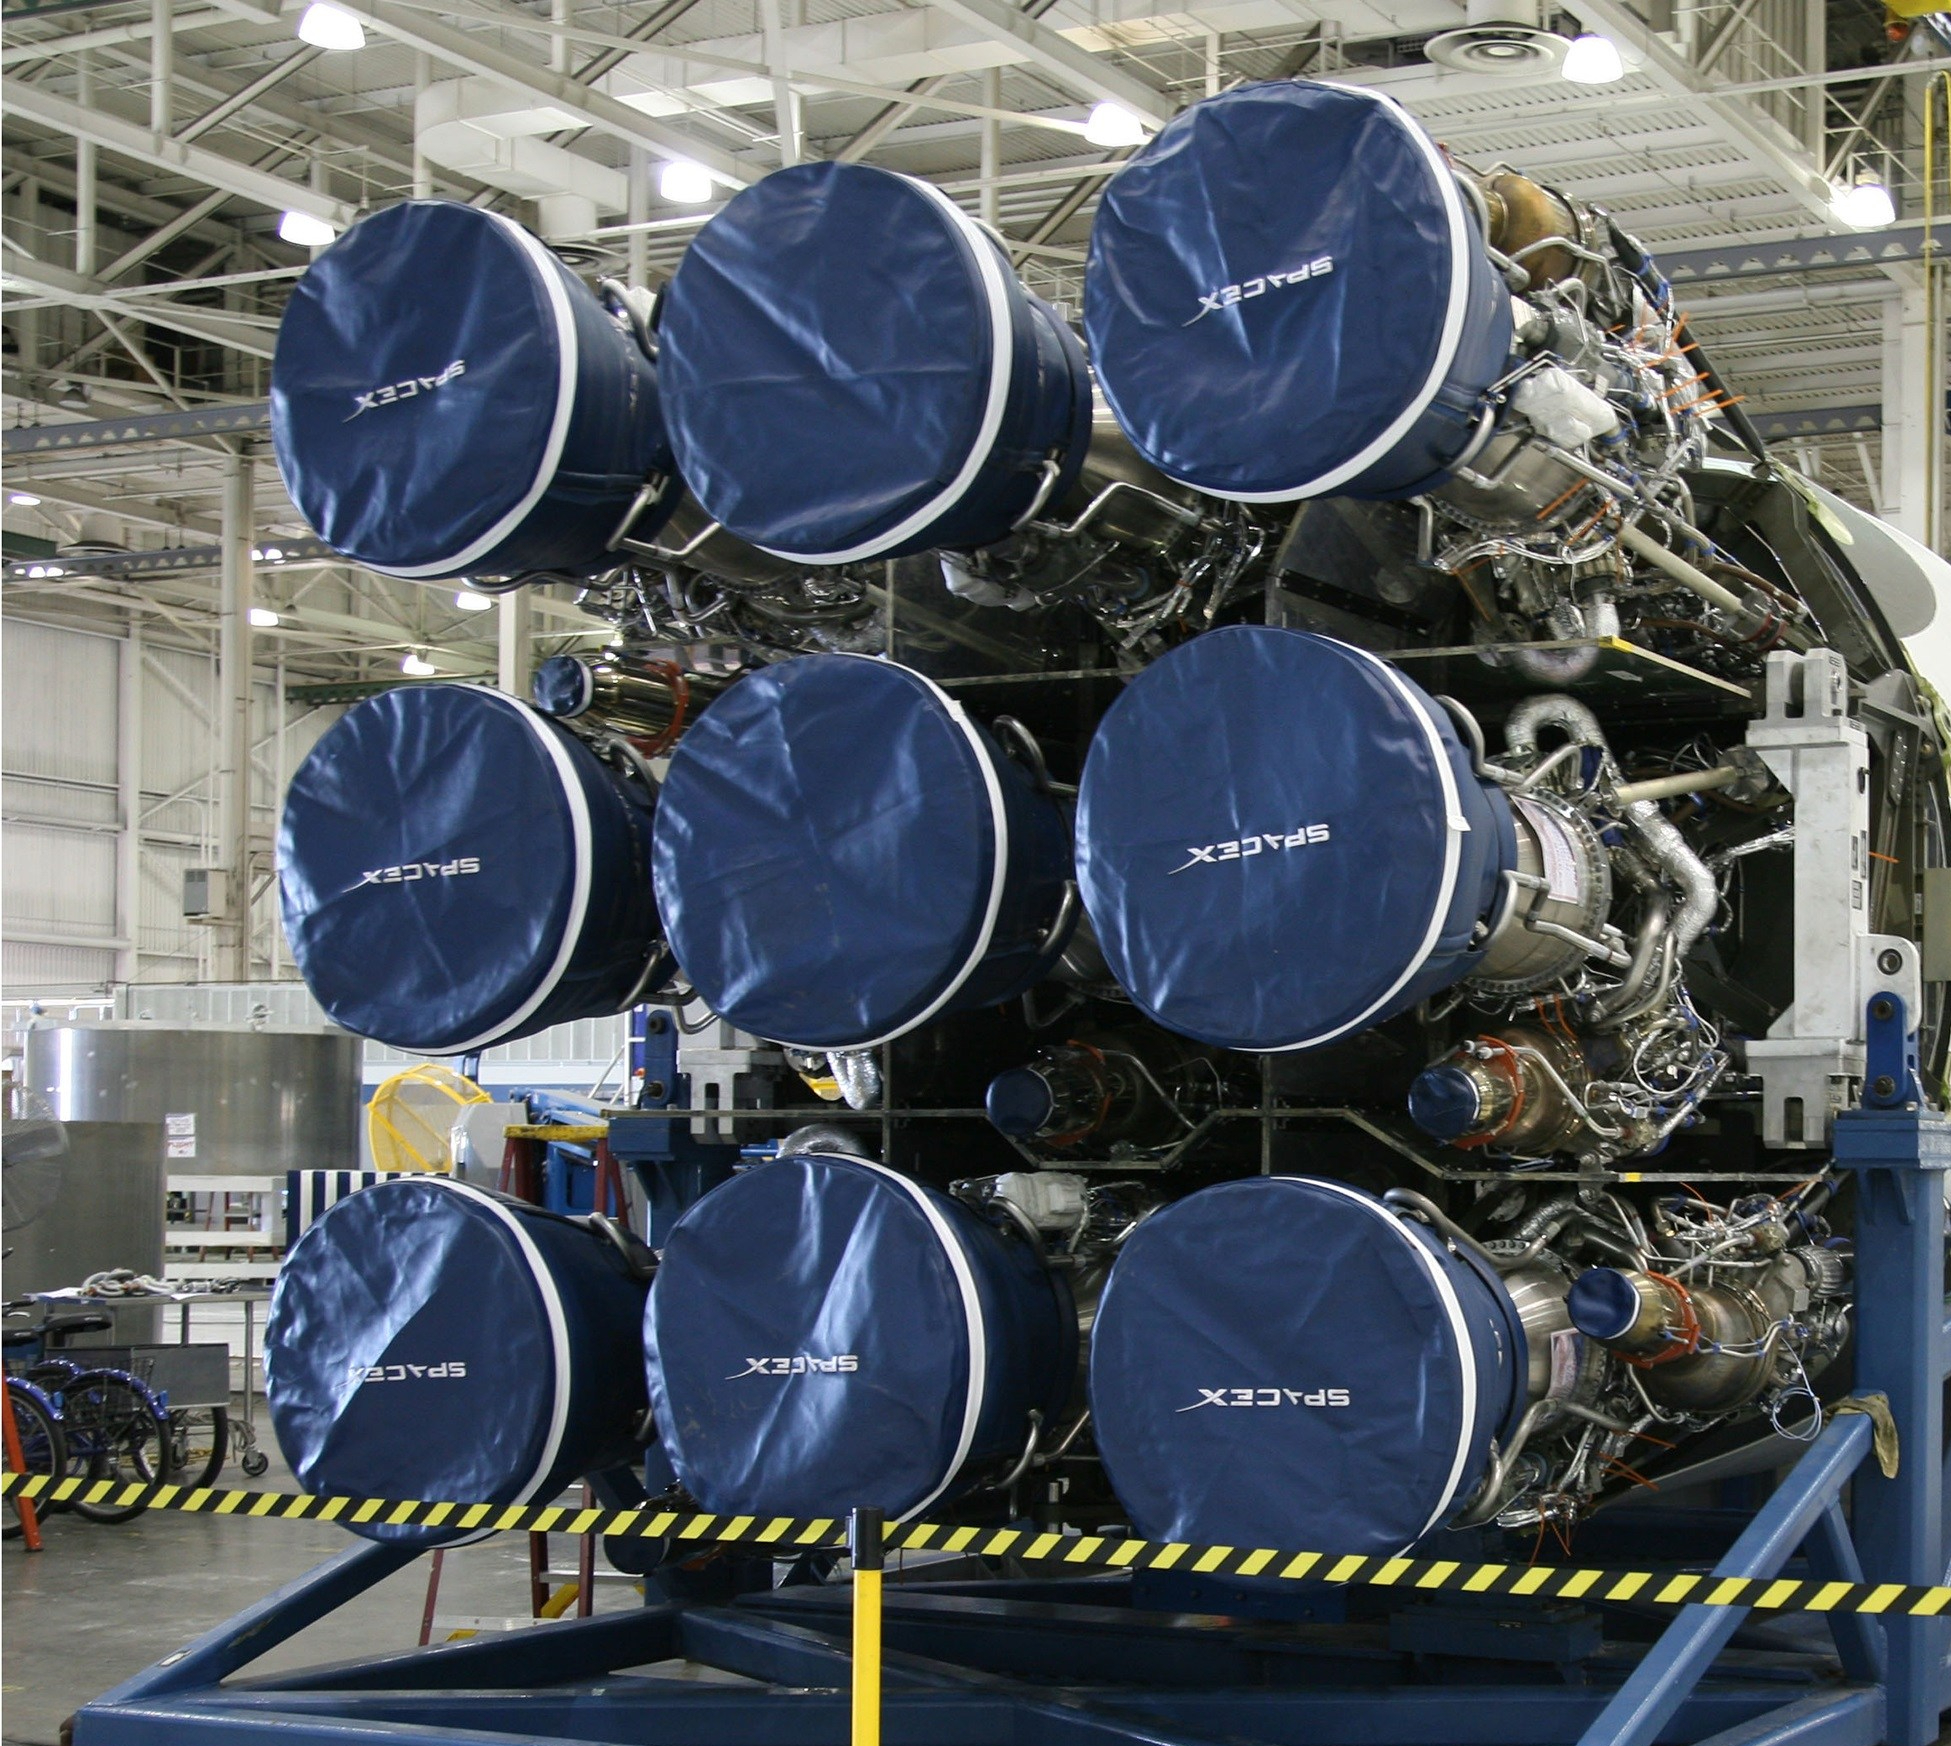
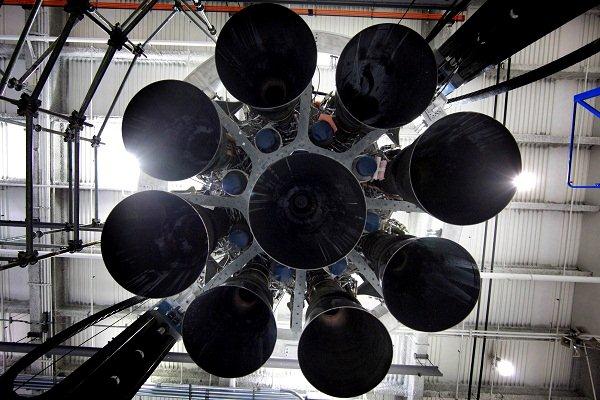
    <p>Changed to octaweb engine configuration from 3x3 grid <a href="https://web.archive.org/web/20131224005137/http://www.spacex.com:80/falcon9" target="_blank" rel="noopener">[5]</a></p>
  </li>
</ul>

<figure class="half">

  <a href="/assets/images/posts/falcon9-history/falcon9-old-engine-layout.jpeg">
  <img src="/assets/images/posts/falcon9-history/falcon9-old-engine-layout.jpeg" /></a>

  <a href="/assets/images/posts/falcon9-history/falcon9-octaweb.jpeg">
  <img src="/assets/images/posts/falcon9-history/falcon9-octaweb.jpeg" /></a>

  <figcaption align="center">The Falcon 9's old engine layout (left) and its current octaweb layout (right)</figcaption>
</figure>

<ul>
  <li>
    <p>First use of 5.2 m/17 ft diameter fairing <a href="https://www.nasaspaceflight.com/2013/09/spacex-debut-falcon-9-v1-1-cassiope-launch/" target="_blank" rel="noopener">[4]</a><a href="http://www.spacelaunchreport.com/falcon9v1-1.html#components" target="_blank" rel="noopener">[6]</a></p>
  </li>
  <li>
    <p>First attempt of propulsive landing - Three-engine entry burn followed by a single-engine landing burn <a href="https://spaceflightnow.com/falcon9/006/130928preview/" target="_blank" rel="noopener">[2]</a><a href="https://www.nasaspaceflight.com/2013/09/spacex-debut-falcon-9-v1-1-cassiope-launch/" target="_blank" rel="noopener">[4]</a></p>
  </li>
  <li>
    <p>Simplified connection between first and second stages - Nine hardware interfaces and three pusher elements that ensure stage separation were replaced with three connectors with integrated pushers. Musk said, “We go from 12 things that can go wrong to three at the point of staging.” <a href="https://spaceflightnow.com/falcon9/006/130928preview/" target="_blank" rel="noopener">[2]</a></p>
  </li>
  <li>
    <p>Increased in-house production <a href="https://www.nasaspaceflight.com/2012/01/spacex-testing-reusable-falcon-9-technology-this-year/" target="_blank" rel="noopener">[7]</a></p>
  </li>
  <li>
    <p>Grid fins added to control booster reentry and descent - Debuted both open-loop and closed-loop hydraulic systems (estimated date for closed-loop adoption). <a href="https://twitter.com/elonmusk/status/878839825473822720" target="_blank" rel="noopener">[8]</a></p>
  </li>
</ul>

<p align="center">
<img src="/assets/images/posts/falcon9-history/falcon9-gridfin.jpeg" />
</p>
<p align="center">
<em>
Unpainted aluminum grid fins. (Photo by SpaceX)
</em>
</p>

<ul>
  <li>
    <p>Upgraded avionics - Introduced triple-redundant flight computers and created new software based on Dragon’s flight-proven unit. - “You could put a bullet hole in any one of the avionics boxes and it would just keep flying,” Musk said. <a href="https://spaceflightnow.com/falcon9/006/130928preview/" target="_blank" rel="noopener">[2]</a><span style="font-weight: 400;"><a href="https://web.archive.org/web/20120309094402/http://www.spacex.com/Falcon9UsersGuide_2009.pdf" target="_blank" rel="noopener">[9]</a></span></p>
  </li>
  <li>
    <p>Stronger heat shield at the base to survive re-entry <a href="https://spaceflightnow.com/falcon9/006/130928preview/" target="_blank" rel="noopener">[2]</a></p>
  </li>
  <li>
    <p>Merlin improvements in reliability - <span style="font-weight: 400;">high-efficiency processes, increased robotic construction and reduced parts count <a href="https://spaceflightnow.com/falcon9/006/130928preview/" target="_blank" rel="noopener">[2]</a></span></p>
  </li>
  <li>
    <p>M1D thrust to 140,000lbf from 95,000lbf <a href="https://www.nasaspaceflight.com/2012/01/spacex-testing-reusable-falcon-9-technology-this-year/" target="_blank" rel="noopener">[10]</a></p>
  </li>
  <li>
    <p>Introduced 70% throttle capability on the first stage - Instead of staging engine shutdown prior to stage separation, the rocket could now simply throttle all engines to limit its acceleration. <a href="https://www.nasaspaceflight.com/2012/01/spacex-testing-reusable-falcon-9-technology-this-year/" target="_blank" rel="noopener">[10]</a></p>
  </li>
  <li>
    <p>Removed structure from Merlin 1D engine to reduce weight - Each engine now weighed less than 1,000 lb (excluding thrust-vector-control system).<span style="font-weight: 400;"><a href="https://spaceflightnow.com/falcon9/006/130928preview/" target="_blank" rel="noopener">[2]</a><a href="https://www.nasaspaceflight.com/2012/01/spacex-testing-reusable-falcon-9-technology-this-year/" target="_blank" rel="noopener">[10]</a></span></p>
  </li>
  <li>
    <p>Upgraded the Merlin propellant injection system - Replaced two fuel and oxidizer valves with a single unit <a href="https://spaceflightnow.com/falcon9/006/130928preview/" target="_blank" rel="noopener">[2]</a></p>
  </li>
  <li>
    <p>Increased Merlin chamber and nozzle thermal margins <a href="https://www.nasaspaceflight.com/2012/01/spacex-testing-reusable-falcon-9-technology-this-year/" target="_blank" rel="noopener">[10]</a></p>
  </li>
  <li>
    <p>Ablative engine bumpers to prevent mishaps during gimballing <a href="https://spaceflightnow.com/falcon9/006/130928preview/" target="_blank" rel="noopener">[2]</a></p>
  </li>
  <li>
    <p>Improved manufacturing of the chamber jacket - Elon explains this best: “The hardest part of the engine to mass produce is the electroplating of nickel-cobalttothe chamber. We create this thick metal jacket that takes the primary stress of the pressure vessel and it’s plated one molecule at a time. Plating is about the slowest way you can make a metal thing. With the Merlin-1D we take a metal jacket that is explosively formed. We take a metal sheet that’s in a cylindrical form and put it in a bucket of water, effectively. Sort of a concrete pool. And you set off an explosive and the jacket just goes “boohmp” and forms to the outer side walls into a jacket shape, so you have a mold, effectively. And then you just put the jacket on the chamber and braise it on. You can do several a day.” <a href="http://spacenews.com/elon-musk-chief-executive-and-chief-technology-officer-space-exploration-technologies/" target="_blank" rel="noopener">[11]</a></p>
  </li>
</ul>

<p align="center">
<img src="/assets/images/posts/falcon9-history/falcon9-merlin-test.jpeg" />
</p>
<p align="center">
<em>
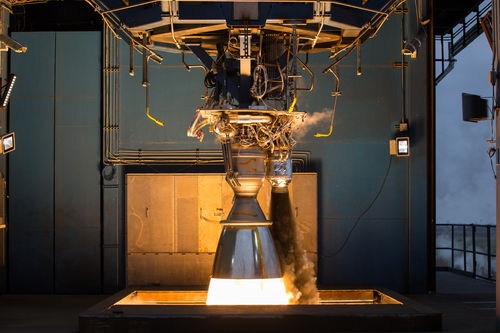
A Merlin engine during operation. (Photo by SpaceX)
</em>
</p>

<h2 id="v12-blocks-1-3">V1.2 Blocks 1-3</h2>

<p>With v1.1 SpaceX got close to recapturing a first stage, but with the next design iteration, SpaceX would finally accomplish what many thought was impossible: recapturing an orbital class first stage booster. The upgrades included increases in engine performance and structural changes aiding reusability. Even though these boosters could theoretically be reused 2-3 times, SpaceX has never launched this design more than twice. <a href="http://www.thespaceshow.com/show/22-jun-2017/broadcast-2934-ms.-gwynne-shotwell" target="_blank" rel="noopener">[16]</a><a href="https://www.nasaspaceflight.com/2018/02/spacex-falcon-9-paz-launch-starlink-demo-new-fairing/" target="_blank" rel="noopener">[23]</a></p>
<h3><span style="text-decoration: underline; color: #000000;"><span style="font-weight: 400;">Upgrades:</span></span></h3>

<ul>
  <li>33% performance increase - Allowed for drone ship landings on missions to geostationary transfer orbits <a href="http://aviationweek.com/blog/spacexs-new-spin-falcon-9" target="_blank" rel="noopener">[14]</a><span style="font-weight: 400;"> </span><a href="http://spacenews.com/spacex-to-debut-upgraded-falcon-9-on-return-to-flight-mission/" target="_blank" rel="noopener">[15]</a></li>
</ul>

<p align="center">
<img src="/assets/images/posts/falcon9-history/falcon9-droneship.jpeg" />
</p>
<p align="center">
<em>
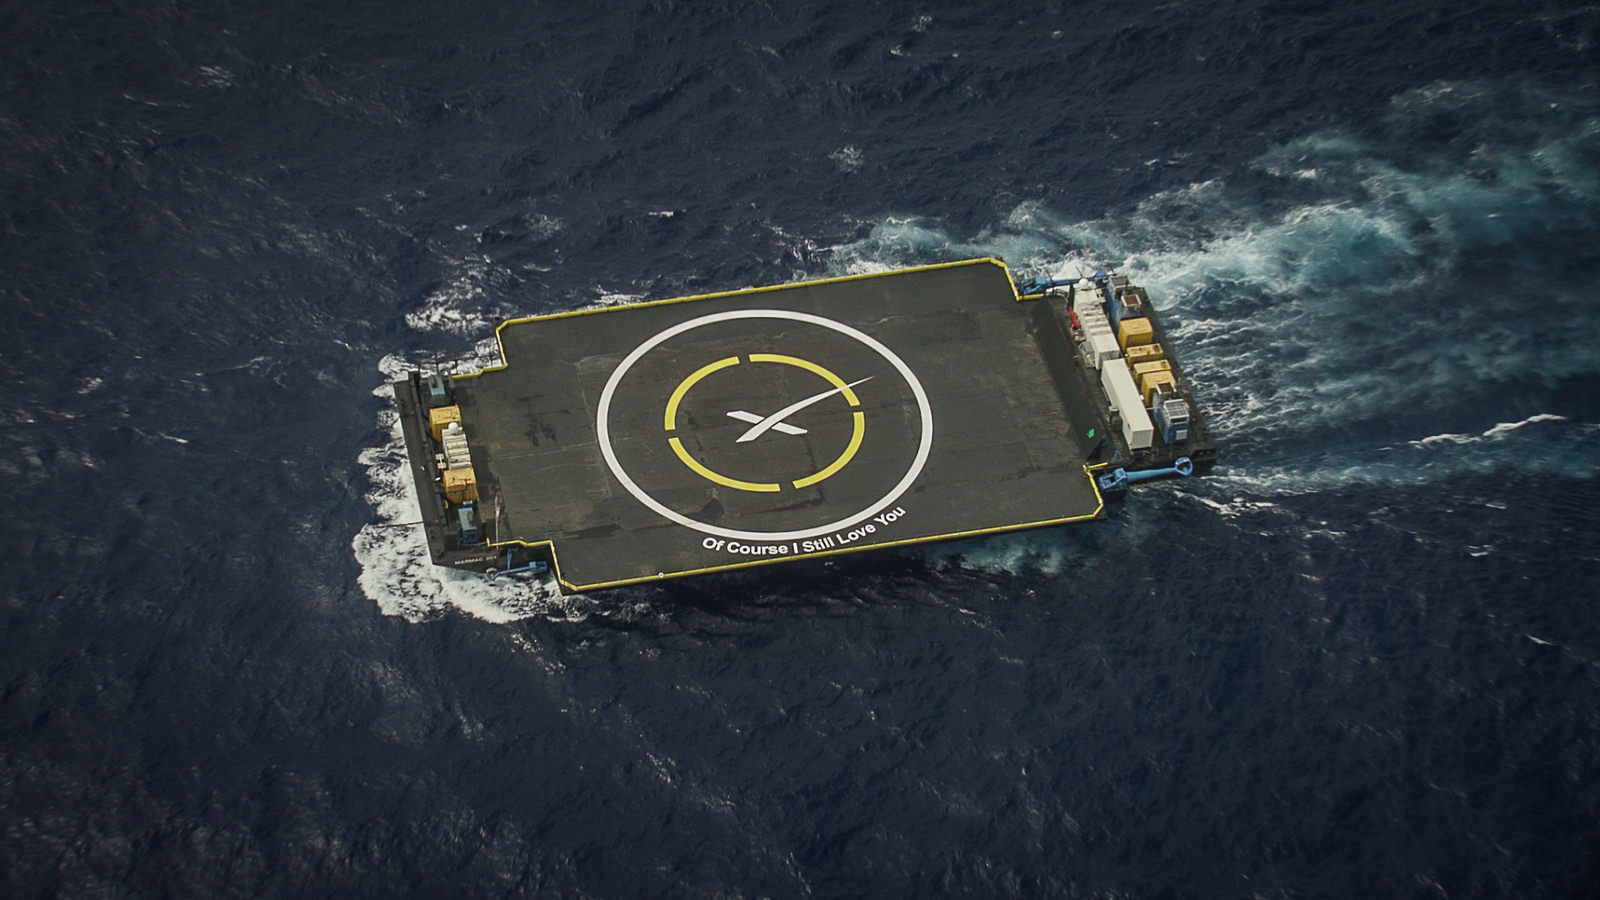
Of Course I Still Love You - The original autonomous spaceport drone ship stationed off the eastern US coast. (By SpaceX via Flickr)
</em>
</p>

<ul>
  <li>
    <p>Increased engine thrust - In June 2017, Gwynne stated they tested the Merlin engines up to almost 240,000lbf - <span style="font-weight: 400;">“In order to launch and get operational with …v1.1, we needed to draw a line on engine development. But what we did see during the development of our Merlin engines … was that there was more performance to go get, …so…we’ve gone back, got that extra performance from those engines.” <a href="http://aviationweek.com/blog/spacexs-new-spin-falcon-9" target="_blank" rel="noopener">[14]</a><a href="http://www.thespaceshow.com/show/22-jun-2017/broadcast-2934-ms.-gwynne-shotwell" target="_blank" rel="noopener">[16]</a><a href="https://www.youtube.com/watch?v=WwFa3nk1V0I" target="_blank" rel="noopener">[17]</a></span></p>
  </li>
  <li>
    <p>Deeper cryogenic cooling - LOX densification from 70lbs/ft^3 to 75lbs/ft^3 by chilling to -297 degrees F. 7% increase in density <span style="font-weight: 400;"><a href="https://www.nasaspaceflight.com/2015/09/full-thrust-falcon-9-stage-testing-mcgregor/" target="_blank" rel="noopener">[12]</a><a href="https://youtu.be/WwFa3nk1V0I?t=1170" target="_blank" rel="noopener">[18]</a></span></p>
  </li>
  <li>
    <p>Deepened Merlin lower throttle range to 40% <a href="https://twitter.com/elonmusk/status/728753234811060224" target="_blank" rel="noopener">[19]</a></p>
  </li>
  <li>
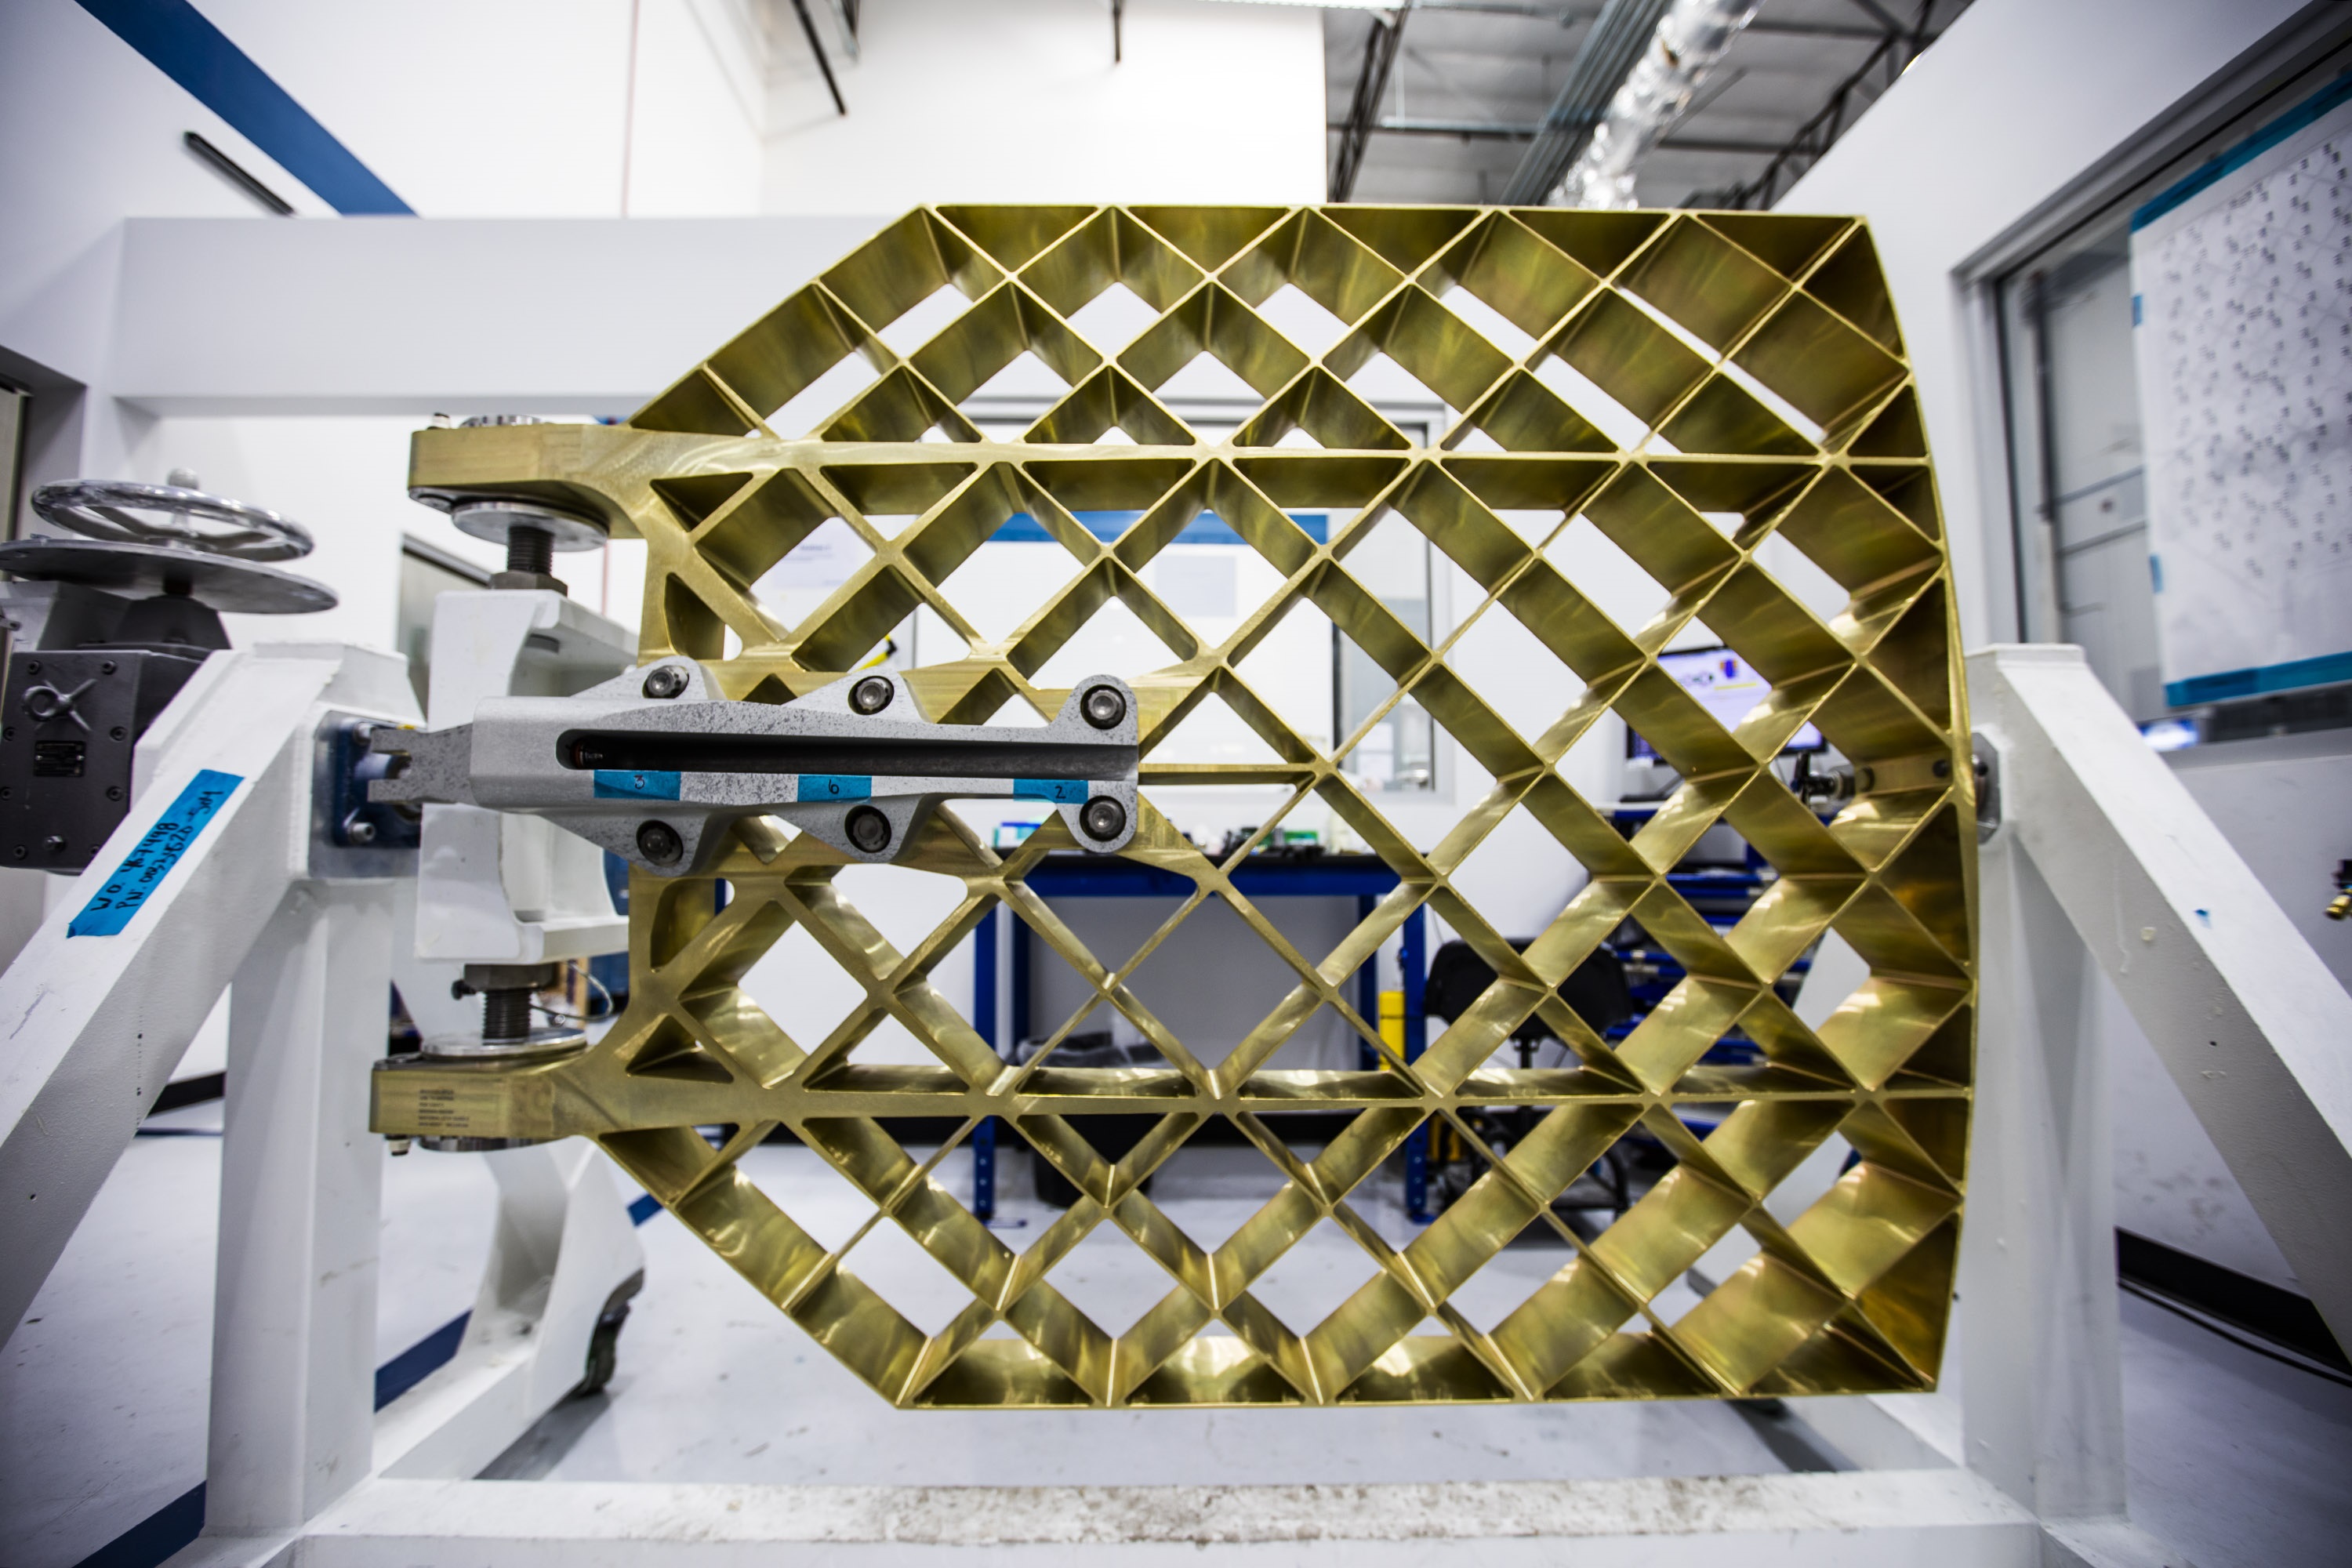
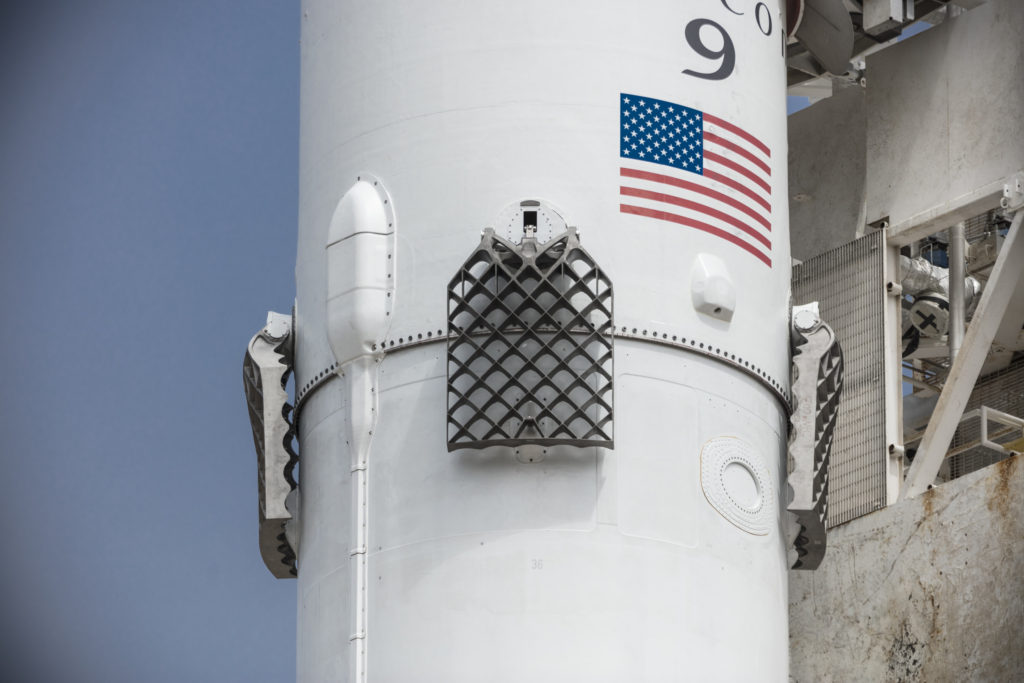
    <p>Upgraded grid fins - Switched from painted aluminum to unpainted, single cast titanium. The heavier grid fins “should be capable of an indefinite number of flights with no service.” <a href="https://twitter.com/elonmusk/status/878821062326198272" target="_blank" rel="noopener">[20]</a><a href="https://twitter.com/elonmusk/status/879080848359686144?lang=en" target="_blank" rel="noopener">[21]</a></p>
  </li>
</ul>

<p align="center">
<img src="/assets/images/posts/falcon9-history/falcon9-gridfins.jpeg" />
</p>
<p align="center">
<em>
Updated grid fins as debuted on the Iridium-2 mission. (By SpaceX via Twitter)
</em>
</p>

<ul>
  <li>
    <p>Longer interstage <a href="http://spacenews.com/ses-betting-on-spacex-falcon-9-upgrade-as-debut-approaches/" target="_blank" rel="noopener">[21]</a></p>
  </li>
  <li>
    <p>Modification of structure to streamline production - Gwynne quoted as wanting to only manufacture two core types: one for FH center core and one for the side boosters/single stick F9 <a href="http://aviationweek.com/blog/spacexs-new-spin-falcon-9" target="_blank" rel="noopener">[14]</a></p>
  </li>
  <li>
    <p>Modified octaweb configuration <a href="http://spacenews.com/ses-betting-on-spacex-falcon-9-upgrade-as-debut-approaches/" target="_blank" rel="noopener">[21]</a></p>
  </li>
  <li>
    <p>Upgraded first stage landing legs <a href="http://spacenews.com/ses-betting-on-spacex-falcon-9-upgrade-as-debut-approaches/" target="_blank" rel="noopener">[21]</a></p>
  </li>
  <li>
    <p>Second stage Merlin thrust increase <a href="http://spacenews.com/ses-betting-on-spacex-falcon-9-upgrade-as-debut-approaches/" target="_blank" rel="noopener">[21]</a></p>
  </li>
  <li>
    <p>Second-stage nozzle lengthened <a href="http://spacenews.com/ses-betting-on-spacex-falcon-9-upgrade-as-debut-approaches/" target="_blank" rel="noopener">[21]</a></p>
  </li>
  <li>
    <p>Second stage propellant storage increased <a href="https://youtu.be/WwFa3nk1V0I?t=1170" target="_blank" rel="noopener">[18]</a></p>
  </li>
  <li>
    <p>Minor electronic improvements <a href="https://youtu.be/WwFa3nk1V0I?t=1170" target="_blank" rel="noopener">[18]</a></p>
  </li>
  <li>
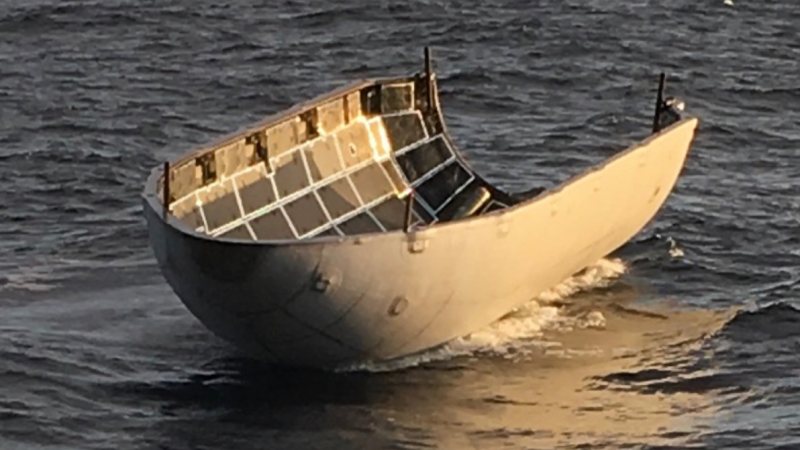
    <p>Debuted Fairing 2.0 - Slightly enlarged the fairing and added hardware aimed at making the fairing recoverable. After protecting the Paz satellite during flight, one of the upgraded fairing halves was guided to a recovery ship using onboard thrusters and a parafoil. The fairing half missed the ship’s waiting “catcher’s mitt” by a few hundred meters but landed intact. <a href="https://twitter.com/elonmusk/status/966692641533390848" target="_blank" rel="noopener">[22]</a></p>
  </li>
</ul>

<p align="center">
<img src="/assets/images/posts/falcon9-history/falcon9-fairing-half.png" />
</p>
<p align="center">
<em>
A fairing 2.0 half floating in the ocean after a missed capture. (Photo by SpaceX)
</em>
</p>

<h2 id="v12-block-4">V1.2 Block 4</h2>

<p>Not many specific details exist regarding the next design iteration of Falcon 9. The only concrete fact I could find was upgraded engines<a href="https://www.nasaspaceflight.com/2017/08/falcon-9-block-4-debut-success-dragon-station-berthing/" target="_blank" rel="noopener">[24]</a>. <span style="font-weight: 400;">According to Gwynne, Block 4 mainly serves as an incremental transition between Block 3 and Block 5<span style="font-weight: 400;"> <a href="http://www.thespaceshow.com/show/22-jun-2017/broadcast-2934-ms.-gwynne-shotwell" target="_blank" rel="noopener">[16]</a>.</span><span style="font-weight: 400;"> Differentiating these three blocks is further blurred by SpaceX’s design change implementation. SpaceX got better at smoothly introducing changes to Falcon over time. With less effect on manufacturing, design changes were continuously implemented rather than introduced in disruptive batches <a href="http://www.thespaceshow.com/show/22-jun-2017/broadcast-2934-ms.-gwynne-shotwell" target="_blank" rel="noopener">[16]</a>.</span></span></p>

<p>What is interesting to note about this design change is its debut. Before complete Block 4 Falcon 9’s were launched, Block 4 second stages were fixed to the previous design’s first stage. This scenario involving Franken-Falcons only occurred three times: NROL-76, Inmarsat 5, and Intelsat 35e. This information led many to believe Block 4 changes involved military launch requirements and increased second stage performance.</p>

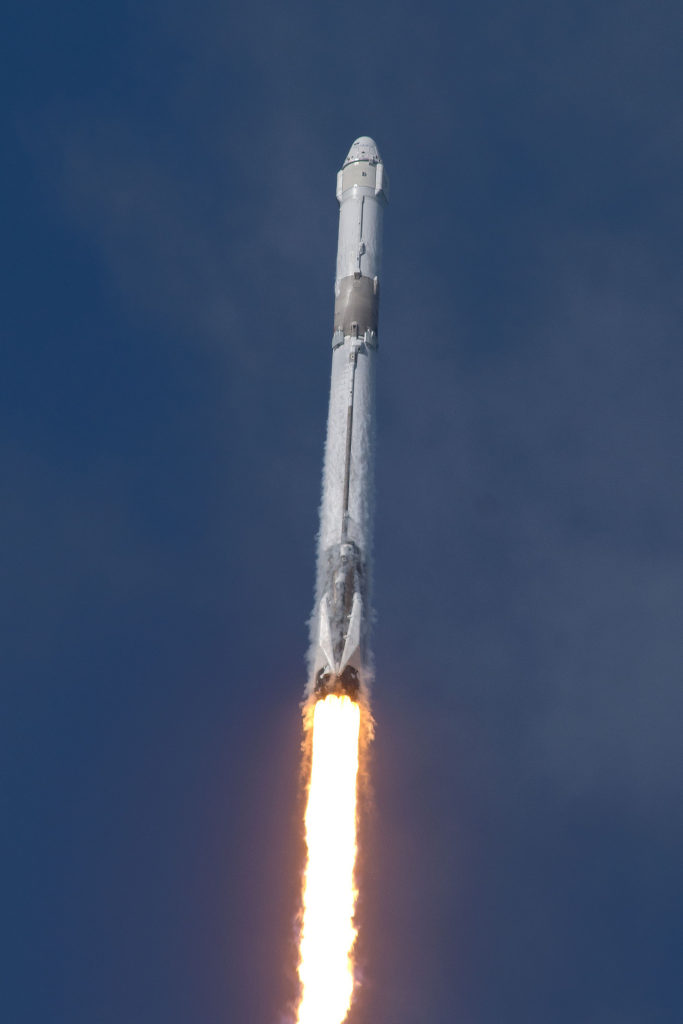
<p align="center">
<img src="/assets/images/posts/falcon9-history/falcon9-reuse.jpeg" />
</p>
<p align="center">
<em>
A reused first stage launching a previously-flow Dragon capsule for the CRS-14 mission. (Photo by SpaceX)
</em>
</p>

<h2 id="v12-block-5">V1.2 Block 5</h2>

<p>Finally, we’ve reached the end…or at least the start of a temporary design freeze. Block 5 is built to meet NASA crew requirements while at the same time demonstrating rapid and dependable rocket reusability. Any SpaceX rocket must meet high demands, but now Gwynne Shotwell has expressed SpaceX’s desire <a href="http://www.thespaceshow.com/show/22-jun-2017/broadcast-2934-ms.-gwynne-shotwell">to launch more reused rockets than new builds</a>. That feat just years ago was only imagined in science fiction. Now it’s a tangible reality. Block 5 is built to fulfill that long-held aerospace wish. And because the design must remain unchanged for at least <a href="https://www.nasaspaceflight.com/2018/02/first-falcon-9-block-5-readying-static-fire-mcgregor-rapid-reuse/" target="_blank" rel="noopener">seven flights to attain crew rating</a>, the launcher will also serve the majority of SpaceX’s clients for the foreseeable future. That means working through a manifest worth $12 billion dollars. To meet these goals and to lower the cost barrier to space, Block 5 comes with plenty of updates. </p>

<h3 id="upgrades-1">Upgrades:</h3>

<ul>
  <li>
    <p>Black interstage, landing legs, and raceway <a href="https://www.nasaspaceflight.com/2018/02/first-falcon-9-block-5-readying-static-fire-mcgregor-rapid-reuse/">[24]</a></p>
  </li>
  <li>
    <p>Retractable landing legs <a href="https://www.nasaspaceflight.com/2018/02/first-falcon-9-block-5-readying-static-fire-mcgregor-rapid-reuse/">[24]</a></p>
  </li>
  <li>
    <p>Redesigned COPVs - Both to account for Amos-6 disaster and to handle many reuses <a href="http://www.thespaceshow.com/show/22-jun-2017/broadcast-2934-ms.-gwynne-shotwell" target="_blank" rel="noopener">[16]</a><a href="https://www.nasaspaceflight.com/2018/02/first-falcon-9-block-5-readying-static-fire-mcgregor-rapid-reuse/">[24]</a></p>
  </li>
  <li>
    <p>Redesigned turbopumps. - NASA required SpaceX to redesign its Merlin turbopumps for  crew rating after recaptured units showed stress cracks in the turbopump blades <a href="https://www.nasaspaceflight.com/2018/02/first-falcon-9-block-5-readying-static-fire-mcgregor-rapid-reuse/">[24]</a></p>
  </li>
  <li>
    <p>Other general Merlin engine improvements - Thrust increased to 190,000lbf <a href="http://www.thespaceshow.com/show/22-jun-2017/broadcast-2934-ms.-gwynne-shotwell" target="_blank" rel="noopener">[16]</a></p>
  </li>
  <li>
    <p>Redesign and requalification of active components - Valves for “longer duration and higher levels” <a href="http://www.thespaceshow.com/show/22-jun-2017/broadcast-2934-ms.-gwynne-shotwell" target="_blank" rel="noopener">[16]</a></p>
  </li>
  <li>
    <p>Redesign of octaweb thrust structure - <a href="https://www.nasa.gov/sites/default/files/atoms/files/ccp_presentation_for_nac_public_session.pdf">Bolted rather than welded</a> <a href="http://www.thespaceshow.com/show/22-jun-2017/broadcast-2934-ms.-gwynne-shotwell" target="_blank" rel="noopener">[16]</a></p>
  </li>
  <li>
    <p>Optimized for reusability - Can refly a dozen or so times with inspections and up to 100 flights with refurbishments. <a href="http://www.thespaceshow.com/show/22-jun-2017/broadcast-2934-ms.-gwynne-shotwell" target="_blank" rel="noopener">[16]</a>
 	<a href="https://www.instagram.com/p/BhSC2WtgOQ6/">“Aiming for two flights within 24 hours”</a></p>
  </li>
</ul>

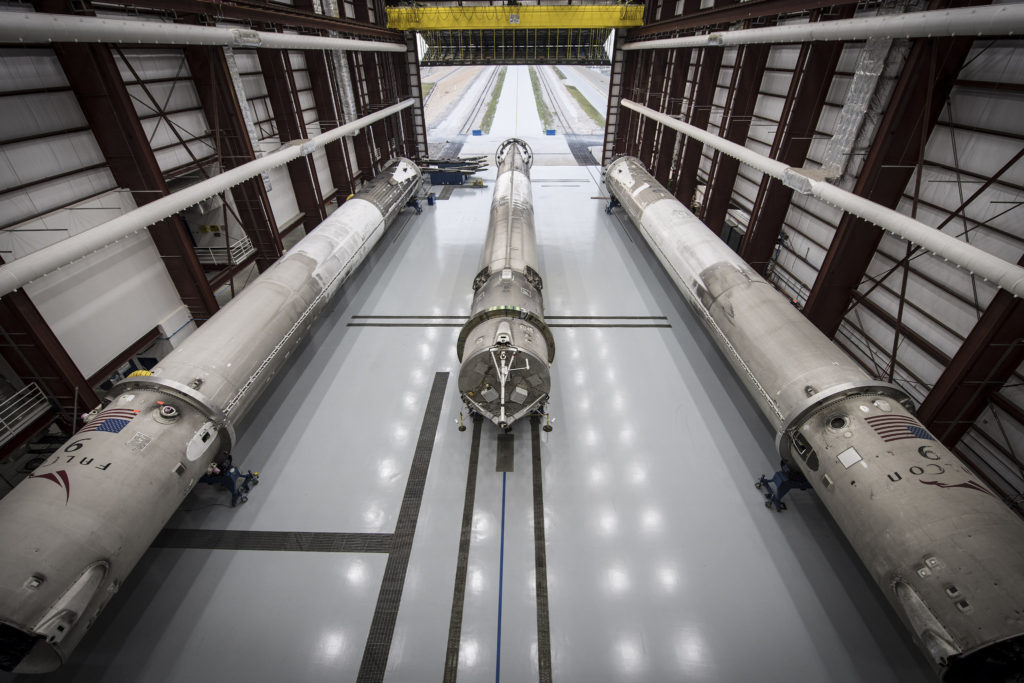
<p align="center">
<img src="/assets/images/posts/falcon9-history/falcon9-boosters.jpeg" />
</p>
<p align="center">
<em>
Recaptured first stages in a SpaceX hangar. (Photo by SpaceX)
</em>
</p>

<!--
[caption id="attachment_769" align="aligncenter" width="767"]<img class=" wp-image-769" src="https://144.202.61.202/wp-content/uploads/2018/04/26428480464_13f0002221_k-1024x683.jpg" alt="Three Falcon 9 recaptured first stages laying horizontally in a hangar" width="767" height="512" /> Recaptured first stages in a SpaceX hangar. (Photo by SpaceX)[/caption] -->

<h3 id="side-note---merlin-engine-takeaway">Side Note - Merlin Engine Takeaway</h3>

<p>Throughout Falcon 9’s development, the rocket’s Merlin engines repeatedly increased their performance. With every iteration, there was an accompanying higher thrust rating. I actually decided to not include thrust numbers with each F9 version because the upgrades were so frequent - even within block versions.</p>

<p>The original Merlin engine only had <a href="https://www.quora.com/Is-SpaceXs-Merlin-1Ds-thrust-to-weight-ratio-of-150+-believable/answer/Thomas-Mueller-11" target="_blank" rel="noopener">60,000lbf</a> (and was rightly named ‘60K’), but now we’ve heard public thrust numbers of up to 240,000lbf. That 4X thrust increase is even accomplished with a lighter engine design. Now the name change to ‘Merlin’ (a species of falcon) makes sense. A ‘Falcon’ grows larger while ‘60K’ just grows more outdated.</p>

<p>Using a rough estimate of <a href="https://www.quora.com/Is-SpaceXs-Merlin-1Ds-thrust-to-weight-ratio-of-150+-believable/answer/Thomas-Mueller-11" target="_blank" rel="noopener">1000lb engine weight</a> and the highest reported thrust of <a href="http://www.thespaceshow.com/show/22-jun-2017/broadcast-2934-ms.-gwynne-shotwell" target="_blank" rel="noopener">240,000lbf</a>, the T/W ratio comes to an astounding 240! Although not the best metric for engine performance, the incredible thrust-to-weight ratio of the Merlin engine is indicative of impressive engineering. </p>

<h2 id="summary">Summary</h2>

<p>Falcon 9’s history is clearly long and winding. The initial v1.0 rocket underwent a few growth spurts, some wardrobe changes, and countless internal tweaks to become the adult Block 5. Because of this, the growing rocket continually questioned its identity. At various times in its life, it’s been called Falcon 9 v1.0, Falcon 9 Block 2, Falcon 9 v1.1, Falcon 9 Upgrade, Falcon 9 v1.2, Falcon 9 Block 3, Falcon 9 v1.1 Full Thrust, Enhanced Falcon 9, Full-Performance Falcon 9, Falcon 9 Block 4, Falcon 9 v1.2 Block 4, Falcon 9 New Design Spin, Falcon 9 Block 5, Falcon 9 v1.2 Block 5, and Falcon 9 Version 7.</p>

<p>Don’t let the names confuse you. The major iteration changes are easy to understand if you think in terms of utility (or at least what outsiders perceive as utility). I’ll stick to the four most widely publicized iterations: v1.0, v1.1, v1.2 Blocks 1-4, and v1.2 Block 5.</p>

<p>The first Falcon 9 design fulfilled NASA requirements to launch cargo to the ISS. <strong>That was v1.0.</strong> Once those requirements were met, SpaceX felt comfortable going back, testing new design features, and increasing performance for reusability and private customers. <strong>That was v1.1.</strong> Then with each landing attempt, SpaceX honed its blueprint. Those frequent lessons, along with military requirements and a desire to recapture GTO boosters, fostered more upgrades. Smooth implementation made this development continuous and ill-defined. <strong>That was v1.2 Blocks 1-4.</strong> Then Commercial Crew requirements eventually ended the party when its inevitable design freeze marched too close for comfort. The final update appeased engineers by including safety changes, reusability optimizations, and ultimate performance increases. SpaceX’s rocket finally matured and is now ready for humans. <strong>That is v1.2 Block 5.</strong></p>

<p><em>Note: This story was originally posted on my old blog (theclimategap.com) but was edited slightly and moved here in 2022.</em></p>]]></content><author><name>Max Hawkins</name></author><category term="Tech" /><category term="tech" /><category term="spacex" /><category term="falcon-9" /><category term="falcon-9-history" /><summary type="html"><![CDATA[A clear explanation of Falcon 9 history. How SpaceX's Falcon 9 rocket came to be the behemoth it is today - from v1.0 to Block 5.]]></summary></entry></feed>